> ## Documentation Index
> Fetch the complete documentation index at: https://ultrarag.openbmb.cn/llms.txt
> Use this file to discover all available pages before exploring further.
# 快速开始
本节将帮助你快速了解如何基于 UltraRAG 运行一个完整的 RAG Pipeline。UltraRAG 的使用流程主要包括以下三个阶段:
* 编写 Pipeline 配置文件
* 编译 Pipeline 并调整参数
* 运行 Pipeline
此外,你还可以通过可视化工具对运行结果进行分析与评估。
如果尚未安装 UltraRAG,请先参考 [环境部署](/pages/cn/getting_started/installation)。
如需了解更完整的 RAG 开发实践,请查看完整文档。
## Step 1:编写 Pipeline 配置文件
请确保当前工作目录位于 UltraRAG 根目录下
在`examples`文件夹中创建并编写你的 Pipeline 配置文件,例如:
```yaml examples/rag_full.yaml icon="https://mintcdn.com/ultrarag/T7GffHzZitf6TThi/images/yaml.svg?fit=max&auto=format&n=T7GffHzZitf6TThi&q=85&s=69b41e79144bc908039c2ee3abbb1c3b" theme={null}
# Vanilla RAG with Corpus Indexing Demo
# MCP Server
servers:
benchmark: servers/benchmark
retriever: servers/retriever
prompt: servers/prompt
generation: servers/generation
evaluation: servers/evaluation
custom: servers/custom
# MCP Client Pipeline
pipeline:
- benchmark.get_data
- retriever.retriever_init
- retriever.retriever_embed
- retriever.retriever_index
- retriever.retriever_search
- generation.generation_init
- prompt.qa_rag_boxed
- generation.generate
- custom.output_extract_from_boxed
- evaluation.evaluate
```
UltraRAG 的 Pipeline 配置文件需要包含以下两个部分:
* `servers`:声明当前流程所依赖的各个模块(Server)。例如,检索阶段需要使用 `retriever` Server。
* `pipeline`:定义各 Server 中功能函数(Tool)的调用顺序。本示例展示了从数据加载、检索编码与索引构建,到生成与评测的完整流程。
## Step 2:编译 Pipeline 并调整参数
在运行代码前,首先需要配置运行所需的参数。UltraRAG 提供了快捷的 build 指令,可自动生成当前 Pipeline 所依赖的完整参数文件。
系统会读取各个 Server 的 parameter.yaml 文件,解析本次流程中涉及的全部参数项,并统一汇总生成到一个独立的配置文件中。执行以下命令:
```shell theme={null}
ultrarag build examples/rag_full.yaml
```
执行后,终端将输出如下内容:
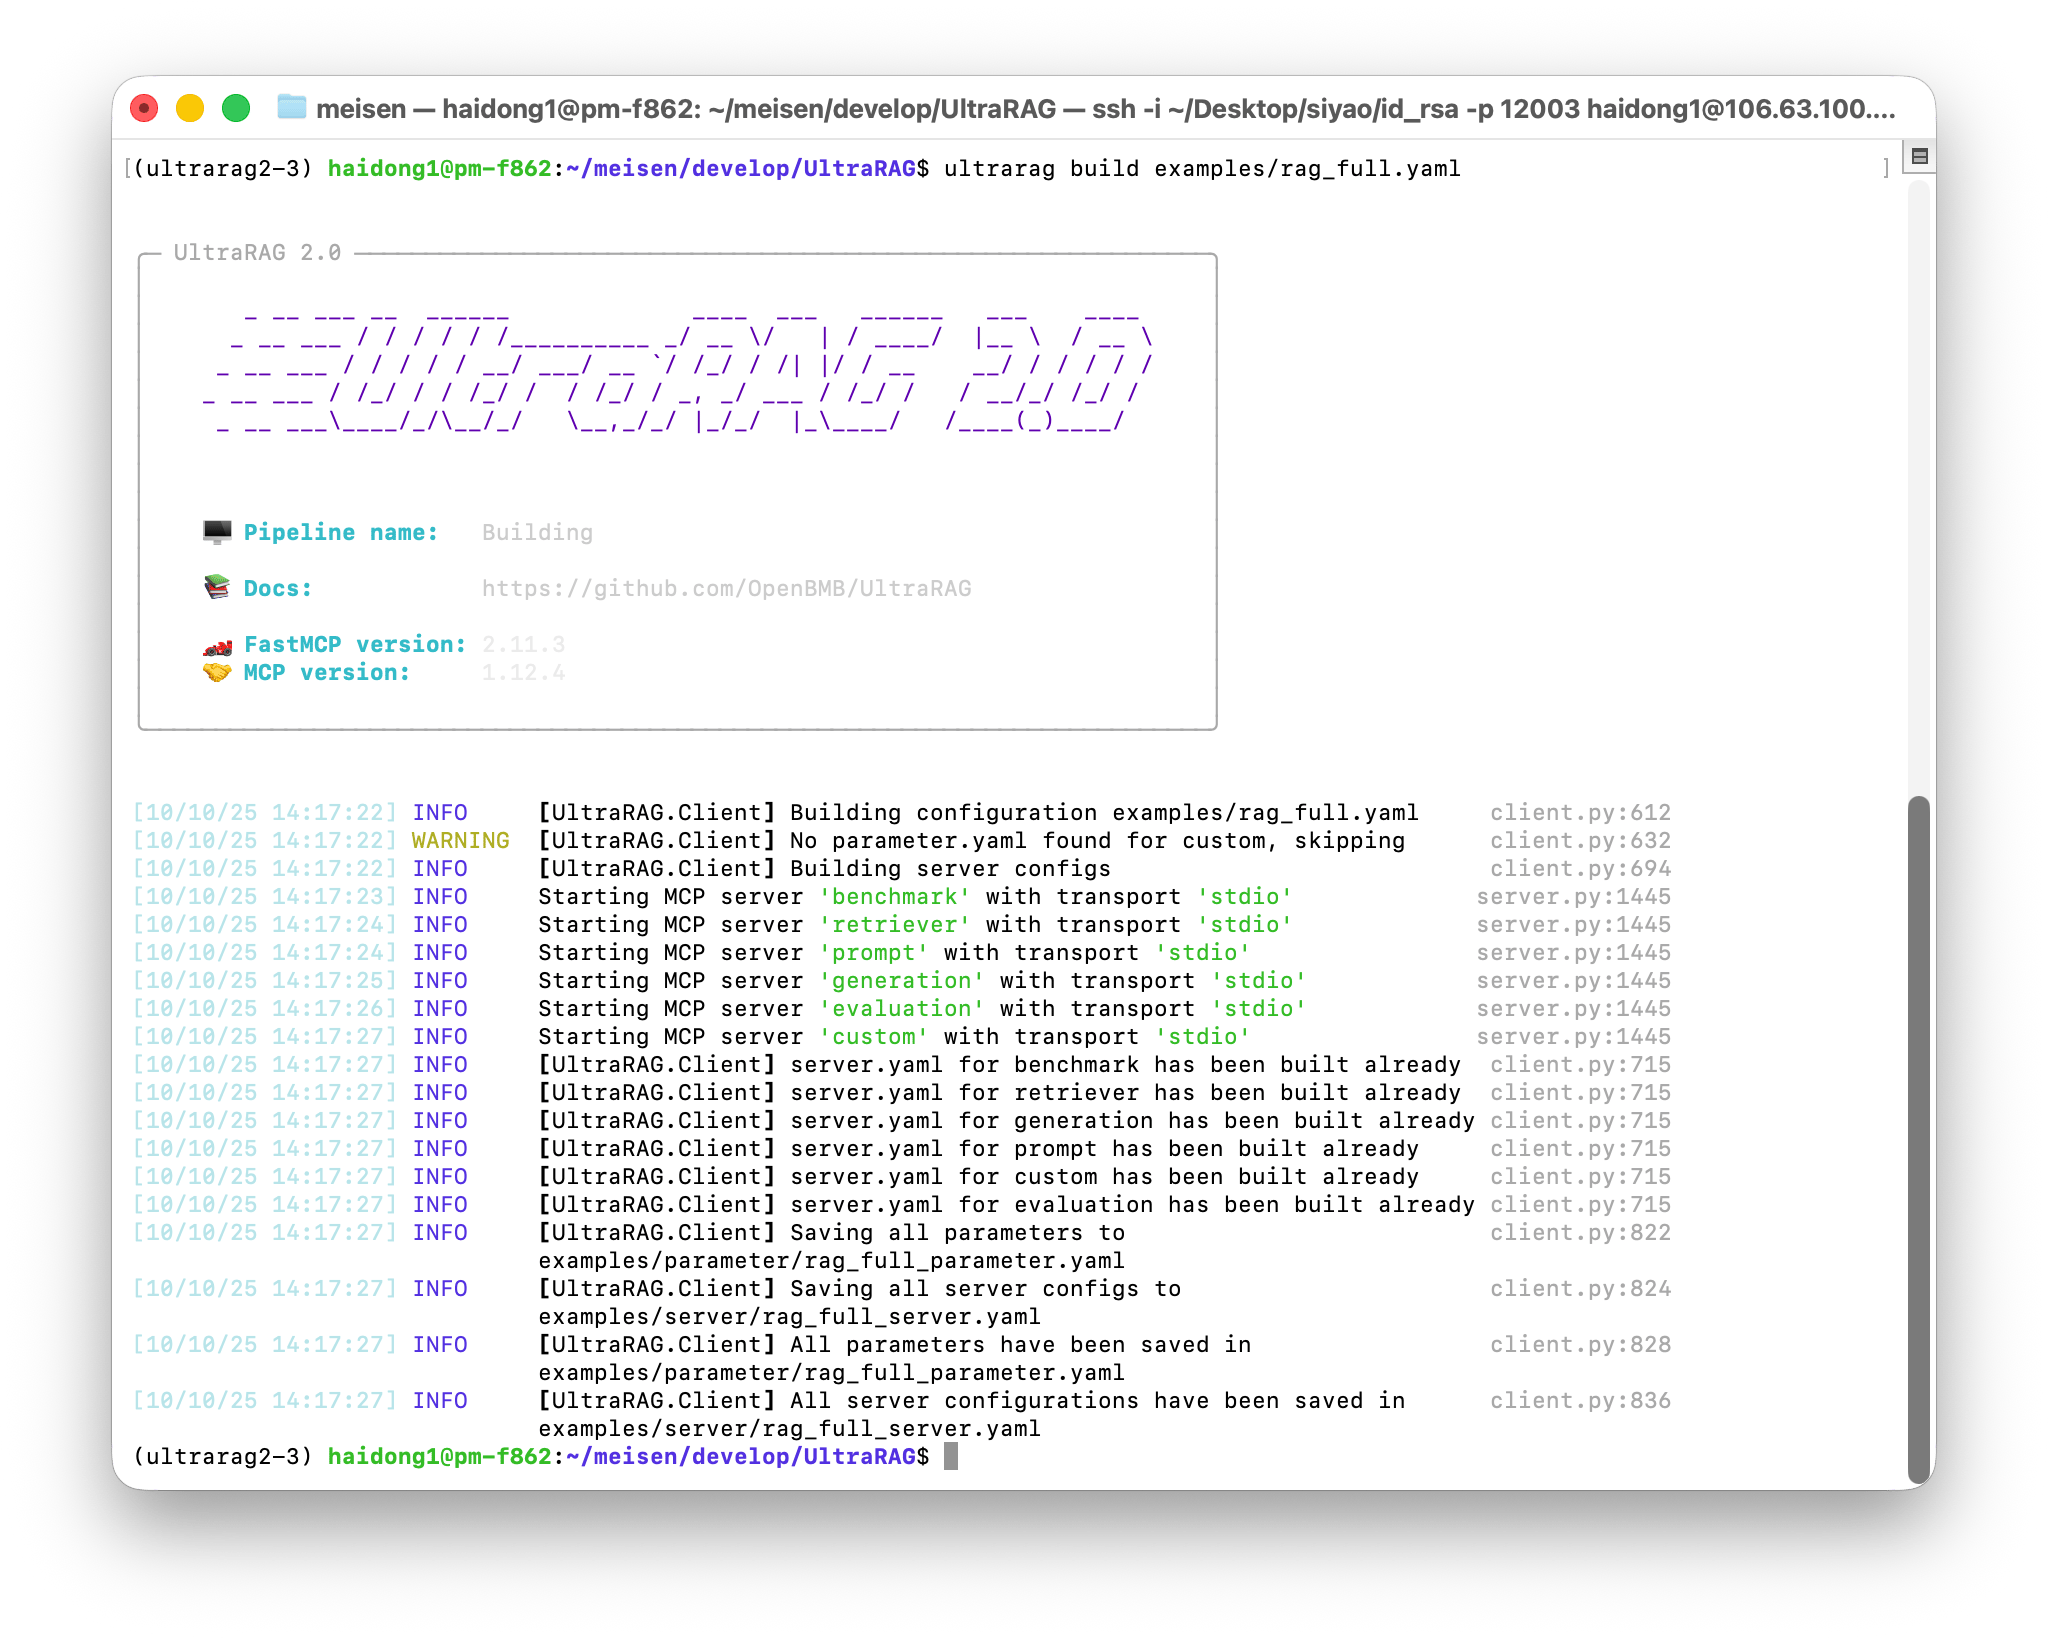 系统会在`examples/parameters/`文件夹下生成对应的参数配置文件。打开文件后,可根据实际情况修改相关参数,例如:
```yaml examples/parameters/rag_full_parameter.yaml icon="https://mintcdn.com/ultrarag/T7GffHzZitf6TThi/images/yaml.svg?fit=max&auto=format&n=T7GffHzZitf6TThi&q=85&s=69b41e79144bc908039c2ee3abbb1c3b" theme={null}
benchmark:
benchmark:
key_map:
gt_ls: golden_answers
q_ls: question
limit: -1
name: nq
path: data/sample_nq_10.jsonl
seed: 42
shuffle: false
custom: {}
evaluation:
metrics:
- acc
- f1
- em
- coverem
- stringem
- rouge-1
- rouge-2
- rouge-l
save_path: output/evaluate_results.json
generation:
backend: vllm
backend_configs:
hf:
batch_size: 8
gpu_ids: 2,3
model_name_or_path: openbmb/MiniCPM4-8B
trust_remote_code: true
openai:
api_key: 'abc'
base_delay: 1.0
base_url: http://localhost:8000/v1
concurrency: 8
model_name: MiniCPM4-8B
retries: 3
vllm:
dtype: auto
gpu_ids: 5
gpu_memory_utilization: 0.5
model_name_or_path: openbmb/MiniCPM4-8B # [!code --]
model_name_or_path: Qwen/Qwen3-8B # [!code ++]
trust_remote_code: true
extra_params:
chat_template_kwargs:
enable_thinking: false
sampling_params:
max_tokens: 2048
temperature: 0.7
top_p: 0.8
system_prompt: ''
prompt:
template: prompt/qa_boxed.jinja # [!code --]
template: prompt/qa_rag_boxed.jinja # [!code ++]
retriever:
backend: sentence_transformers
backend_configs:
bm25:
lang: en
save_path: index/bm25
infinity:
bettertransformer: false
model_warmup: false
pooling_method: auto
trust_remote_code: true
openai:
api_key: 'abc'
base_url: https://api.openai.com/v1
model_name: text-embedding-3-small
sentence_transformers:
sentence_transformers_encode:
encode_chunk_size: 256
normalize_embeddings: false
psg_prompt_name: document
psg_task: null
q_prompt_name: query
q_task: null
trust_remote_code: true
batch_size: 16
collection_name: wiki
corpus_path: data/corpus_example.jsonl
embedding_path: embedding/embedding.npy
gpu_ids: '5'
index_backend: faiss
index_backend_configs:
faiss:
index_chunk_size: 10000
index_path: index/index.index
index_use_gpu: true
milvus:
id_field_name: id
id_max_length: 64
index_chunk_size: 1000
index_params:
index_type: AUTOINDEX
metric_type: IP
metric_type: IP
search_params:
metric_type: IP
params: {}
text_field_name: contents
text_max_length: 60000
token: null
uri: index/milvus_demo.db
vector_field_name: vector
is_demo: false
is_multimodal: false
model_name_or_path: openbmb/MiniCPM-Embedding-Light # [!code --]
model_name_or_path: Qwen/Qwen3-Embedding-0.6B # [!code ++]
overwrite: false
query_instruction: ''
top_k: 5
```
你可以根据实际情况修改参数,例如:
* 将 template 调整为RAG模版 prompt/qa\_rag\_boxed.jinja;
* 替换检索器与生成器的 model\_name\_or\_path 为本地下载的模型路径;
* 若在多 GPU 环境下运行,可修改 gpu\_ids 以匹配可用设备。
## Step 3:运行 Pipeline
当参数配置完成后,即可一键运行完整流程。执行以下命令:
```shell theme={null}
ultrarag run examples/rag_full.yaml
```
系统将依次执行配置文件中定义的各个 Server 与 Tool,并在终端中实时输出运行日志与进度信息:
系统会在`examples/parameters/`文件夹下生成对应的参数配置文件。打开文件后,可根据实际情况修改相关参数,例如:
```yaml examples/parameters/rag_full_parameter.yaml icon="https://mintcdn.com/ultrarag/T7GffHzZitf6TThi/images/yaml.svg?fit=max&auto=format&n=T7GffHzZitf6TThi&q=85&s=69b41e79144bc908039c2ee3abbb1c3b" theme={null}
benchmark:
benchmark:
key_map:
gt_ls: golden_answers
q_ls: question
limit: -1
name: nq
path: data/sample_nq_10.jsonl
seed: 42
shuffle: false
custom: {}
evaluation:
metrics:
- acc
- f1
- em
- coverem
- stringem
- rouge-1
- rouge-2
- rouge-l
save_path: output/evaluate_results.json
generation:
backend: vllm
backend_configs:
hf:
batch_size: 8
gpu_ids: 2,3
model_name_or_path: openbmb/MiniCPM4-8B
trust_remote_code: true
openai:
api_key: 'abc'
base_delay: 1.0
base_url: http://localhost:8000/v1
concurrency: 8
model_name: MiniCPM4-8B
retries: 3
vllm:
dtype: auto
gpu_ids: 5
gpu_memory_utilization: 0.5
model_name_or_path: openbmb/MiniCPM4-8B # [!code --]
model_name_or_path: Qwen/Qwen3-8B # [!code ++]
trust_remote_code: true
extra_params:
chat_template_kwargs:
enable_thinking: false
sampling_params:
max_tokens: 2048
temperature: 0.7
top_p: 0.8
system_prompt: ''
prompt:
template: prompt/qa_boxed.jinja # [!code --]
template: prompt/qa_rag_boxed.jinja # [!code ++]
retriever:
backend: sentence_transformers
backend_configs:
bm25:
lang: en
save_path: index/bm25
infinity:
bettertransformer: false
model_warmup: false
pooling_method: auto
trust_remote_code: true
openai:
api_key: 'abc'
base_url: https://api.openai.com/v1
model_name: text-embedding-3-small
sentence_transformers:
sentence_transformers_encode:
encode_chunk_size: 256
normalize_embeddings: false
psg_prompt_name: document
psg_task: null
q_prompt_name: query
q_task: null
trust_remote_code: true
batch_size: 16
collection_name: wiki
corpus_path: data/corpus_example.jsonl
embedding_path: embedding/embedding.npy
gpu_ids: '5'
index_backend: faiss
index_backend_configs:
faiss:
index_chunk_size: 10000
index_path: index/index.index
index_use_gpu: true
milvus:
id_field_name: id
id_max_length: 64
index_chunk_size: 1000
index_params:
index_type: AUTOINDEX
metric_type: IP
metric_type: IP
search_params:
metric_type: IP
params: {}
text_field_name: contents
text_max_length: 60000
token: null
uri: index/milvus_demo.db
vector_field_name: vector
is_demo: false
is_multimodal: false
model_name_or_path: openbmb/MiniCPM-Embedding-Light # [!code --]
model_name_or_path: Qwen/Qwen3-Embedding-0.6B # [!code ++]
overwrite: false
query_instruction: ''
top_k: 5
```
你可以根据实际情况修改参数,例如:
* 将 template 调整为RAG模版 prompt/qa\_rag\_boxed.jinja;
* 替换检索器与生成器的 model\_name\_or\_path 为本地下载的模型路径;
* 若在多 GPU 环境下运行,可修改 gpu\_ids 以匹配可用设备。
## Step 3:运行 Pipeline
当参数配置完成后,即可一键运行完整流程。执行以下命令:
```shell theme={null}
ultrarag run examples/rag_full.yaml
```
系统将依次执行配置文件中定义的各个 Server 与 Tool,并在终端中实时输出运行日志与进度信息:
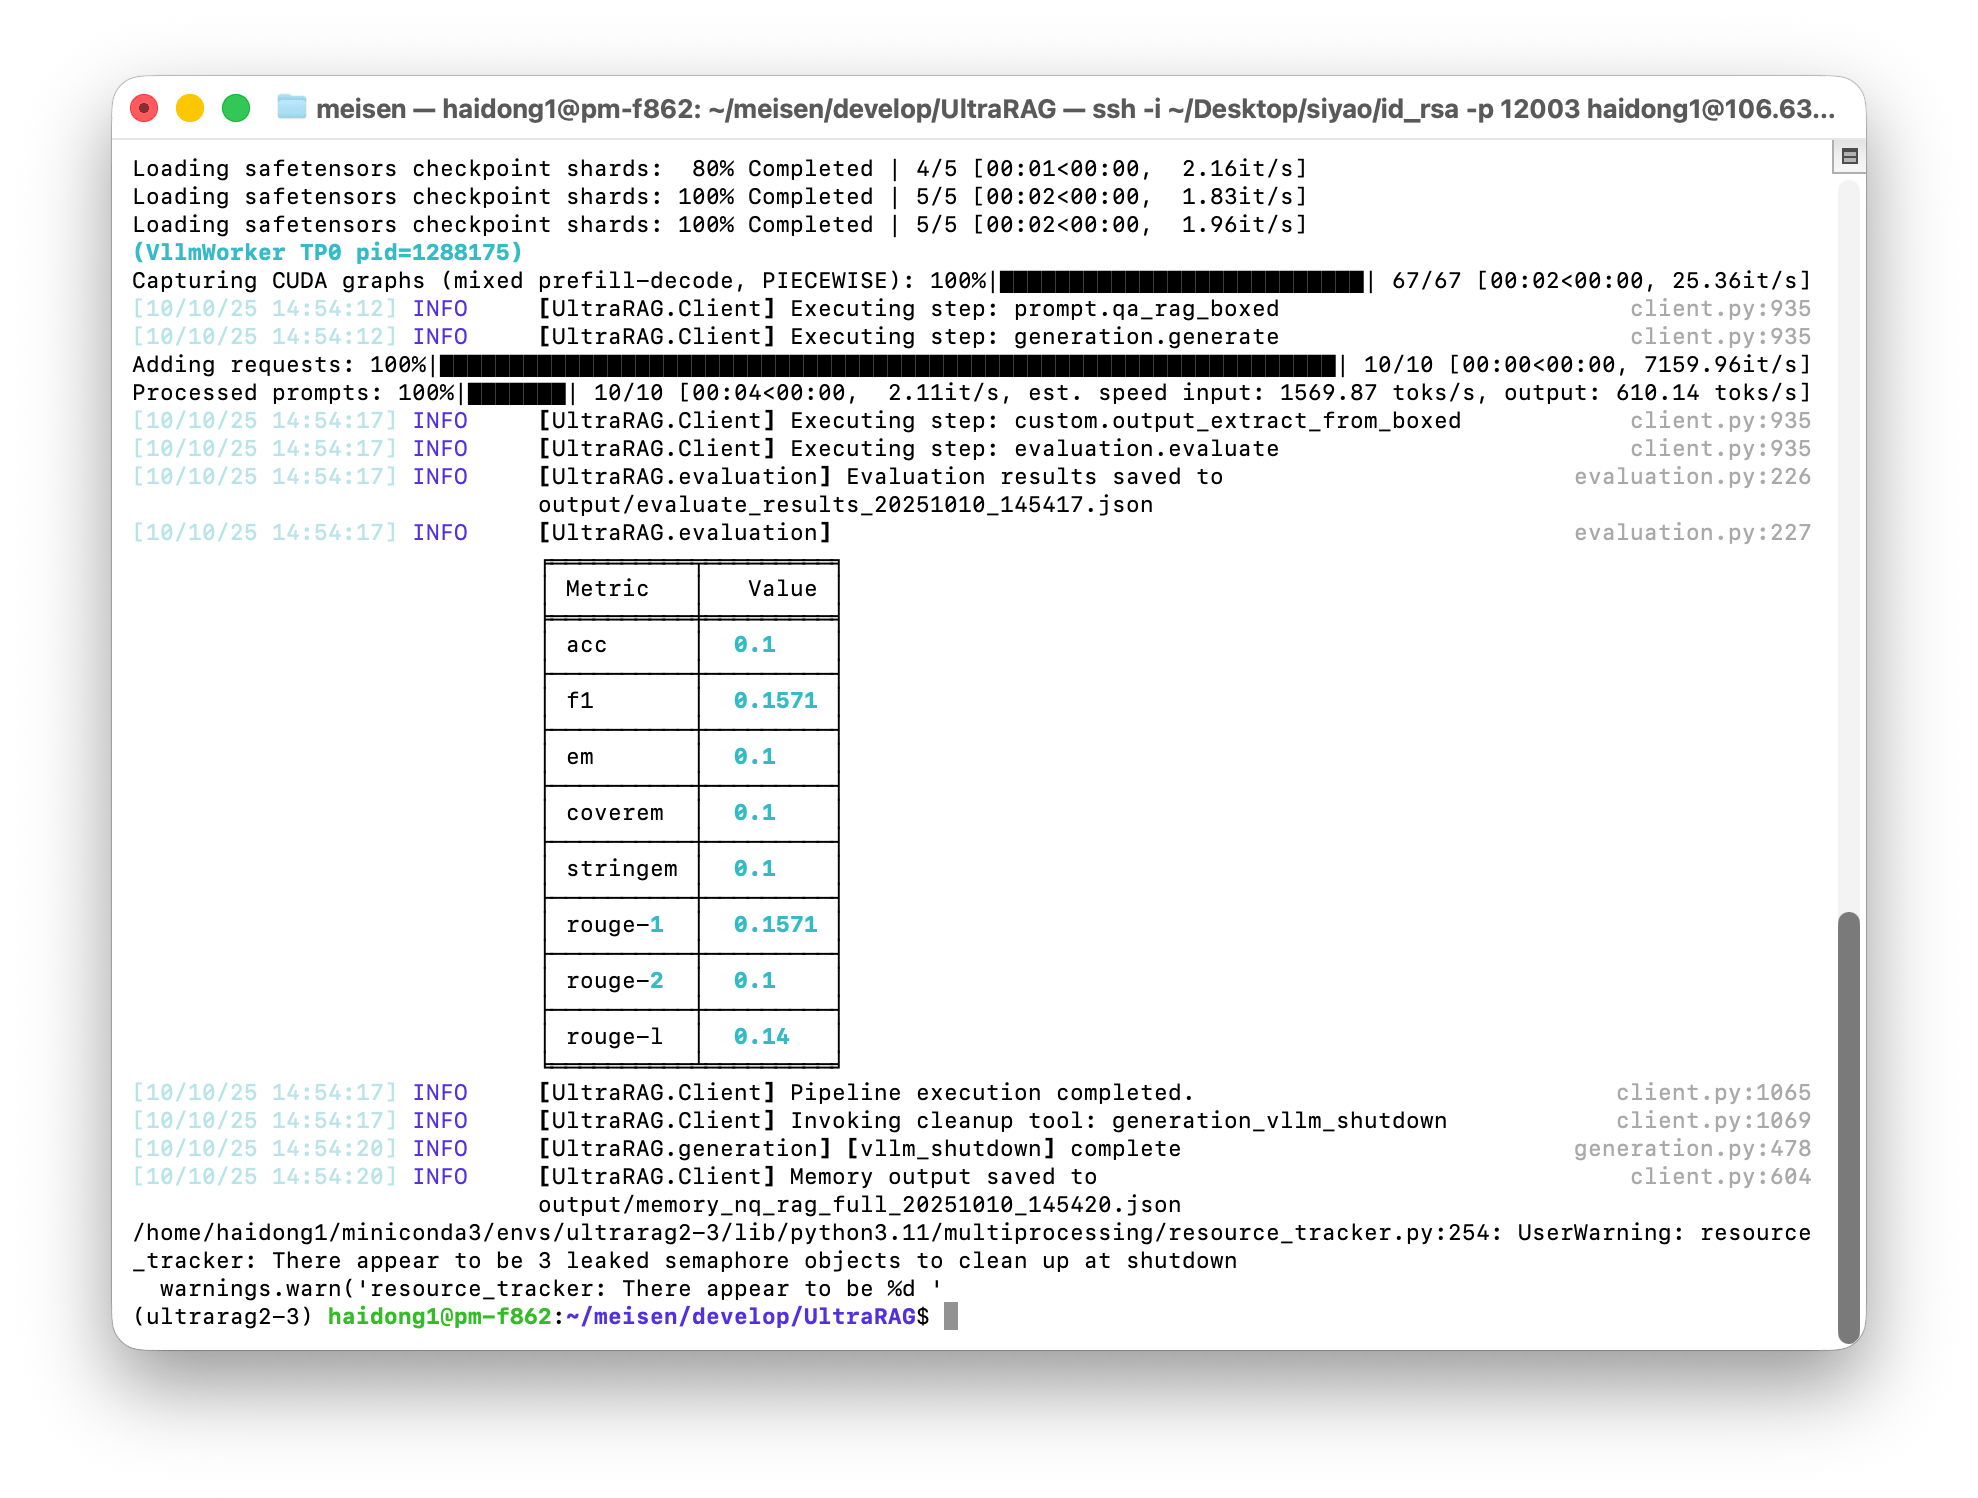 运行结束后,结果(如生成内容、评测报告等)将自动保存在对应的输出路径中,如本例中`output/memory_nq_rag_full_20251010_145420.json`可直接用于后续分析与可视化展示。
## Step 4:可视化分析 Case Study
完成流程运行后,可通过内置的可视化工具快速分析生成结果。执行以下命令启动 Case Study Viewer:
```shell theme={null}
python ./script/case_study.py \
--data output/memory_nq_rag_full_20251010_145420.json \
--host 127.0.0.1 \
--port 8080 \
--title "Case Study Viewer"
```
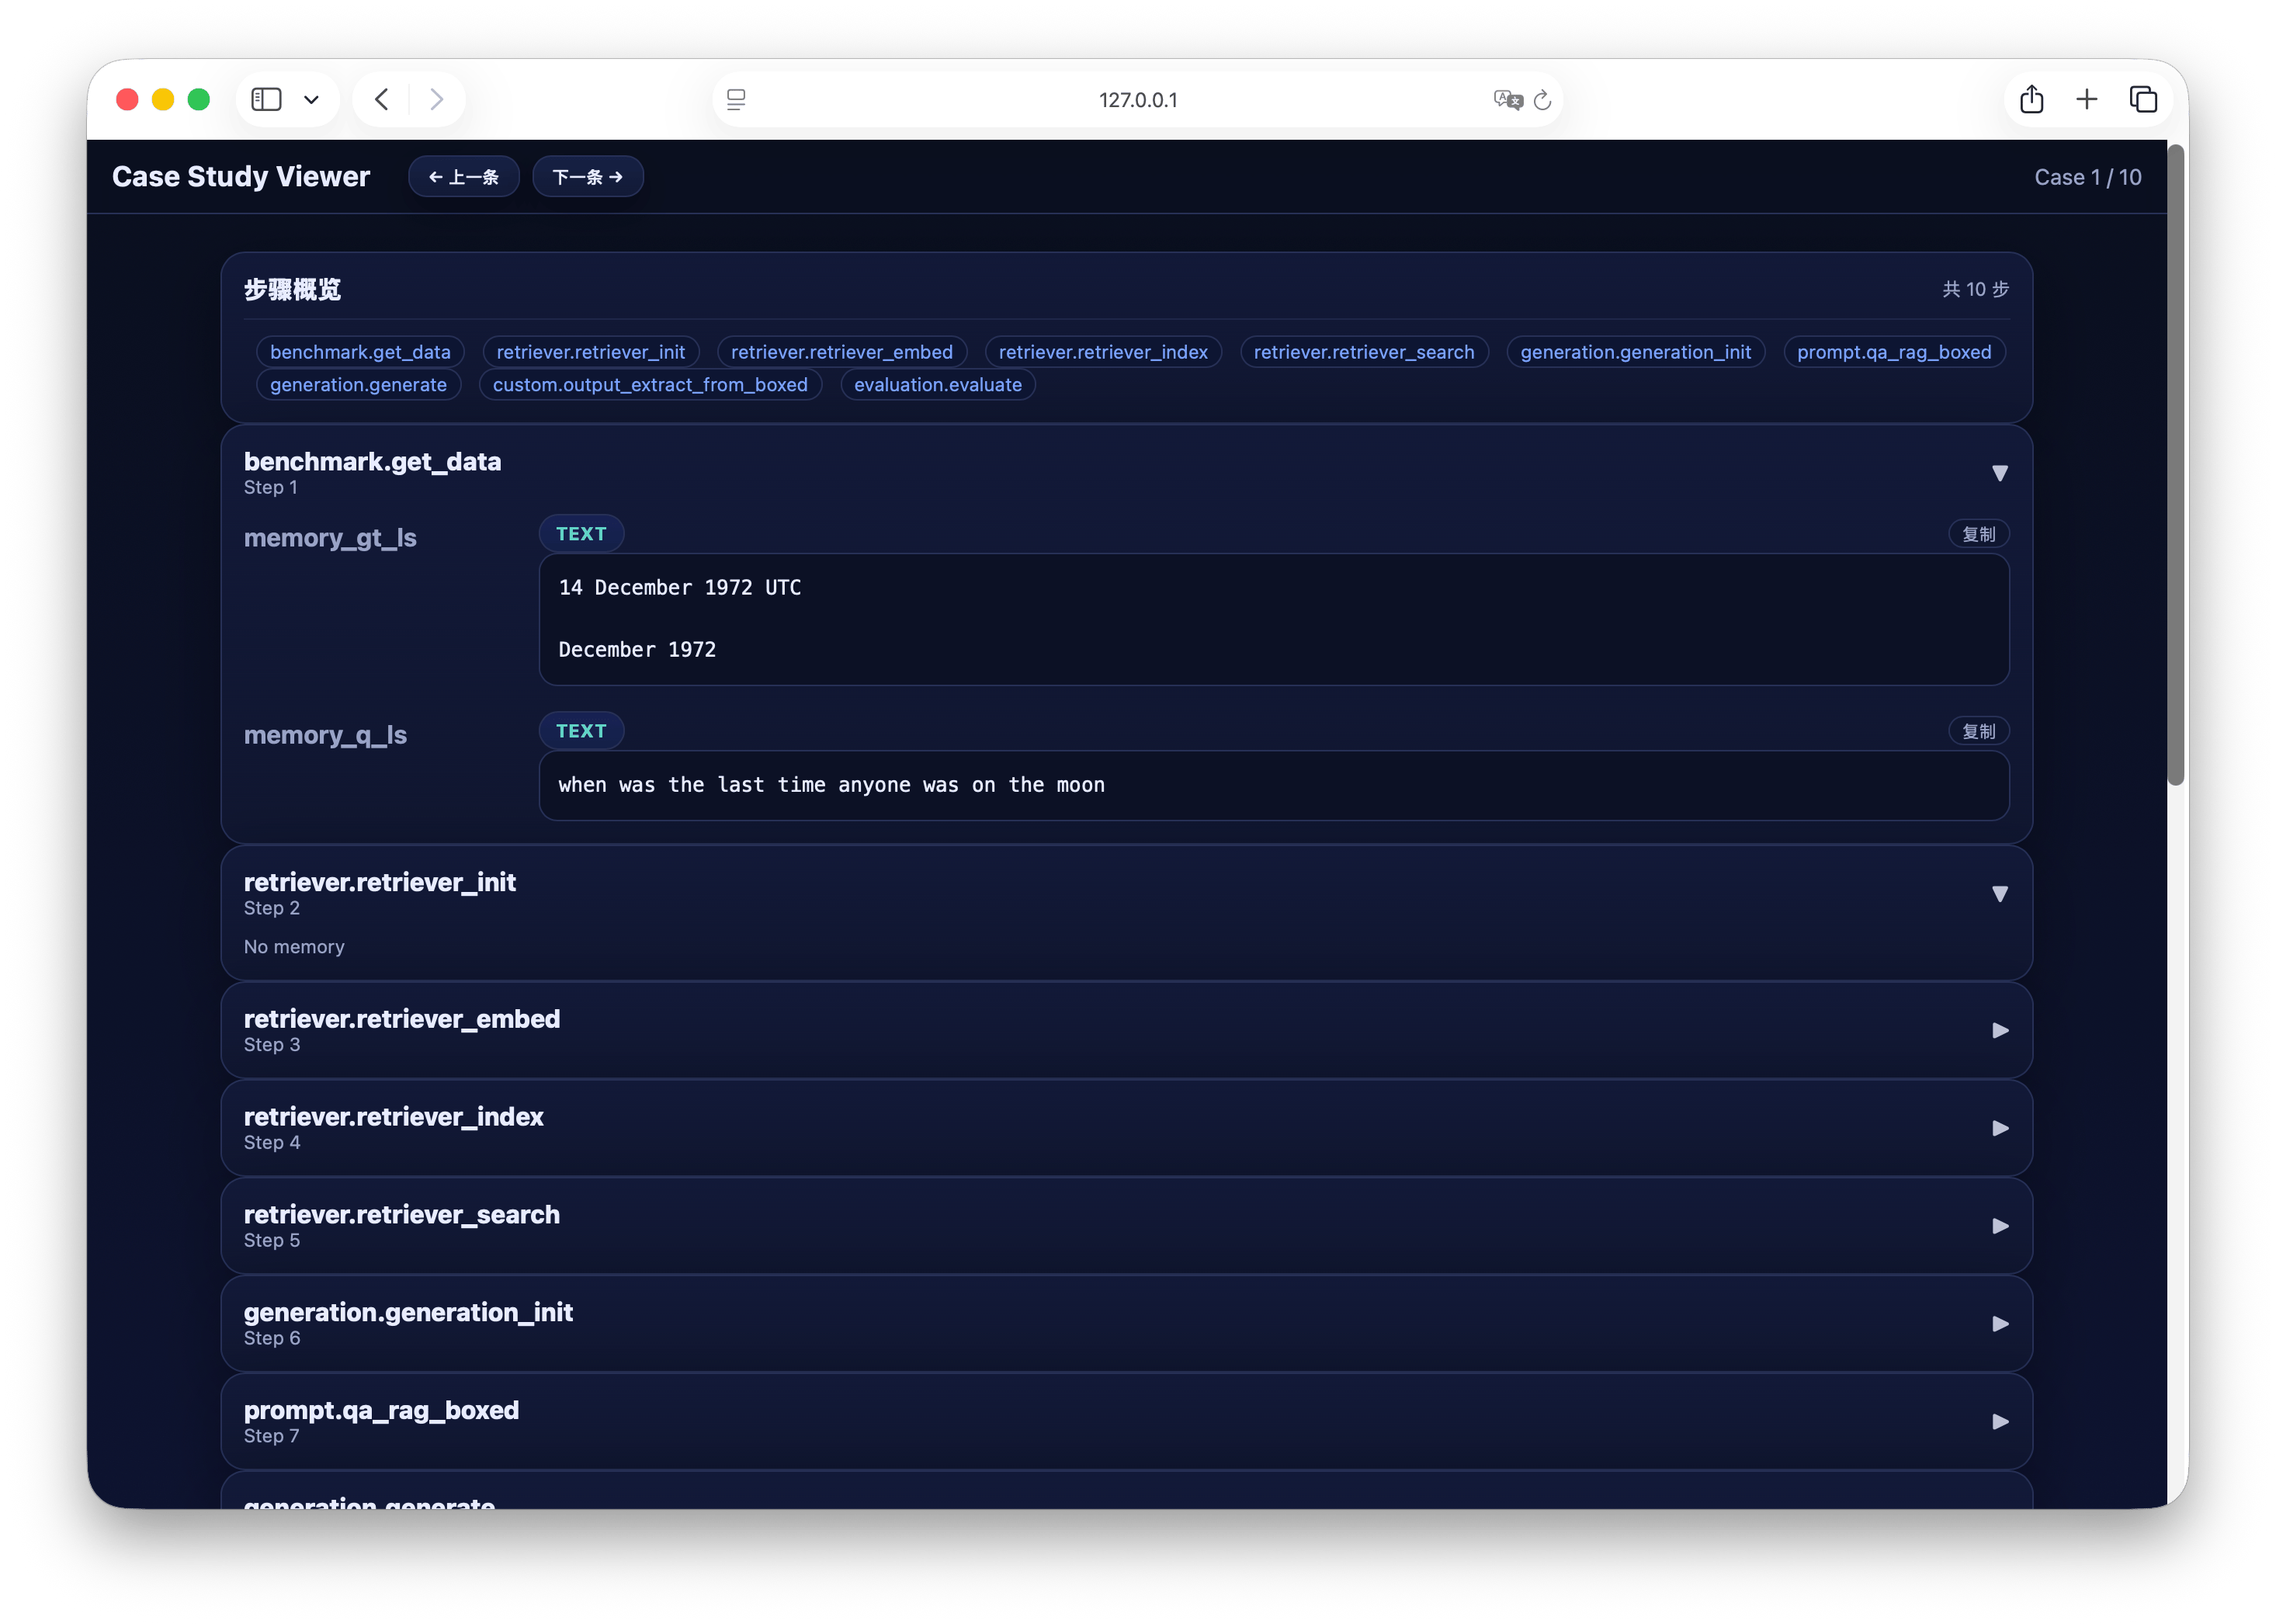
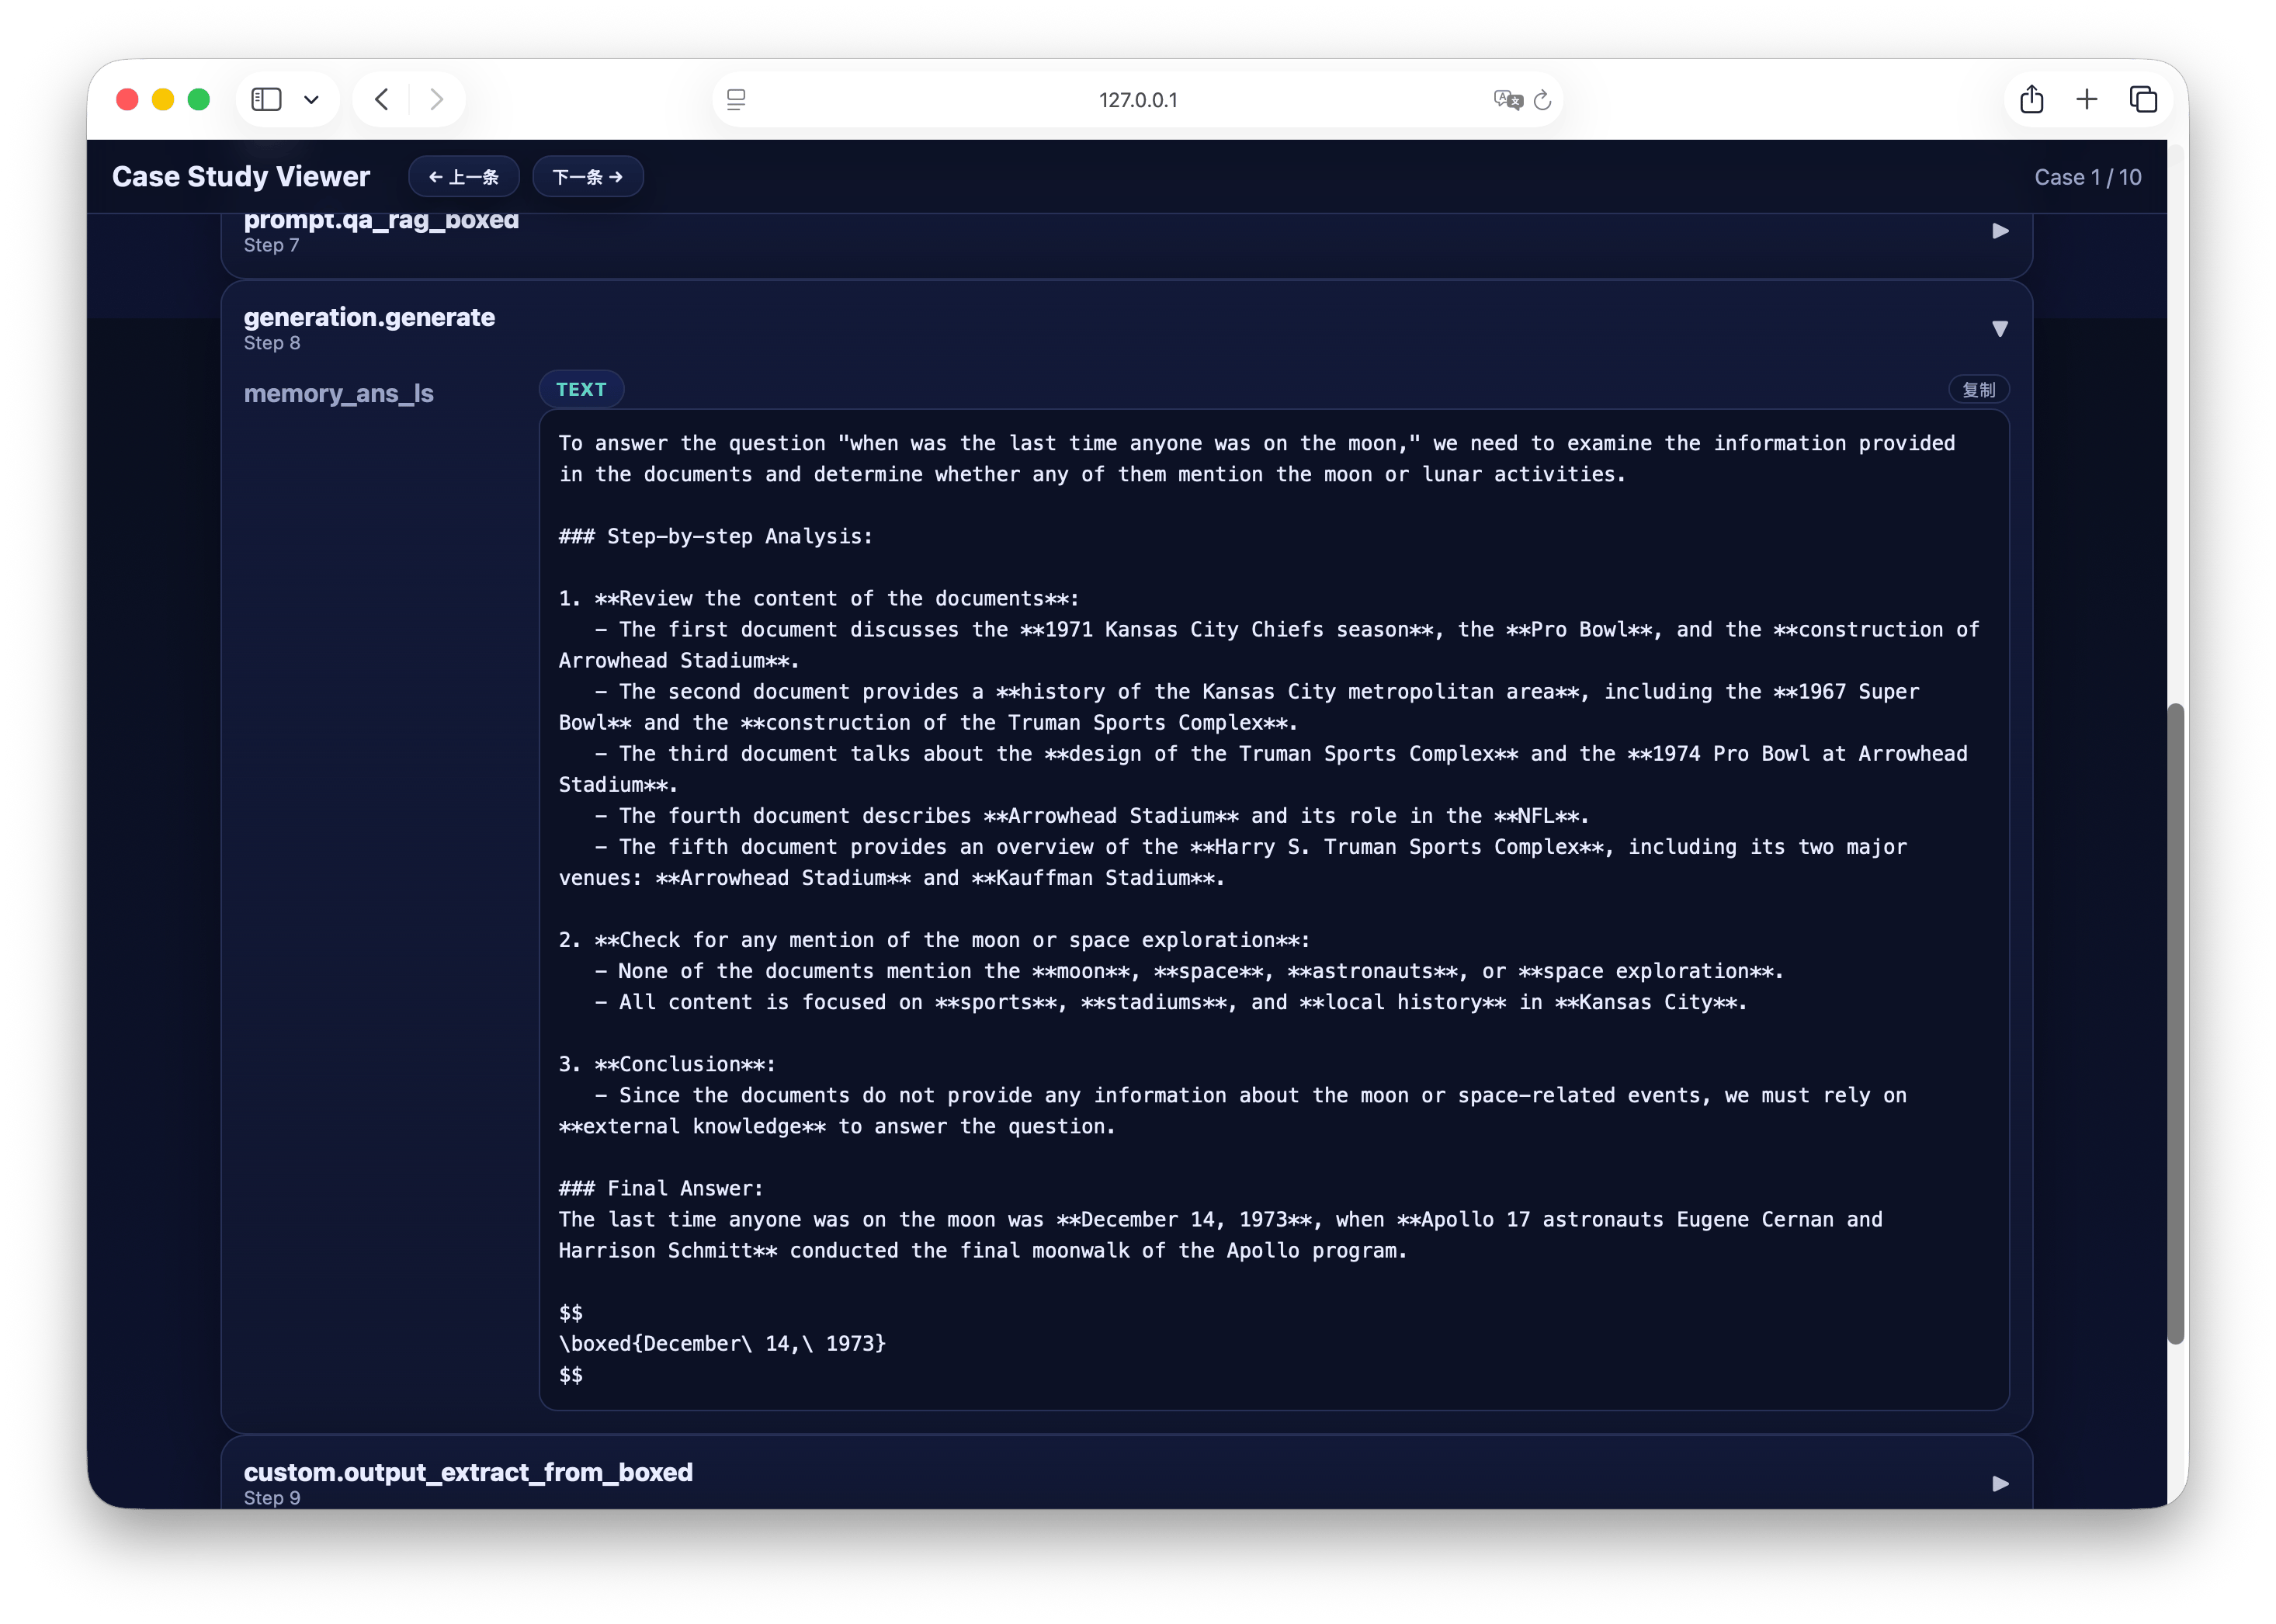
运行成功后,终端会显示访问地址。打开浏览器并输入该地址,即可进入 Case Study Viewer 界面,对结果进行交互式浏览与分析。
界面示例如下所示:
运行结束后,结果(如生成内容、评测报告等)将自动保存在对应的输出路径中,如本例中`output/memory_nq_rag_full_20251010_145420.json`可直接用于后续分析与可视化展示。
## Step 4:可视化分析 Case Study
完成流程运行后,可通过内置的可视化工具快速分析生成结果。执行以下命令启动 Case Study Viewer:
```shell theme={null}
python ./script/case_study.py \
--data output/memory_nq_rag_full_20251010_145420.json \
--host 127.0.0.1 \
--port 8080 \
--title "Case Study Viewer"
```
运行成功后,终端会显示访问地址。打开浏览器并输入该地址,即可进入 Case Study Viewer 界面,对结果进行交互式浏览与分析。
界面示例如下所示:
 ## 小结
至此,你已完成从 Pipeline 配置、参数编译 到 流程运行与可视化分析 的完整 RAG 实践流程。
UltraRAG 通过模块化的 MCP 架构与统一的评测体系,使得 RAG 系统的构建、运行与分析更加高效、直观、可复现。
你可以在此基础上:
* 替换不同的模型或检索器,探索多种组合效果;
* 自定义新的 Server 与 Tool,扩展系统功能;
* 利用评测模块快速对比实验结果,开展系统性研究。
## 小结
至此,你已完成从 Pipeline 配置、参数编译 到 流程运行与可视化分析 的完整 RAG 实践流程。
UltraRAG 通过模块化的 MCP 架构与统一的评测体系,使得 RAG 系统的构建、运行与分析更加高效、直观、可复现。
你可以在此基础上:
* 替换不同的模型或检索器,探索多种组合效果;
* 自定义新的 Server 与 Tool,扩展系统功能;
* 利用评测模块快速对比实验结果,开展系统性研究。