- Write Pipeline configuration file
- Compile Pipeline and adjust parameters
- Run Pipeline
Step 1: Write Pipeline Configuration File
Please ensure that the current working directory is located at the UltraRAG root directory
examples folder, for example:
examples/rag_full.yaml

servers: Declare the various modules (Servers) depended on by the current process. For example, theretrieverServer is required for the retrieval stage.pipeline: Define the calling sequence of functional functions (Tools) in each Server. This example shows a complete process from data loading, retrieval encoding and index construction, to generation and evaluation.
Step 2: Compile Pipeline and Adjust Parameters
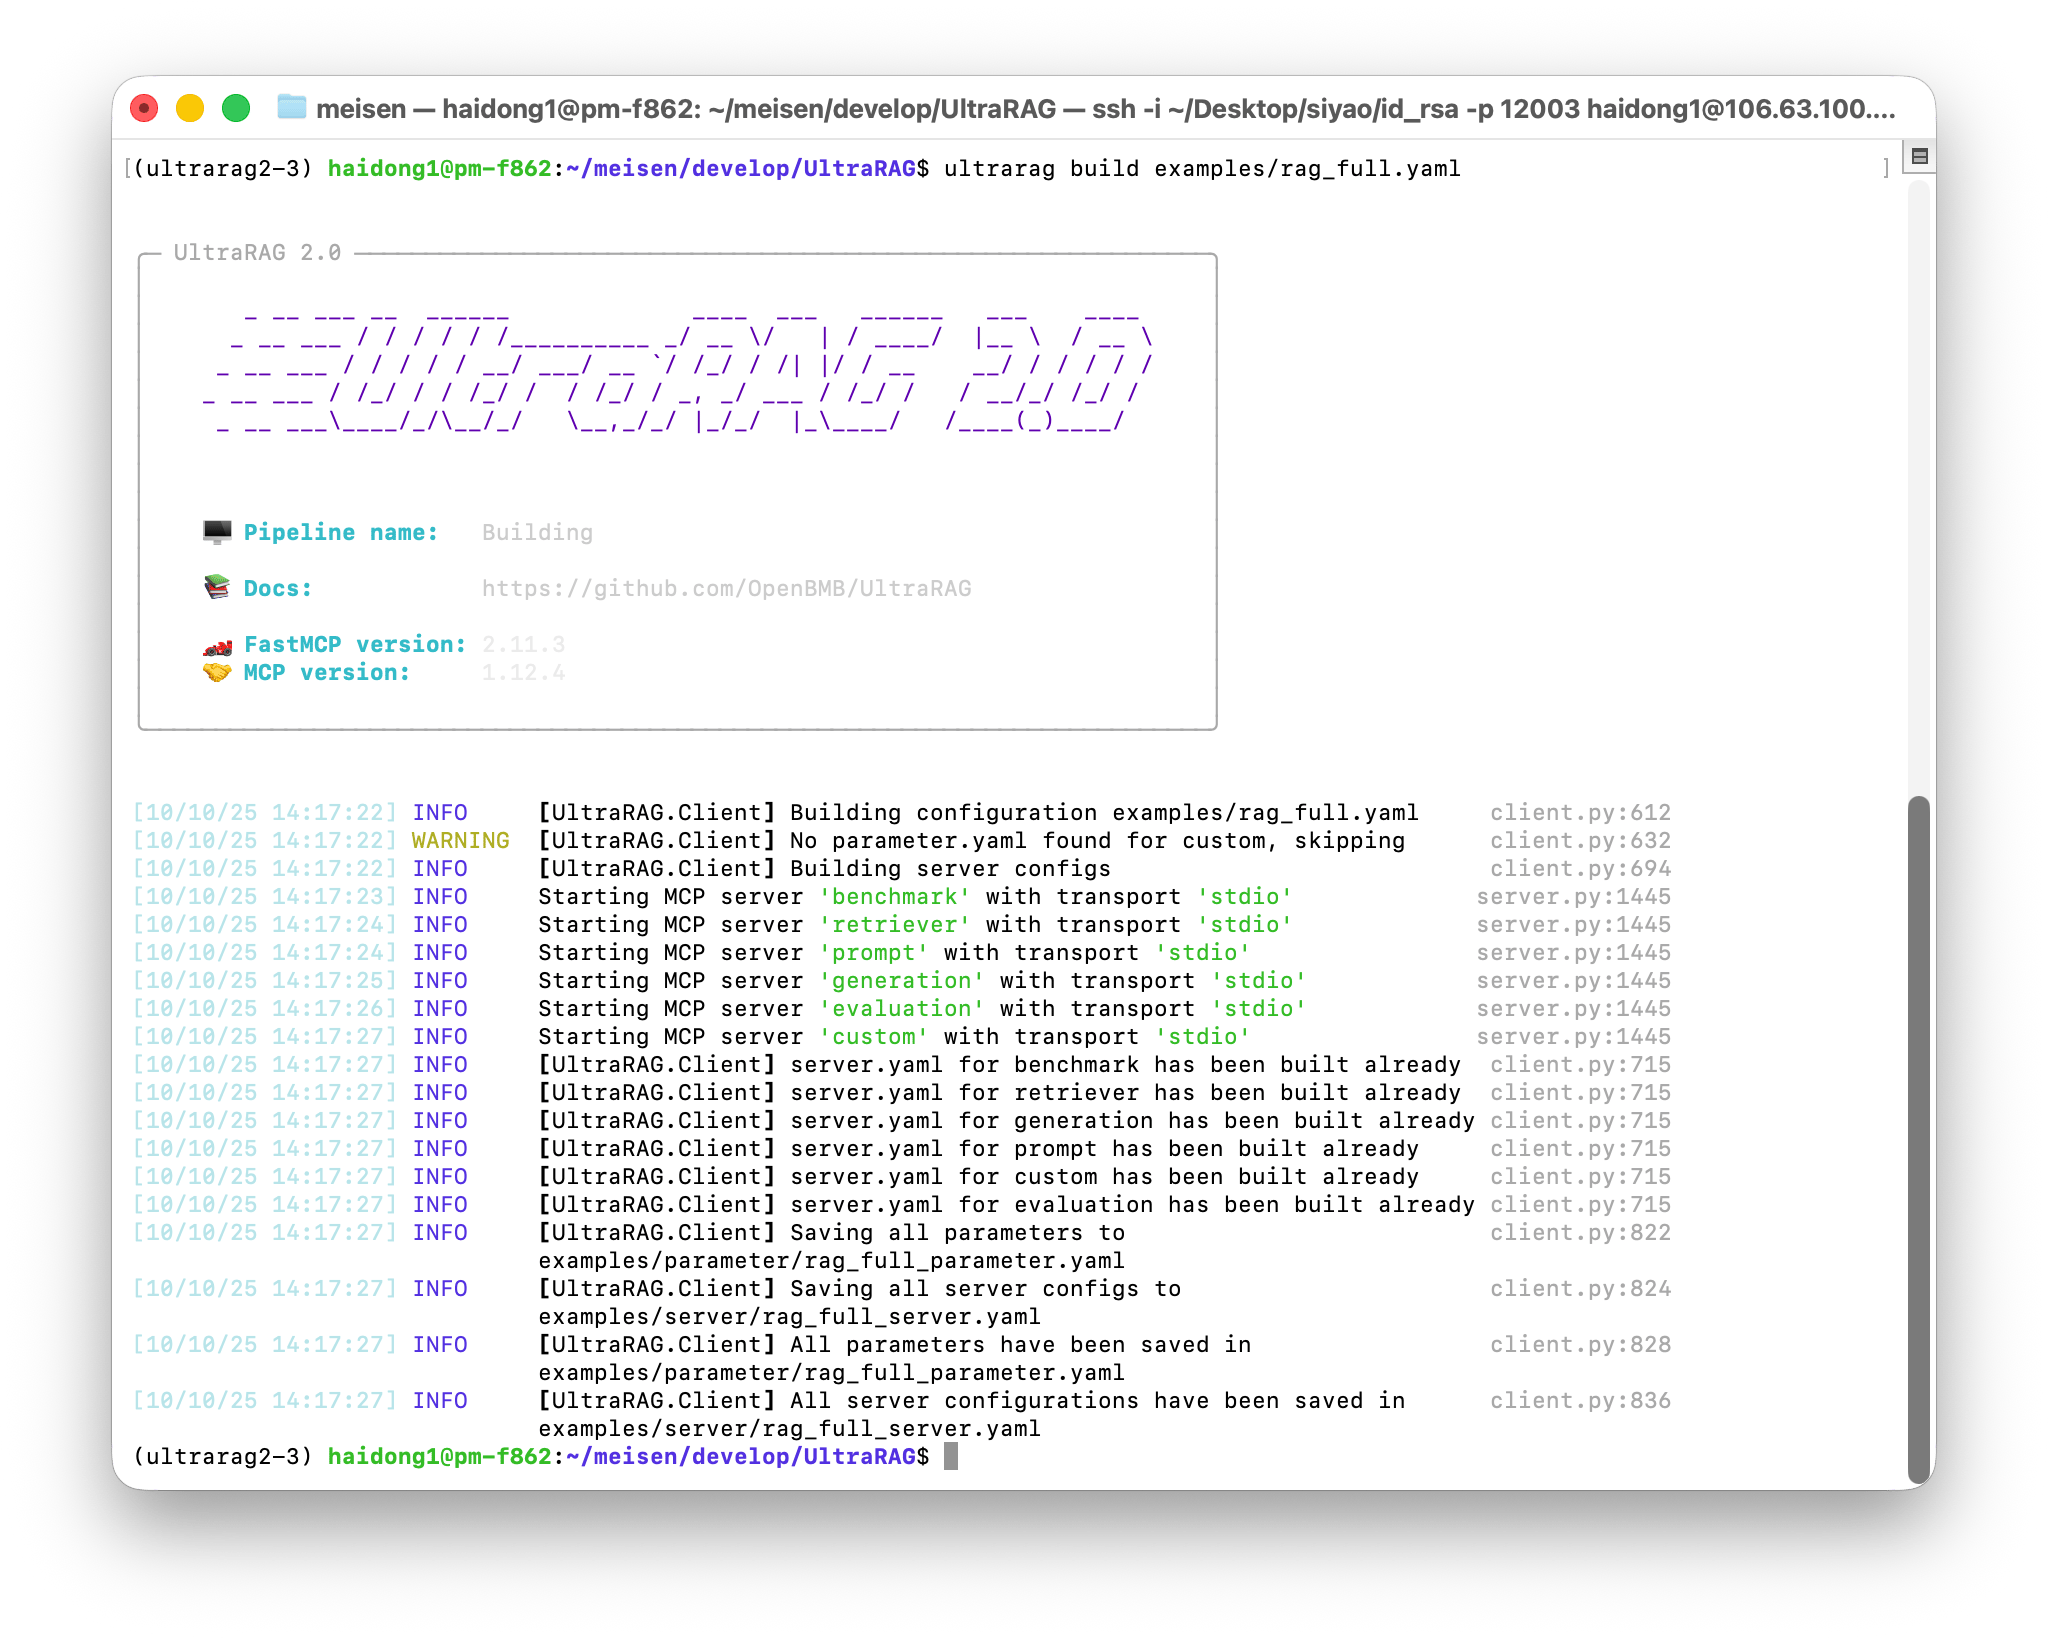
Before running the code, you first need to configure the parameters required for operation. UltraRAG provides a shortcutbuild command, which can automatically generate the complete parameter file depended on by the current Pipeline.
The system will read the parameter.yaml file of each Server, parse all parameter items involved in this process, and consolidate them into an independent configuration file. Execute the following command:
examples/parameters/ folder. Open the file and modify relevant parameters according to the actual situation, for example:
examples/parameters/rag_full_parameter.yaml
- Adjust
templateto the RAG templateprompt/qa_rag_boxed.jinja; - Replace
model_name_or_pathof the retriever and generator with the local downloaded model path; - If running in a multi-GPU environment, modify
gpu_idsto match available devices.
Step 3: Run Pipeline
When the parameter configuration is complete, you can run the entire process with one click. Execute the following command: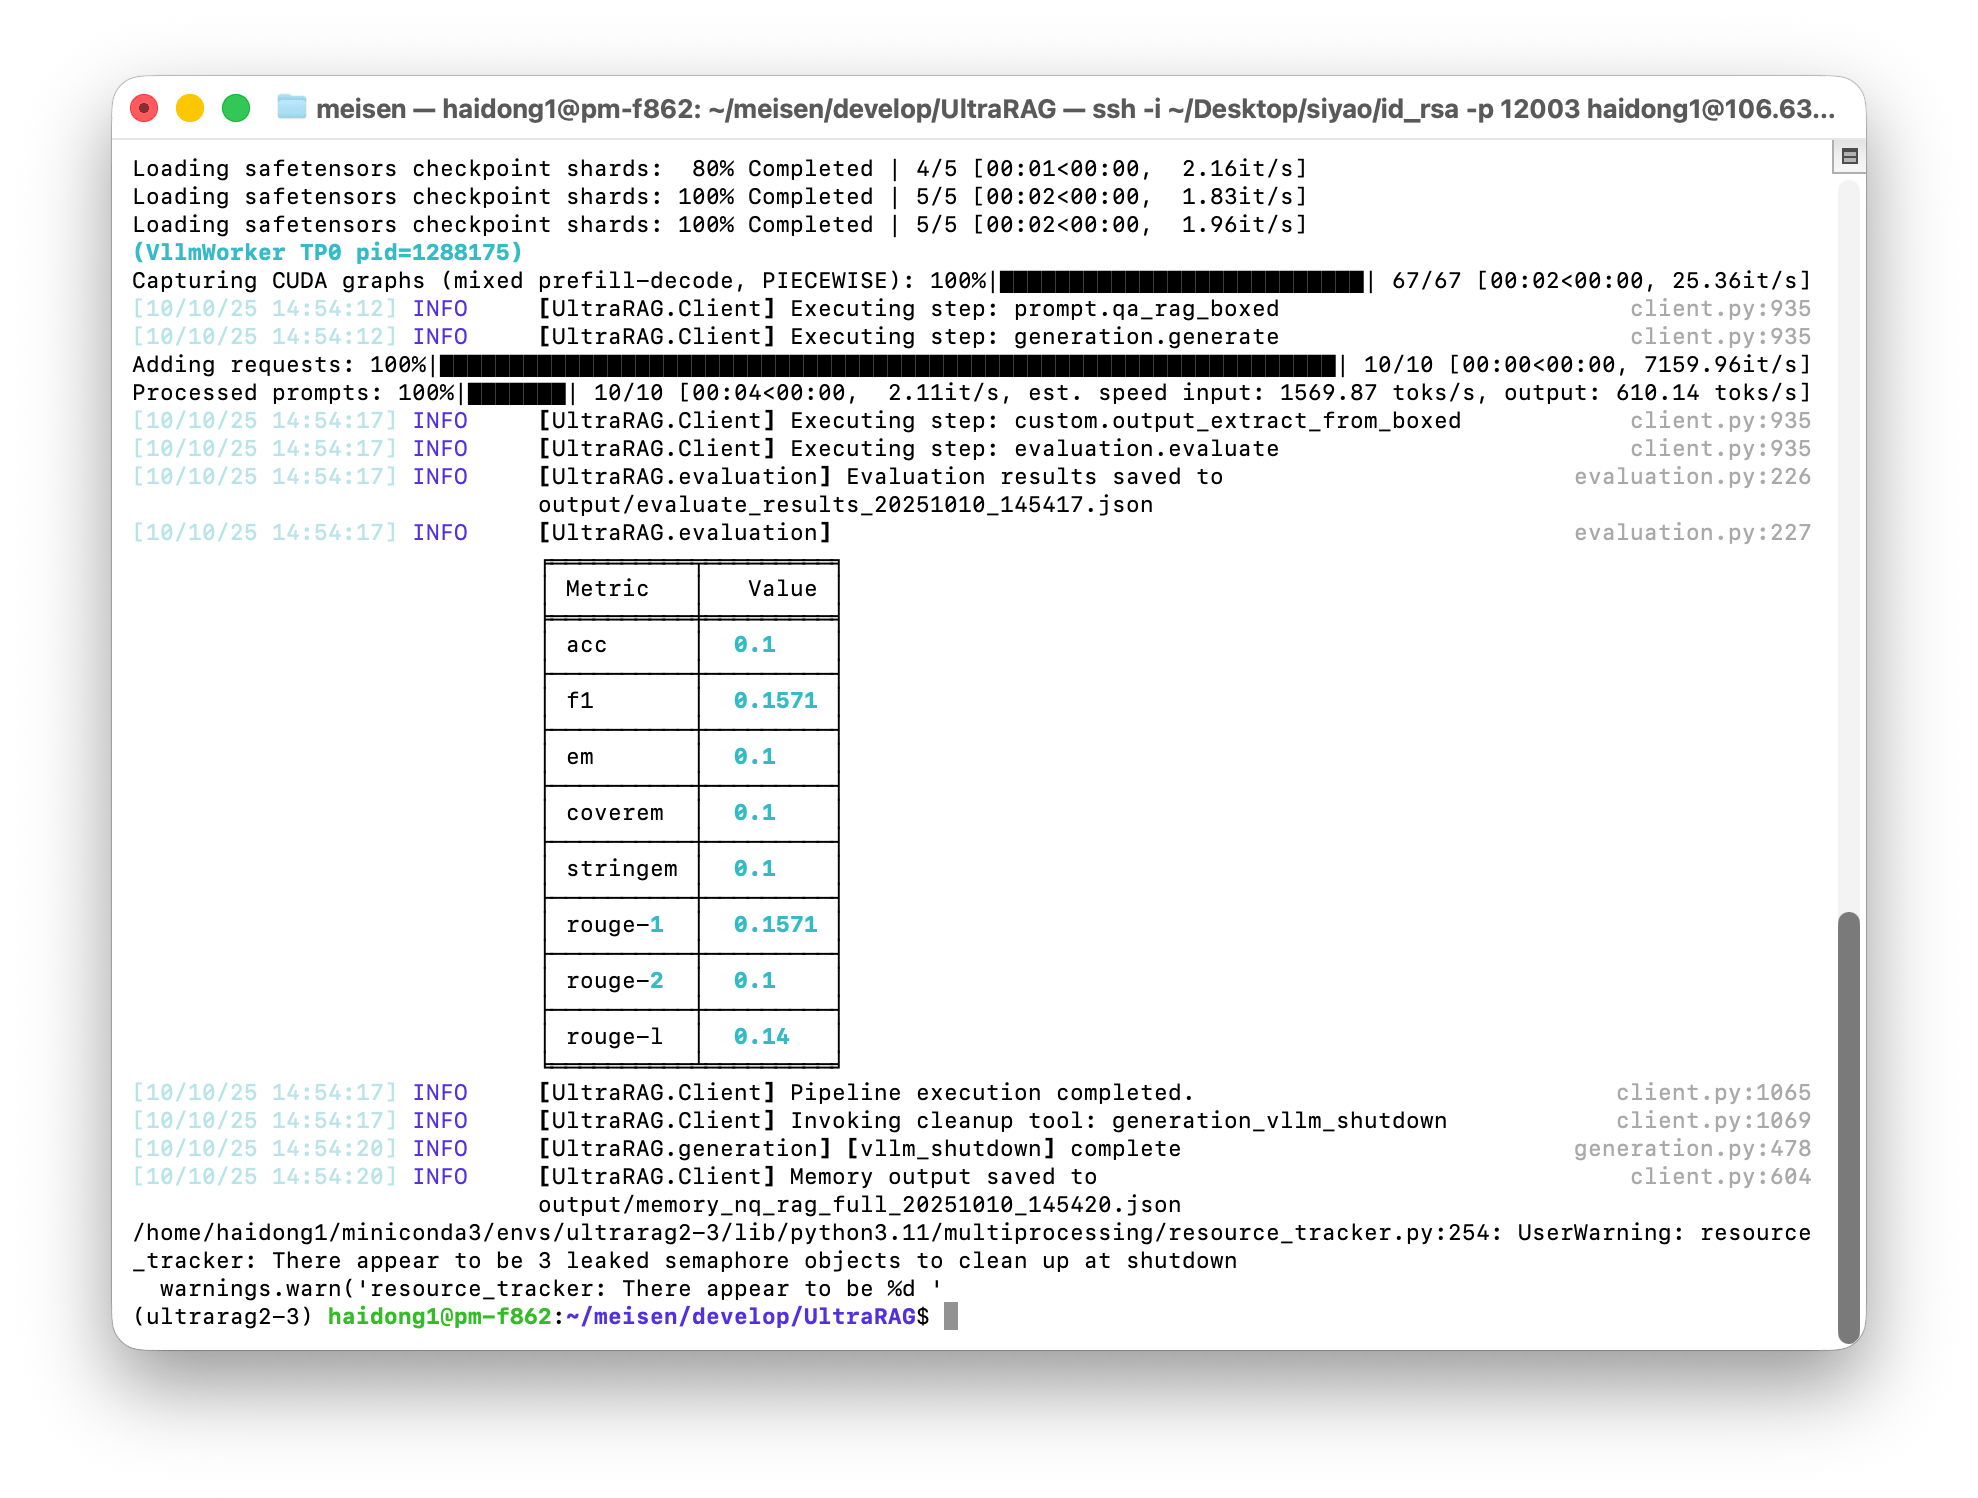
output/memory_nq_rag_full_20251010_145420.json in this example, which can be directly used for subsequent analysis and visual display.
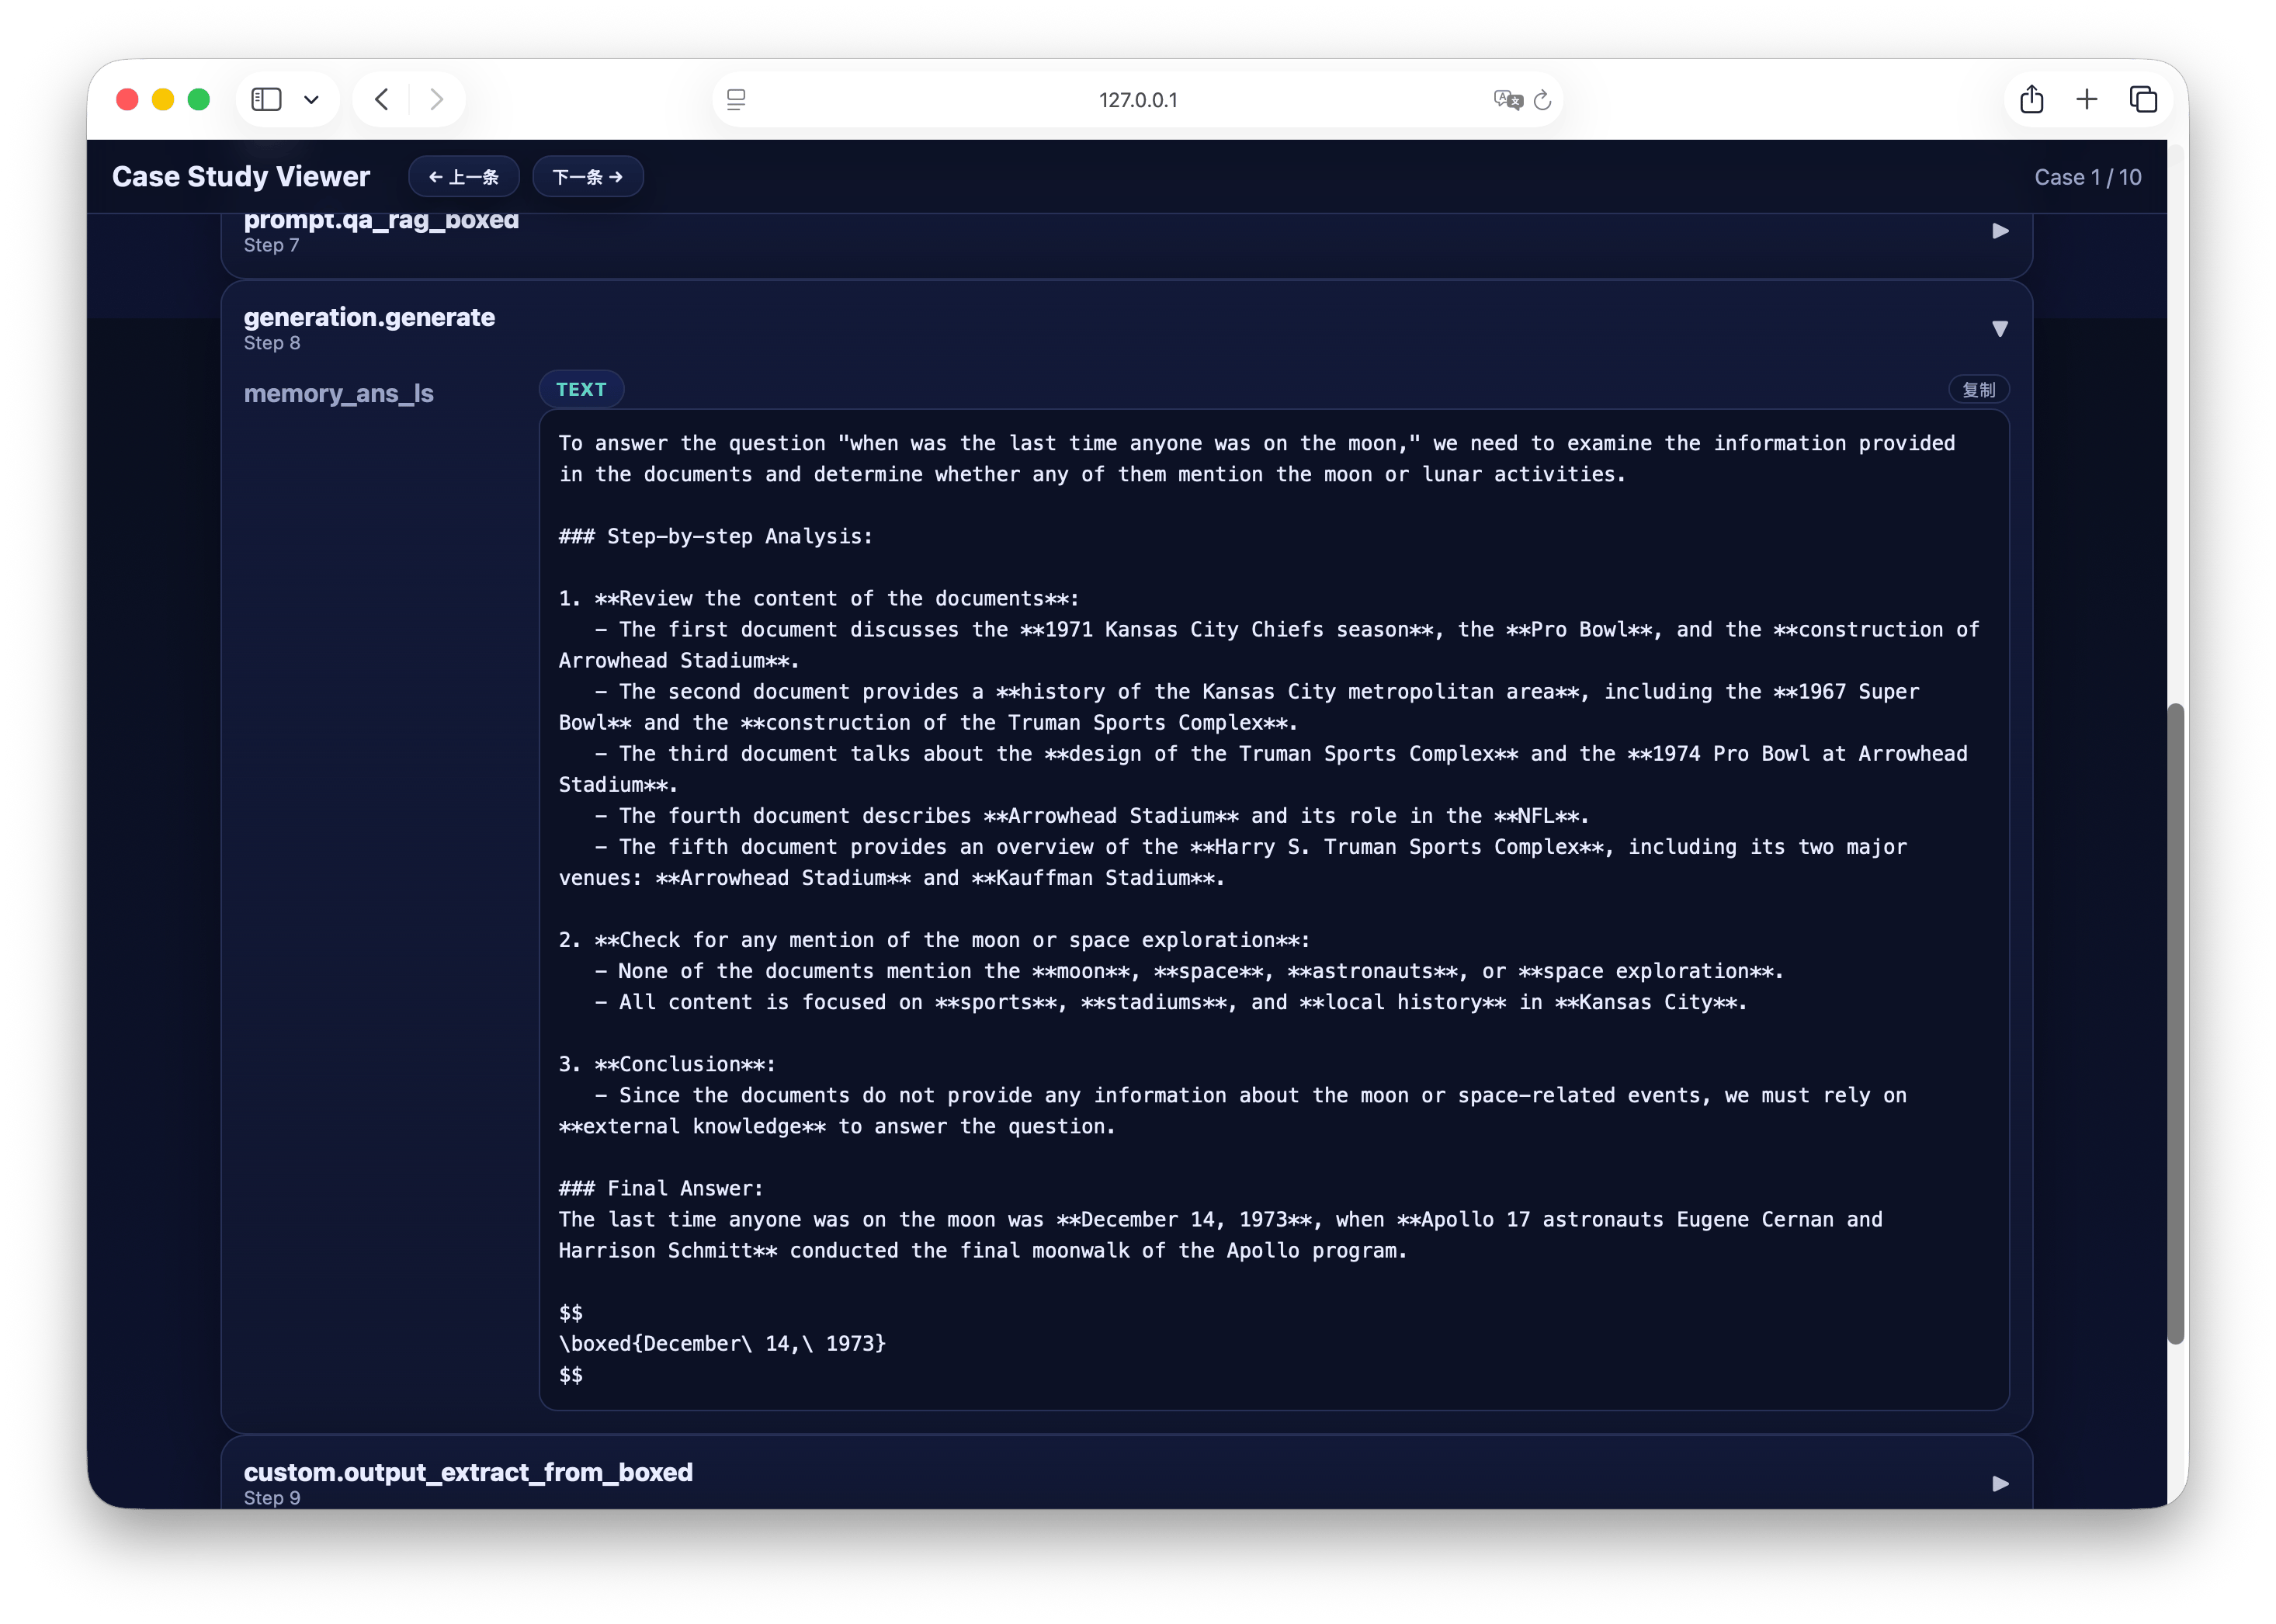
Step 4: Visual Analysis Case Study
After completing the process run, you can quickly analyze the generation results through the built-in visualization tool. Execute the following command to start the Case Study Viewer: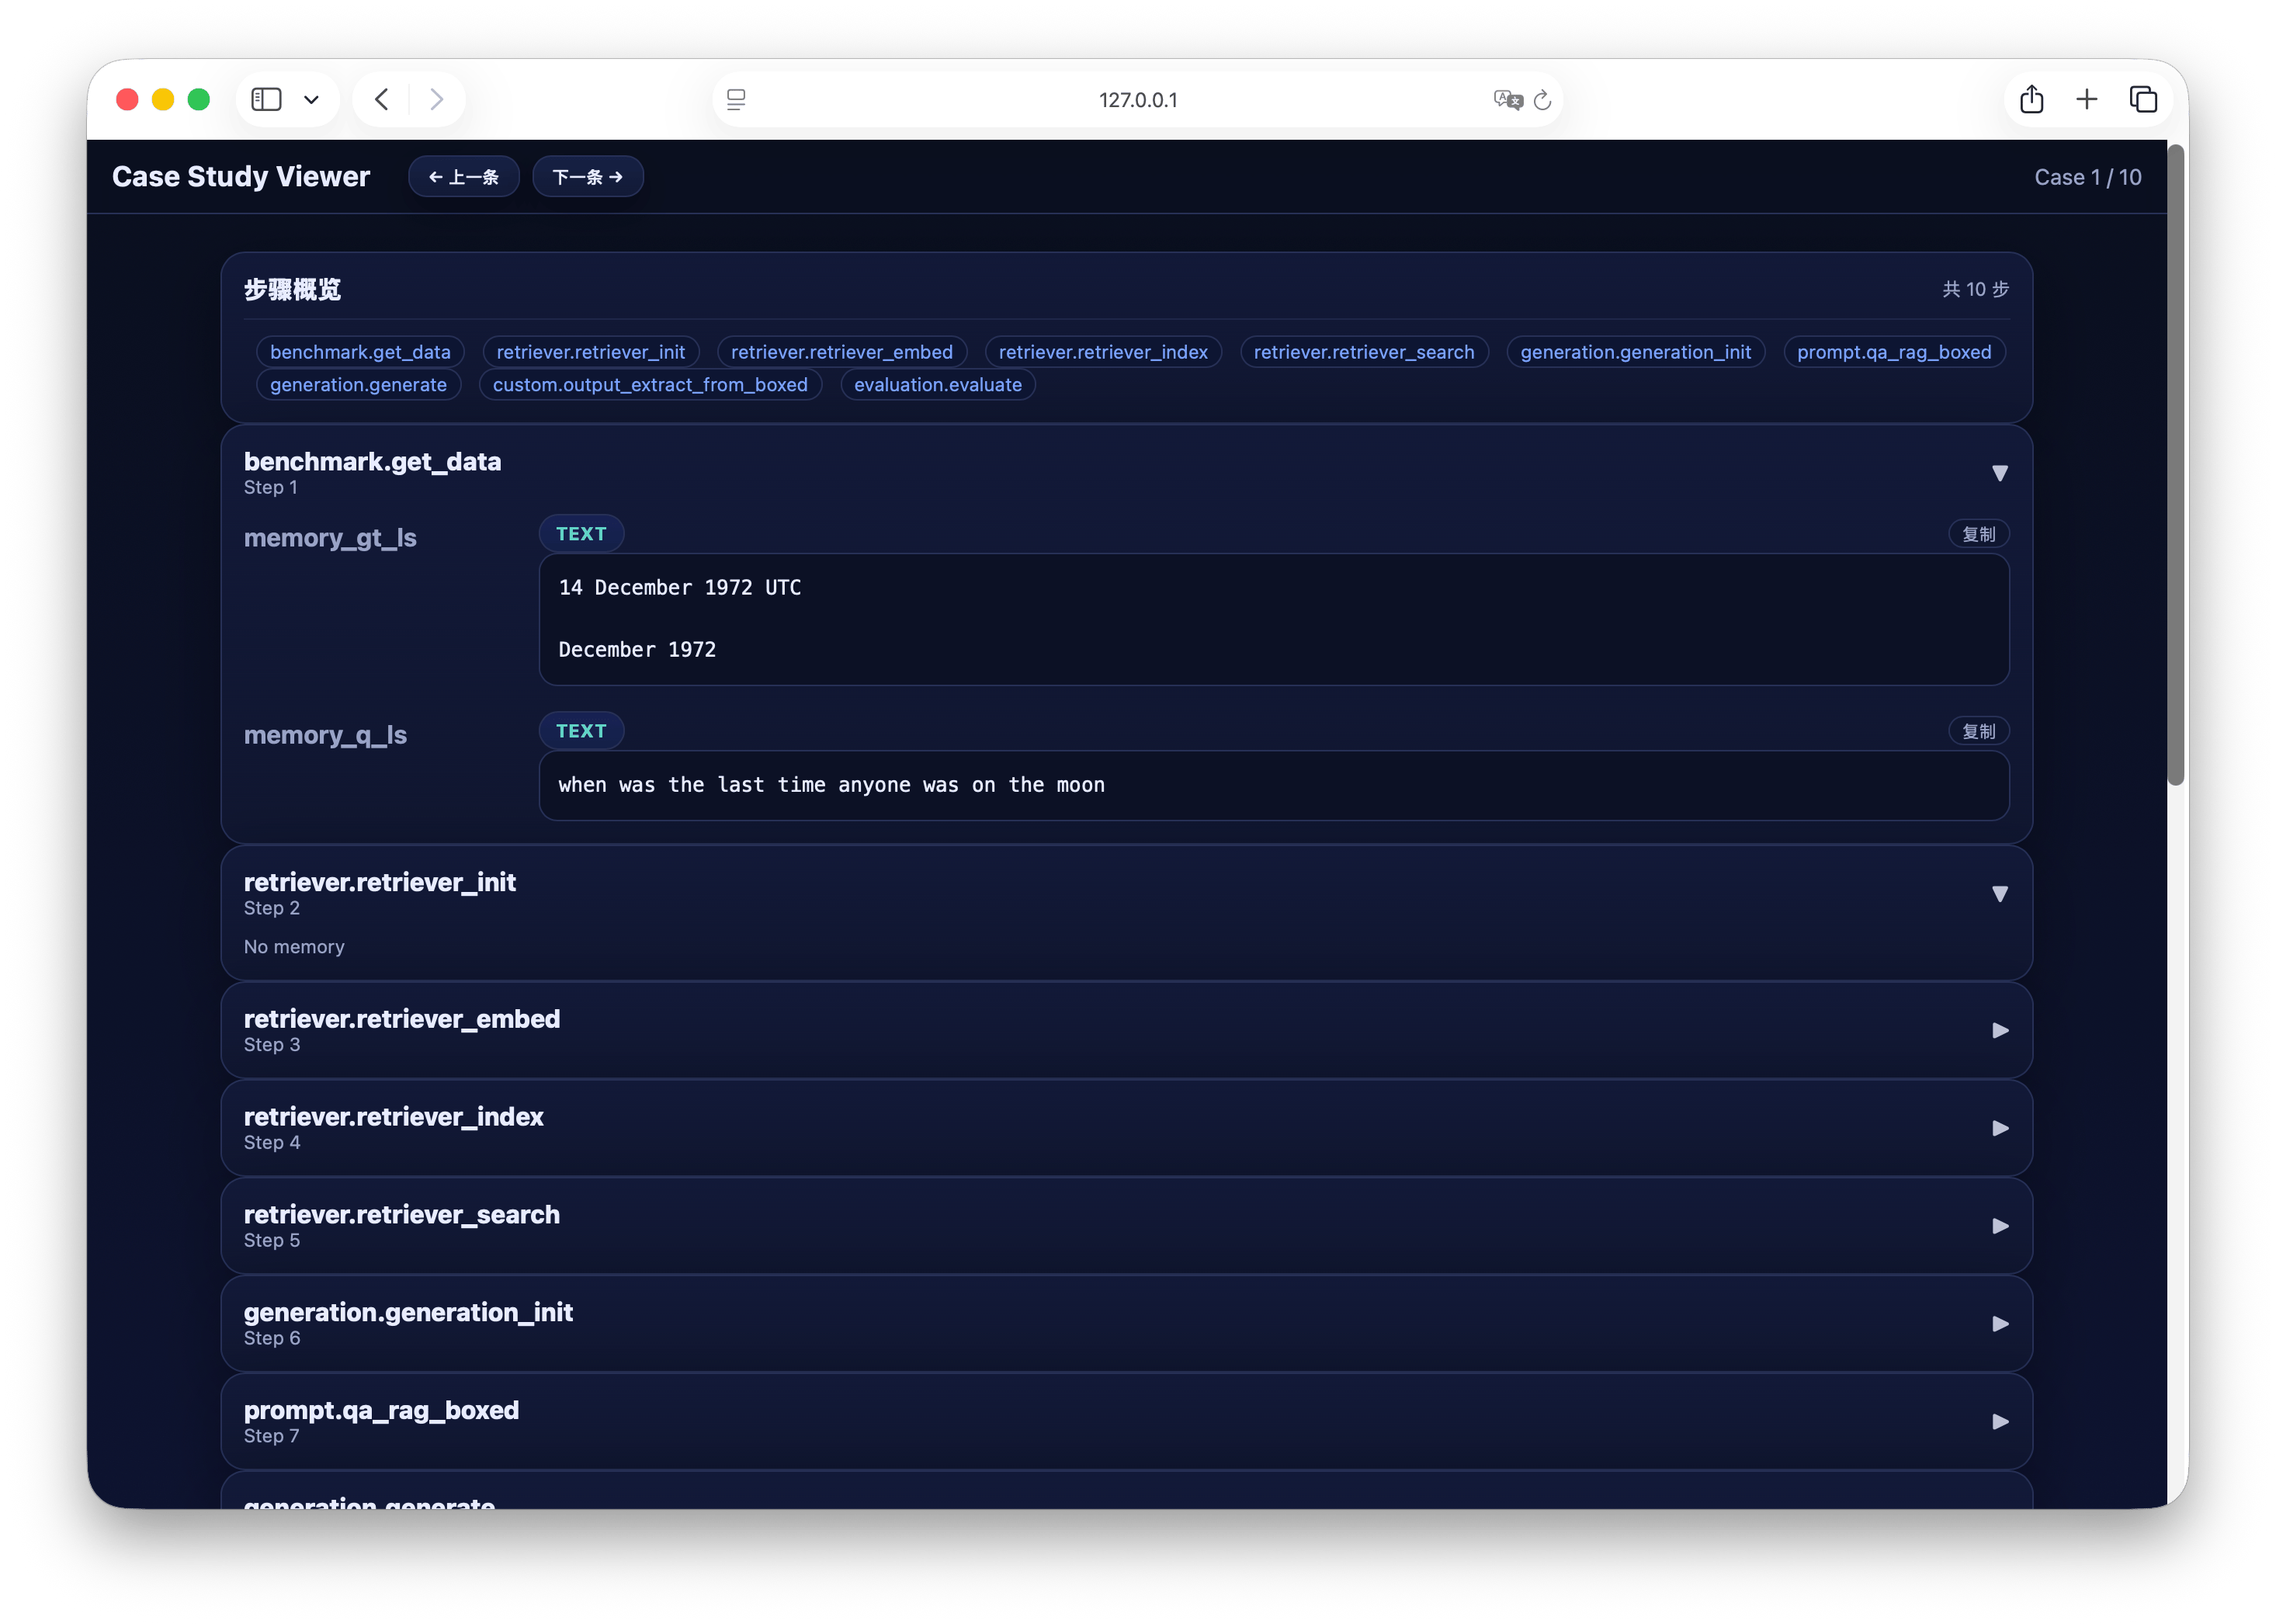
Summary
At this point, you have completed the full RAG practice process from Pipeline Configuration, Parameter Compilation to Process Running and Visual Analysis. UltraRAG makes the construction, operation, and analysis of RAG systems more efficient, intuitive, and reproducible through a modular MCP architecture and a unified evaluation system. Based on this, you can:- Replace different models or retrievers to explore various combination effects;
- Customize new Servers and Tools to extend system functions;
- Use the evaluation module to quickly compare experimental results and conduct systematic research.