UltraRAG UI is not just a chat interface, it is a complete RAG development and debugging platform.
Startup Command
Use the following command to start the UI service:
Common Options
--port <INTEGER>: Specify service port, default is 5050.--host <TEXT>: Specify binding address, default is 127.0.0.1.--admin: Enable administrator mode. By default, the UI only displays the chat interface (Chat Only). After enabling this option, Pipeline Builder (visual orchestration), parameter configuration, and online Prompt editing functions will be unlocked. In addition, an AI assistant is built into the administrator interface to help you efficiently complete Pipeline configuration and debugging.
Examples
Start Admin Mode with Full Functions:
Start Chat Only Interface (Suitable for End Users):
After startup, access http://127.0.0.1:5050 in your browser to enter the system.
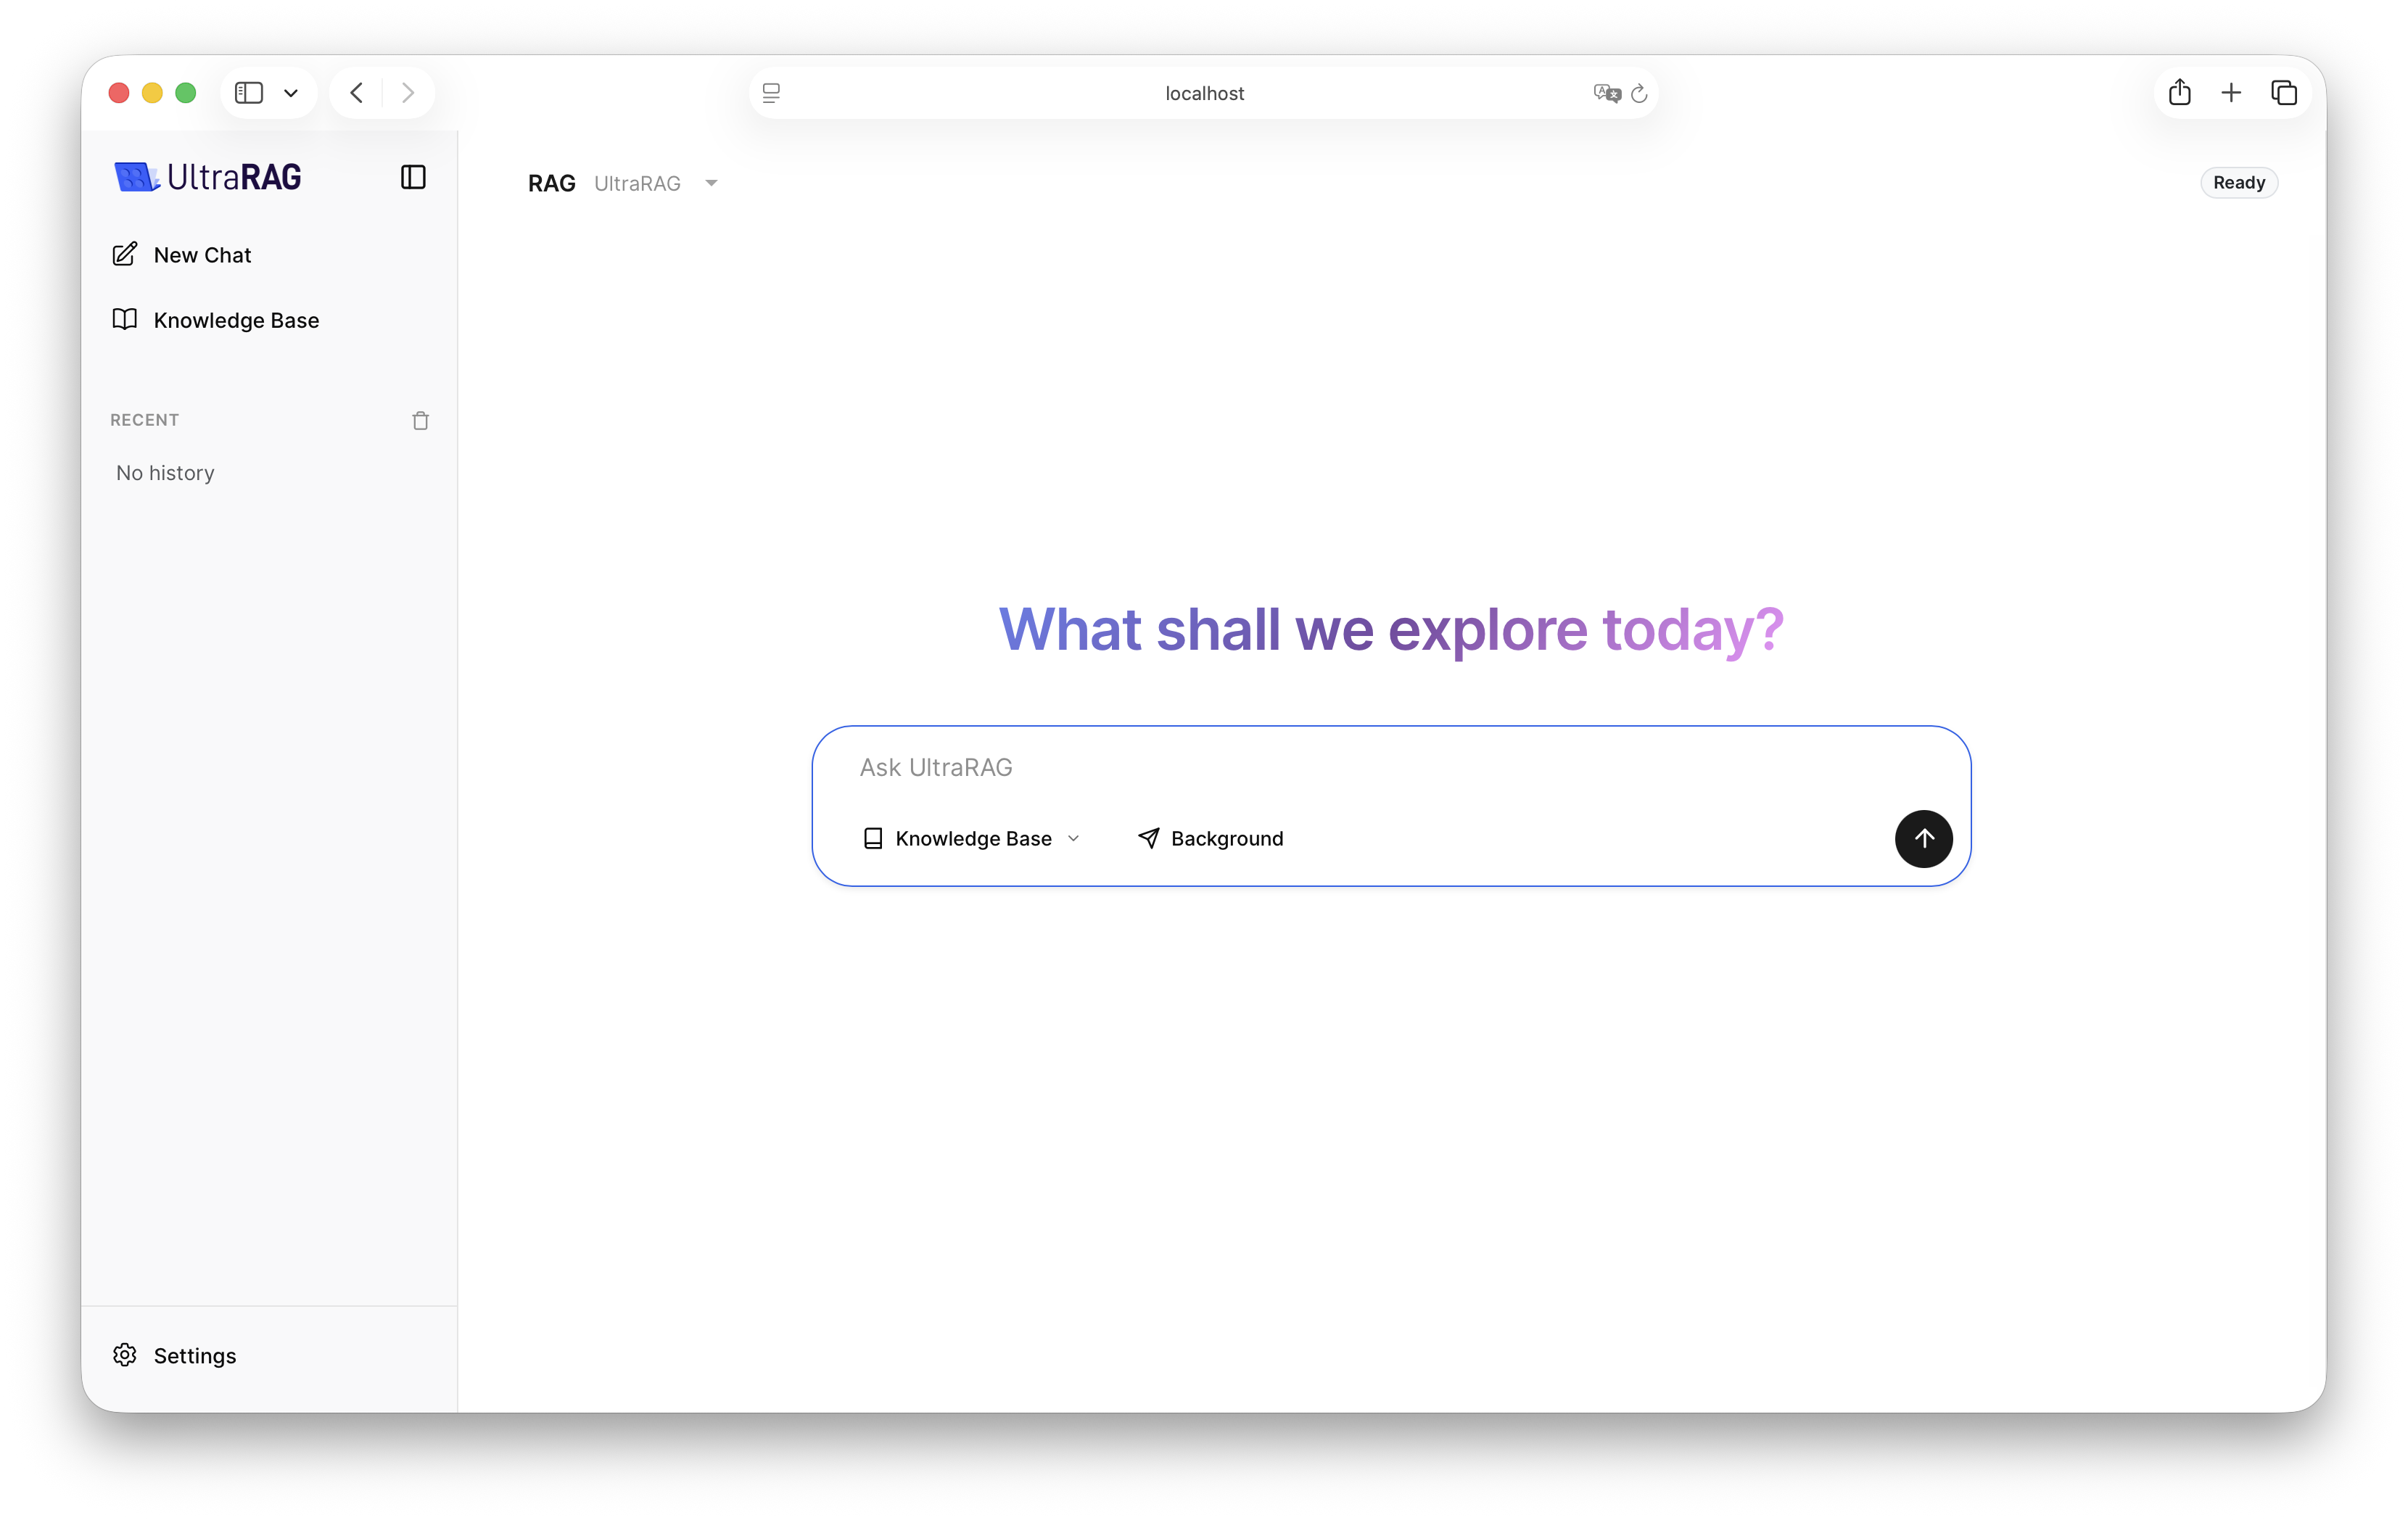
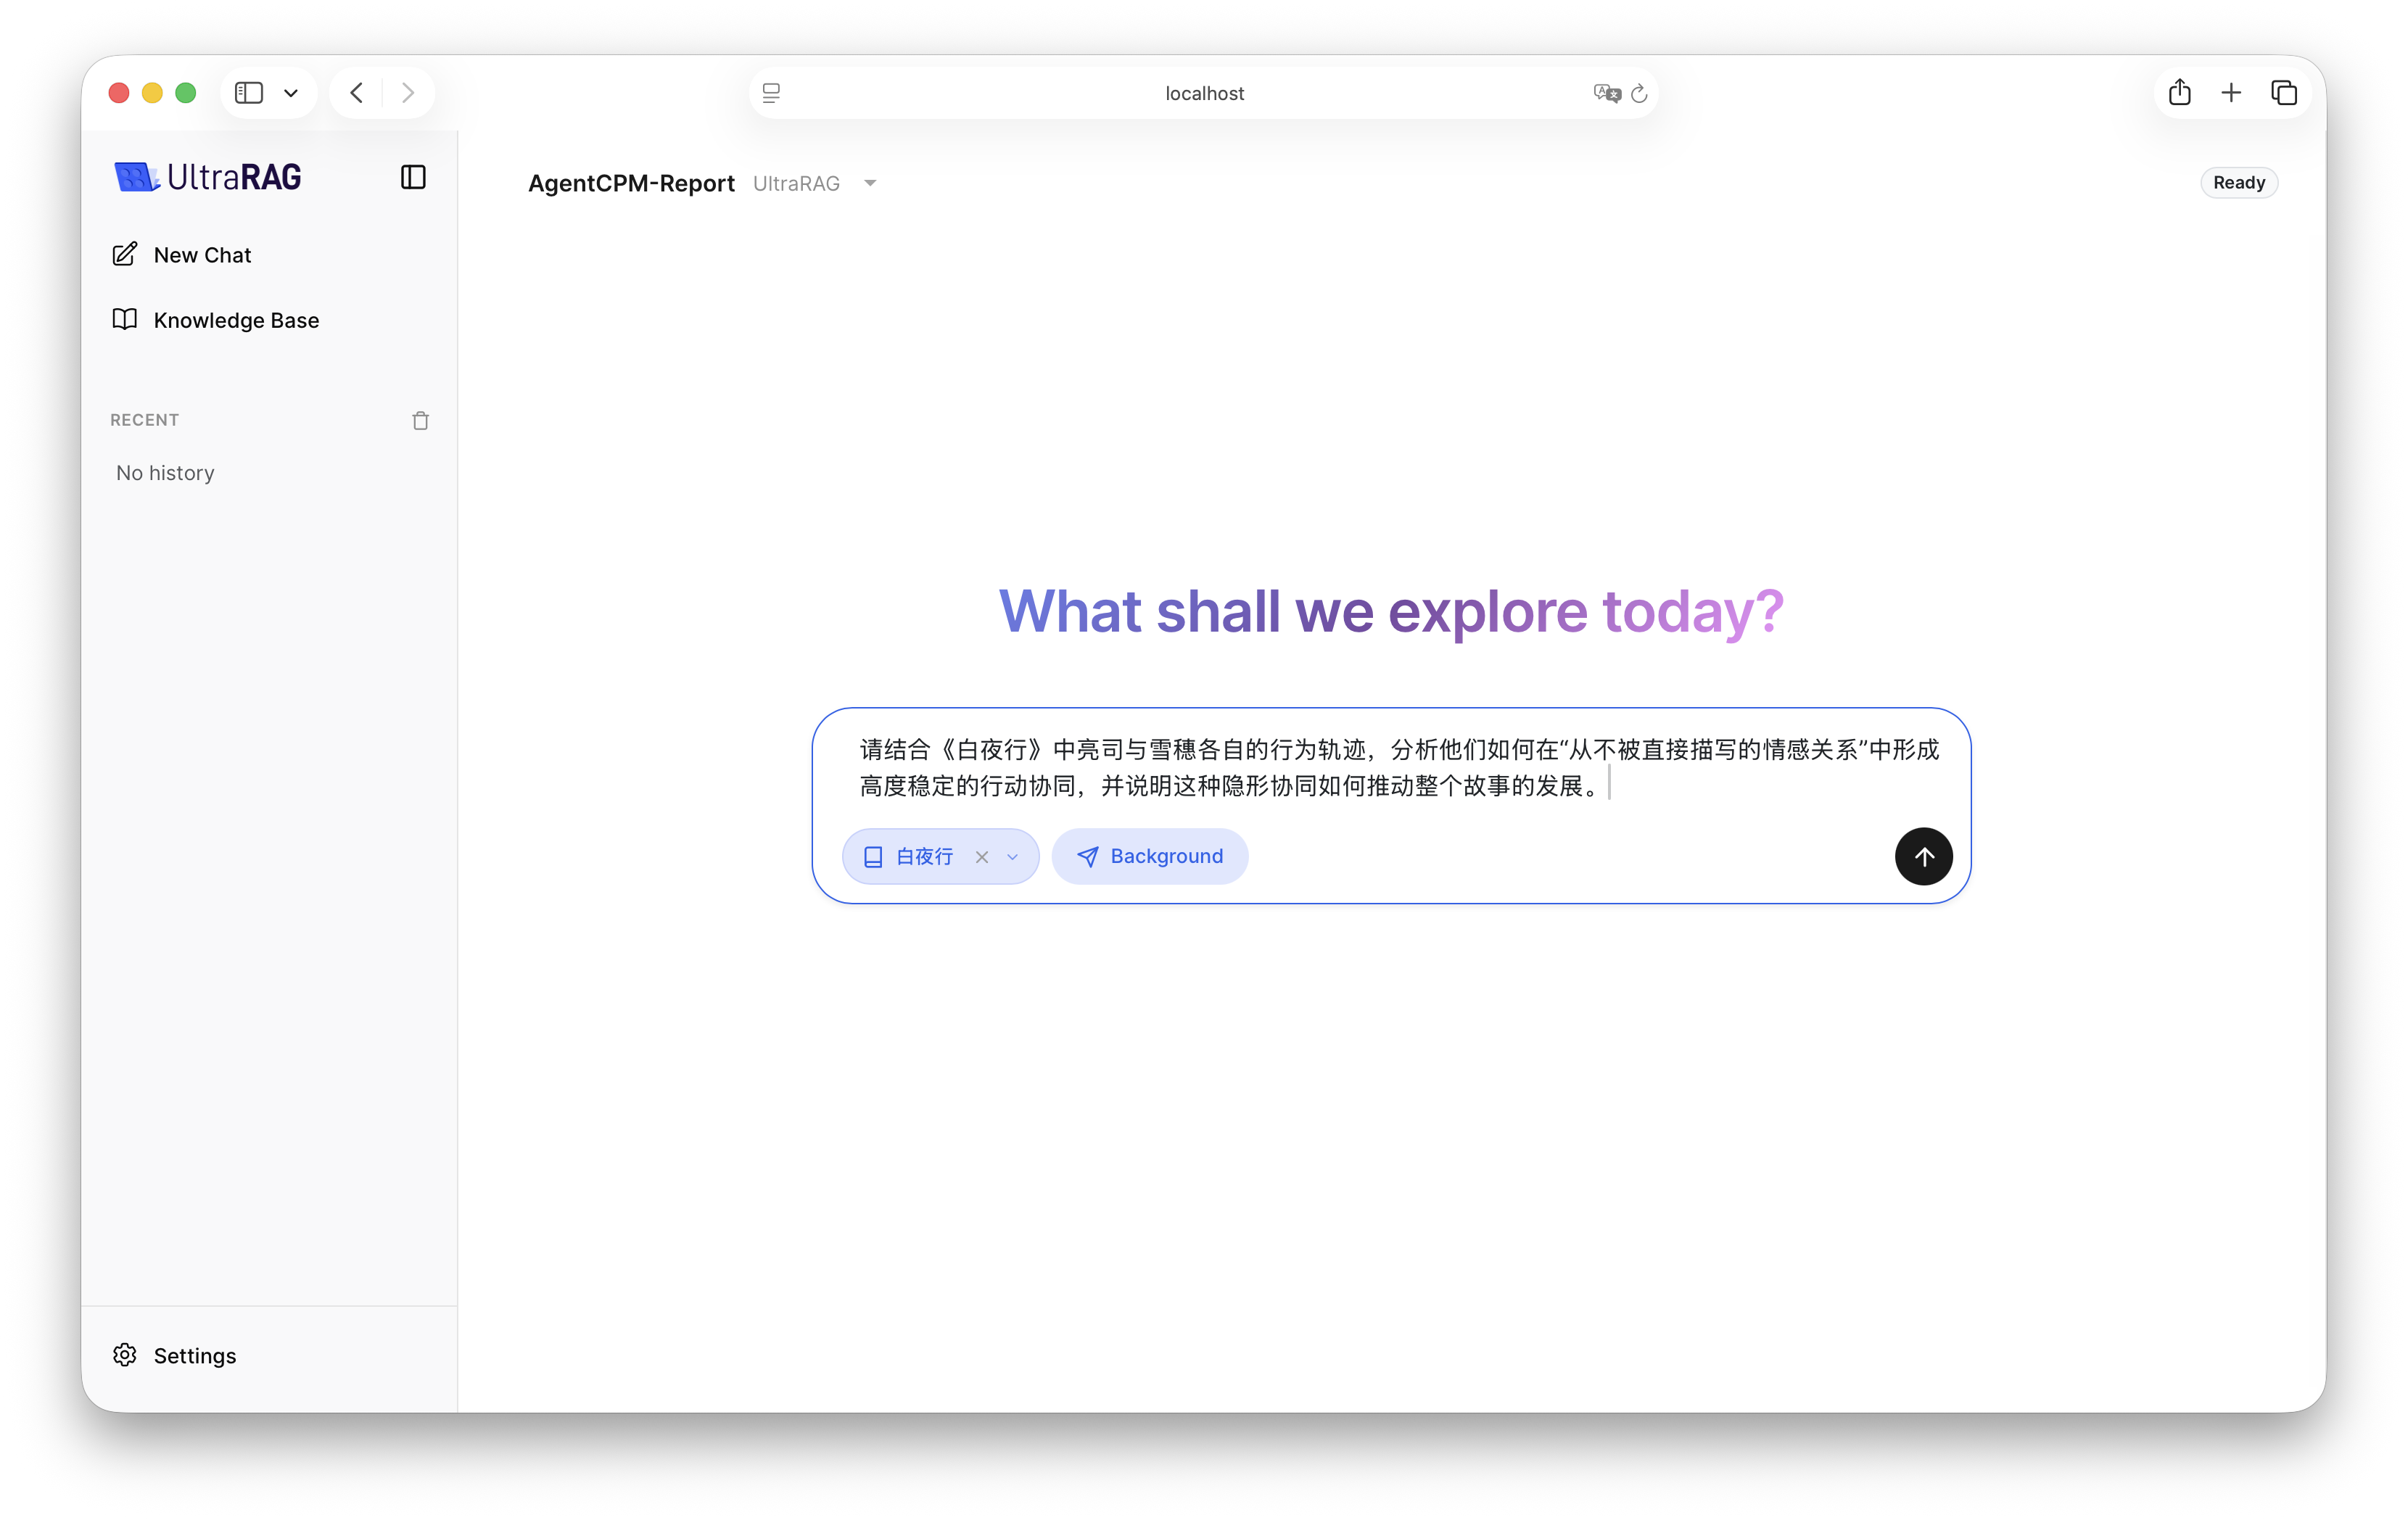
1. Chat
Entering the system displays the chat page by default. You can directly select a compiled Pipeline to start a conversation.
We provide deployment tutorials for several developed Pipelines in
Typical Scenarios. You can also customize Pipelines according to your needs.
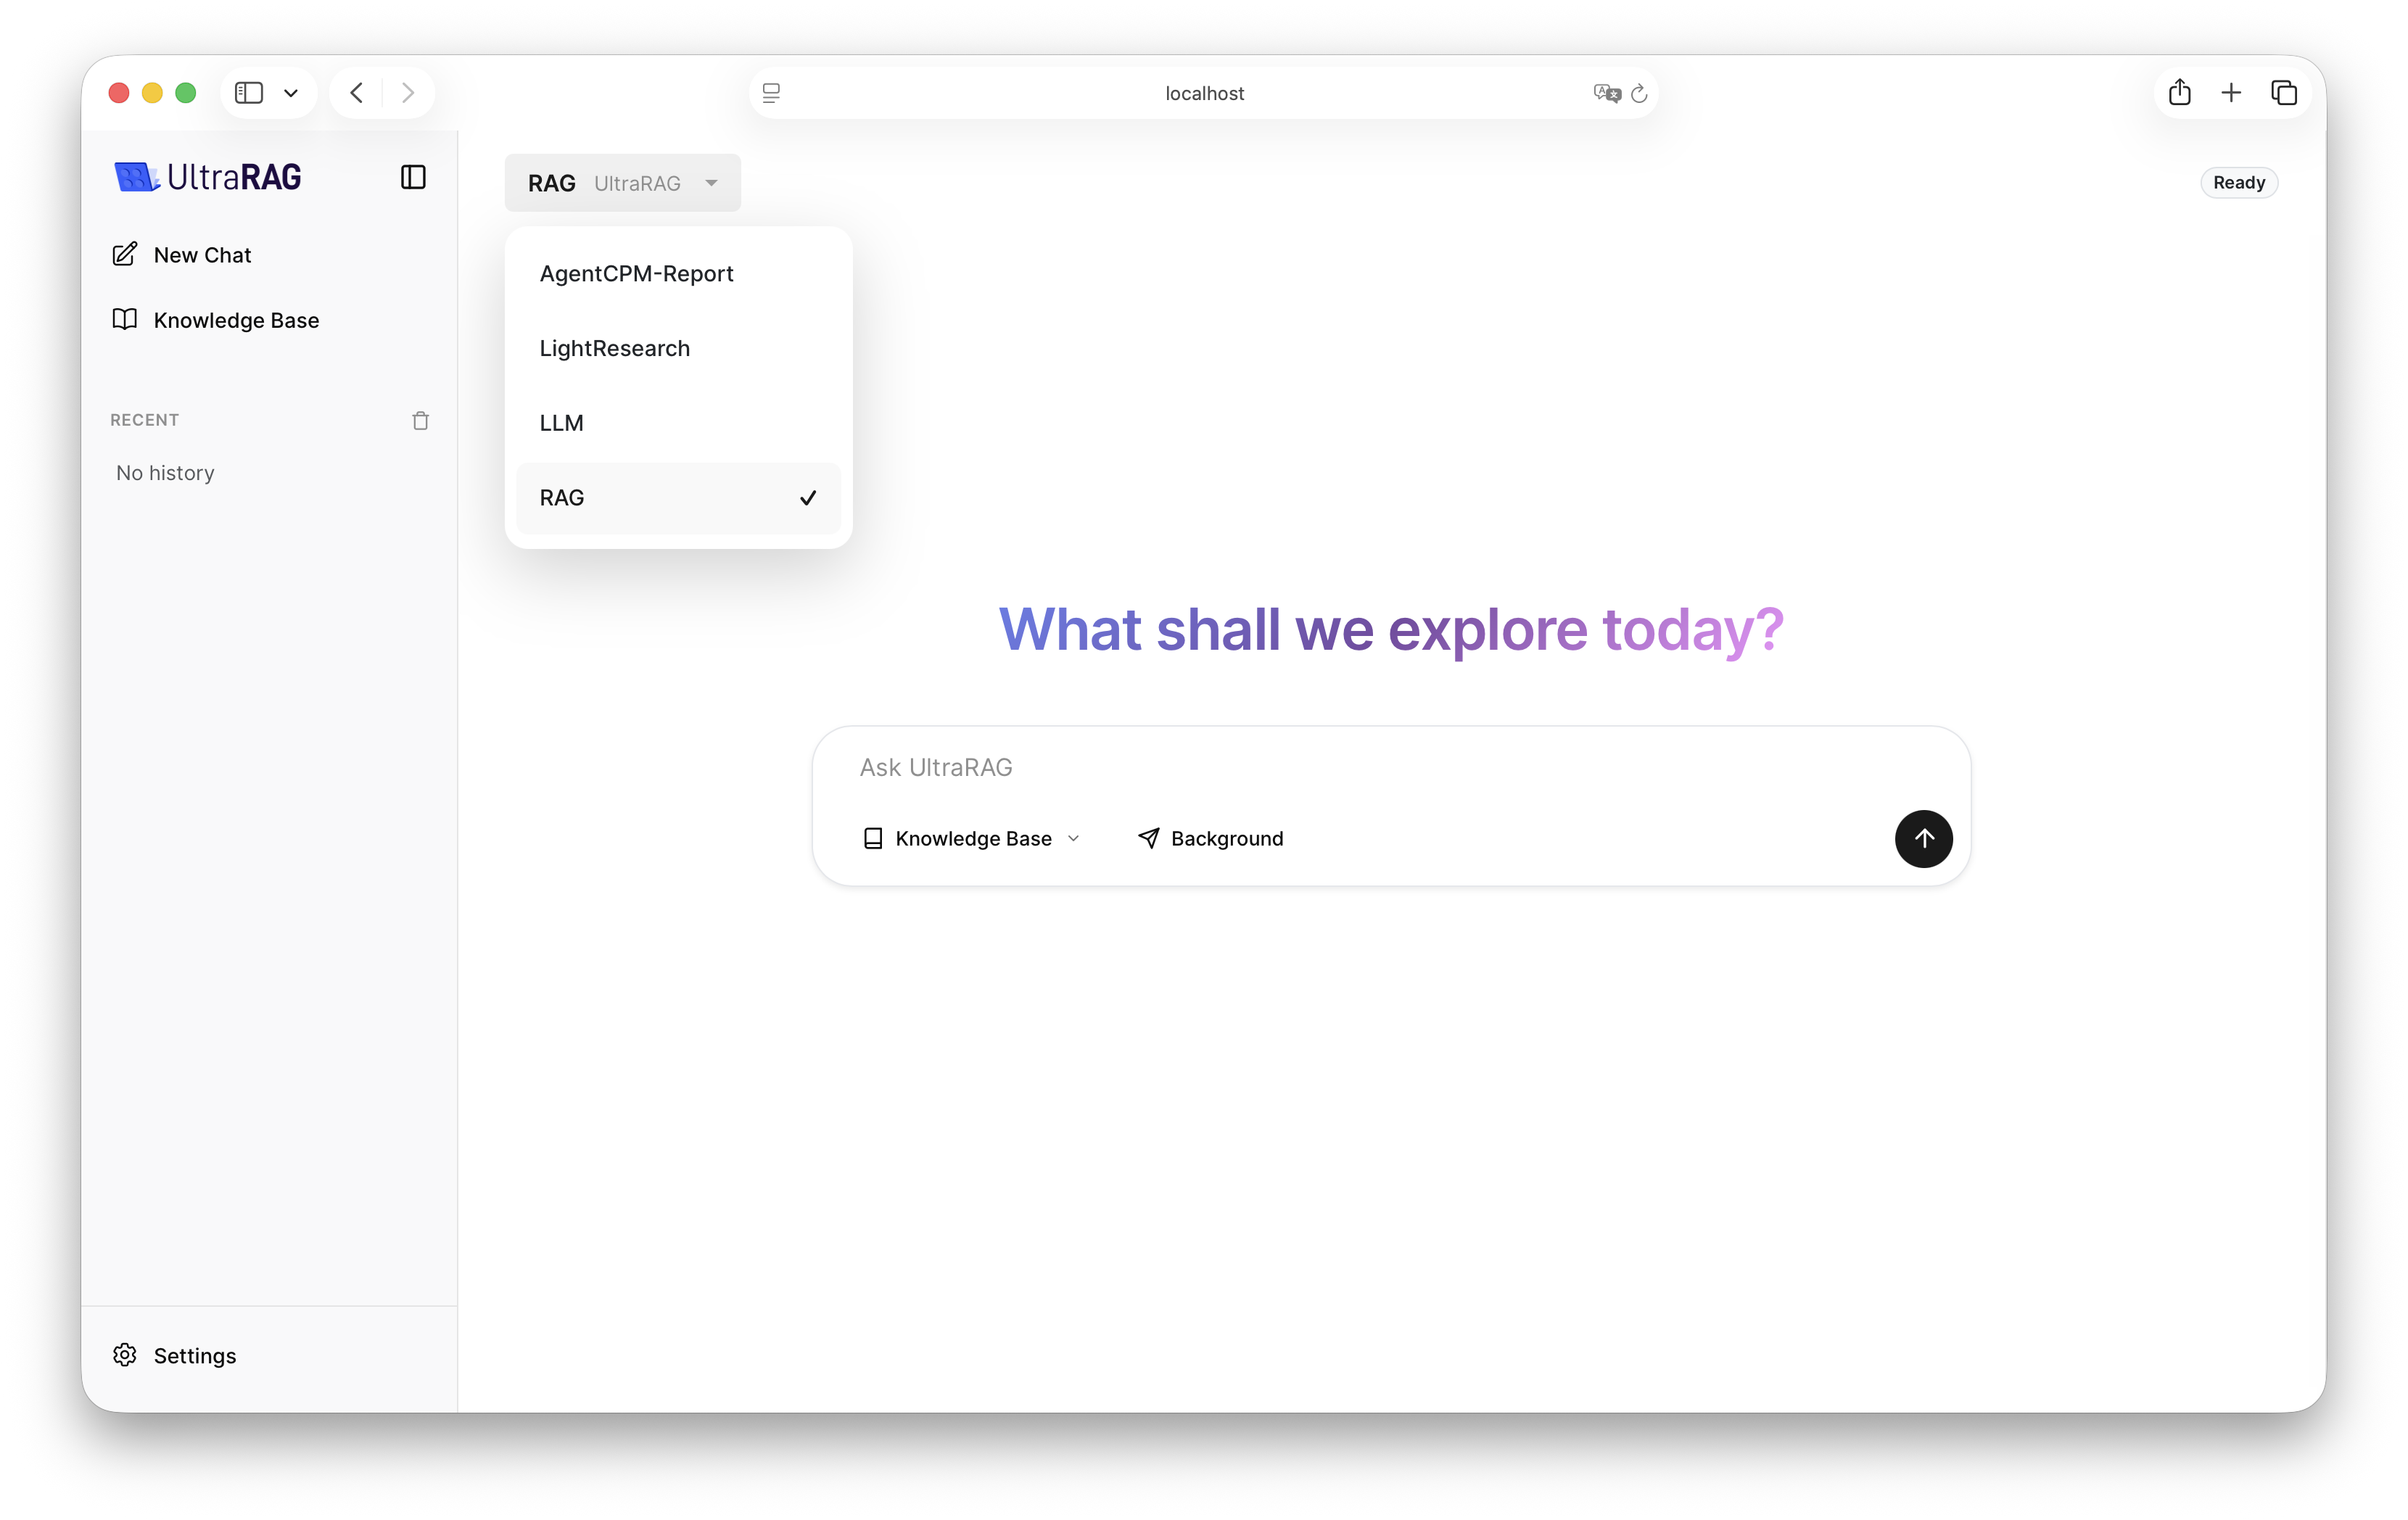
Pipeline Switching
You can quickly switch between Pipelines with configured parameters through the dropdown menu in the upper left corner.
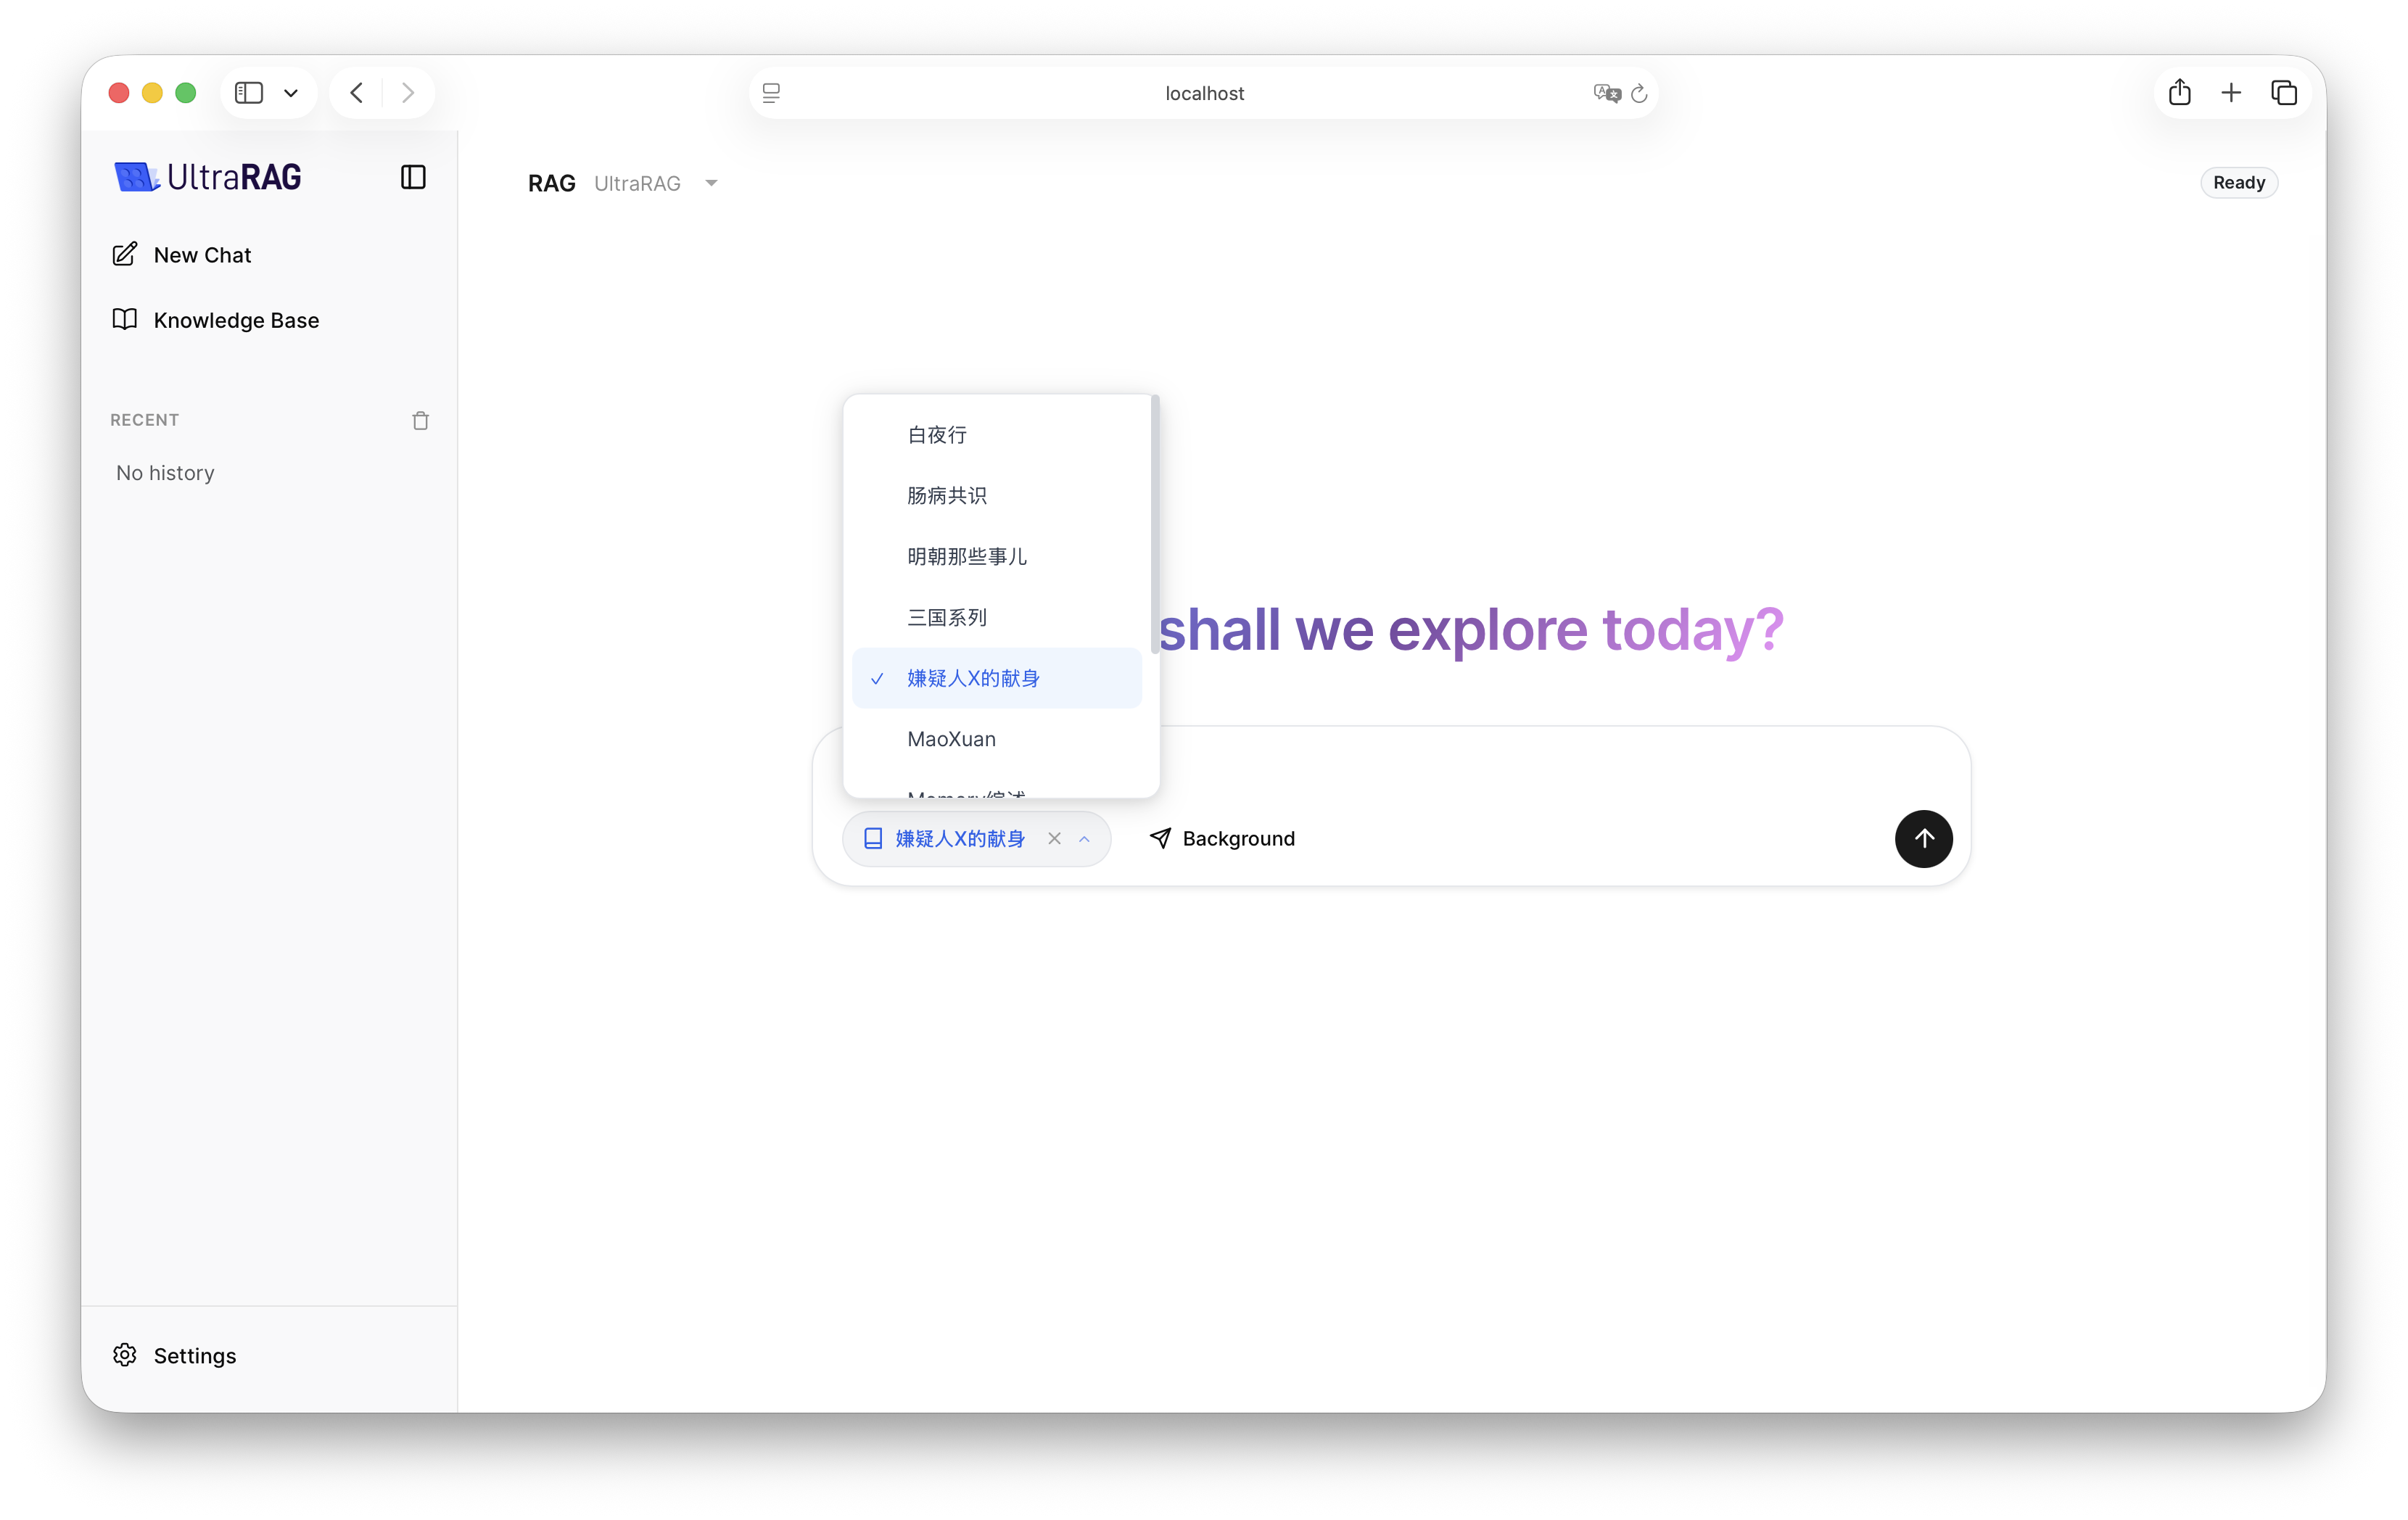
Select Knowledge Base
Click the Knowledge Base icon to mount the constructed knowledge base, and you can perform document-based Q&A.
Background Running
For time-consuming Pipelines such as Deep Research, background running mode is supported. After the task execution is completed, the results will be automatically loaded into the current chat window.
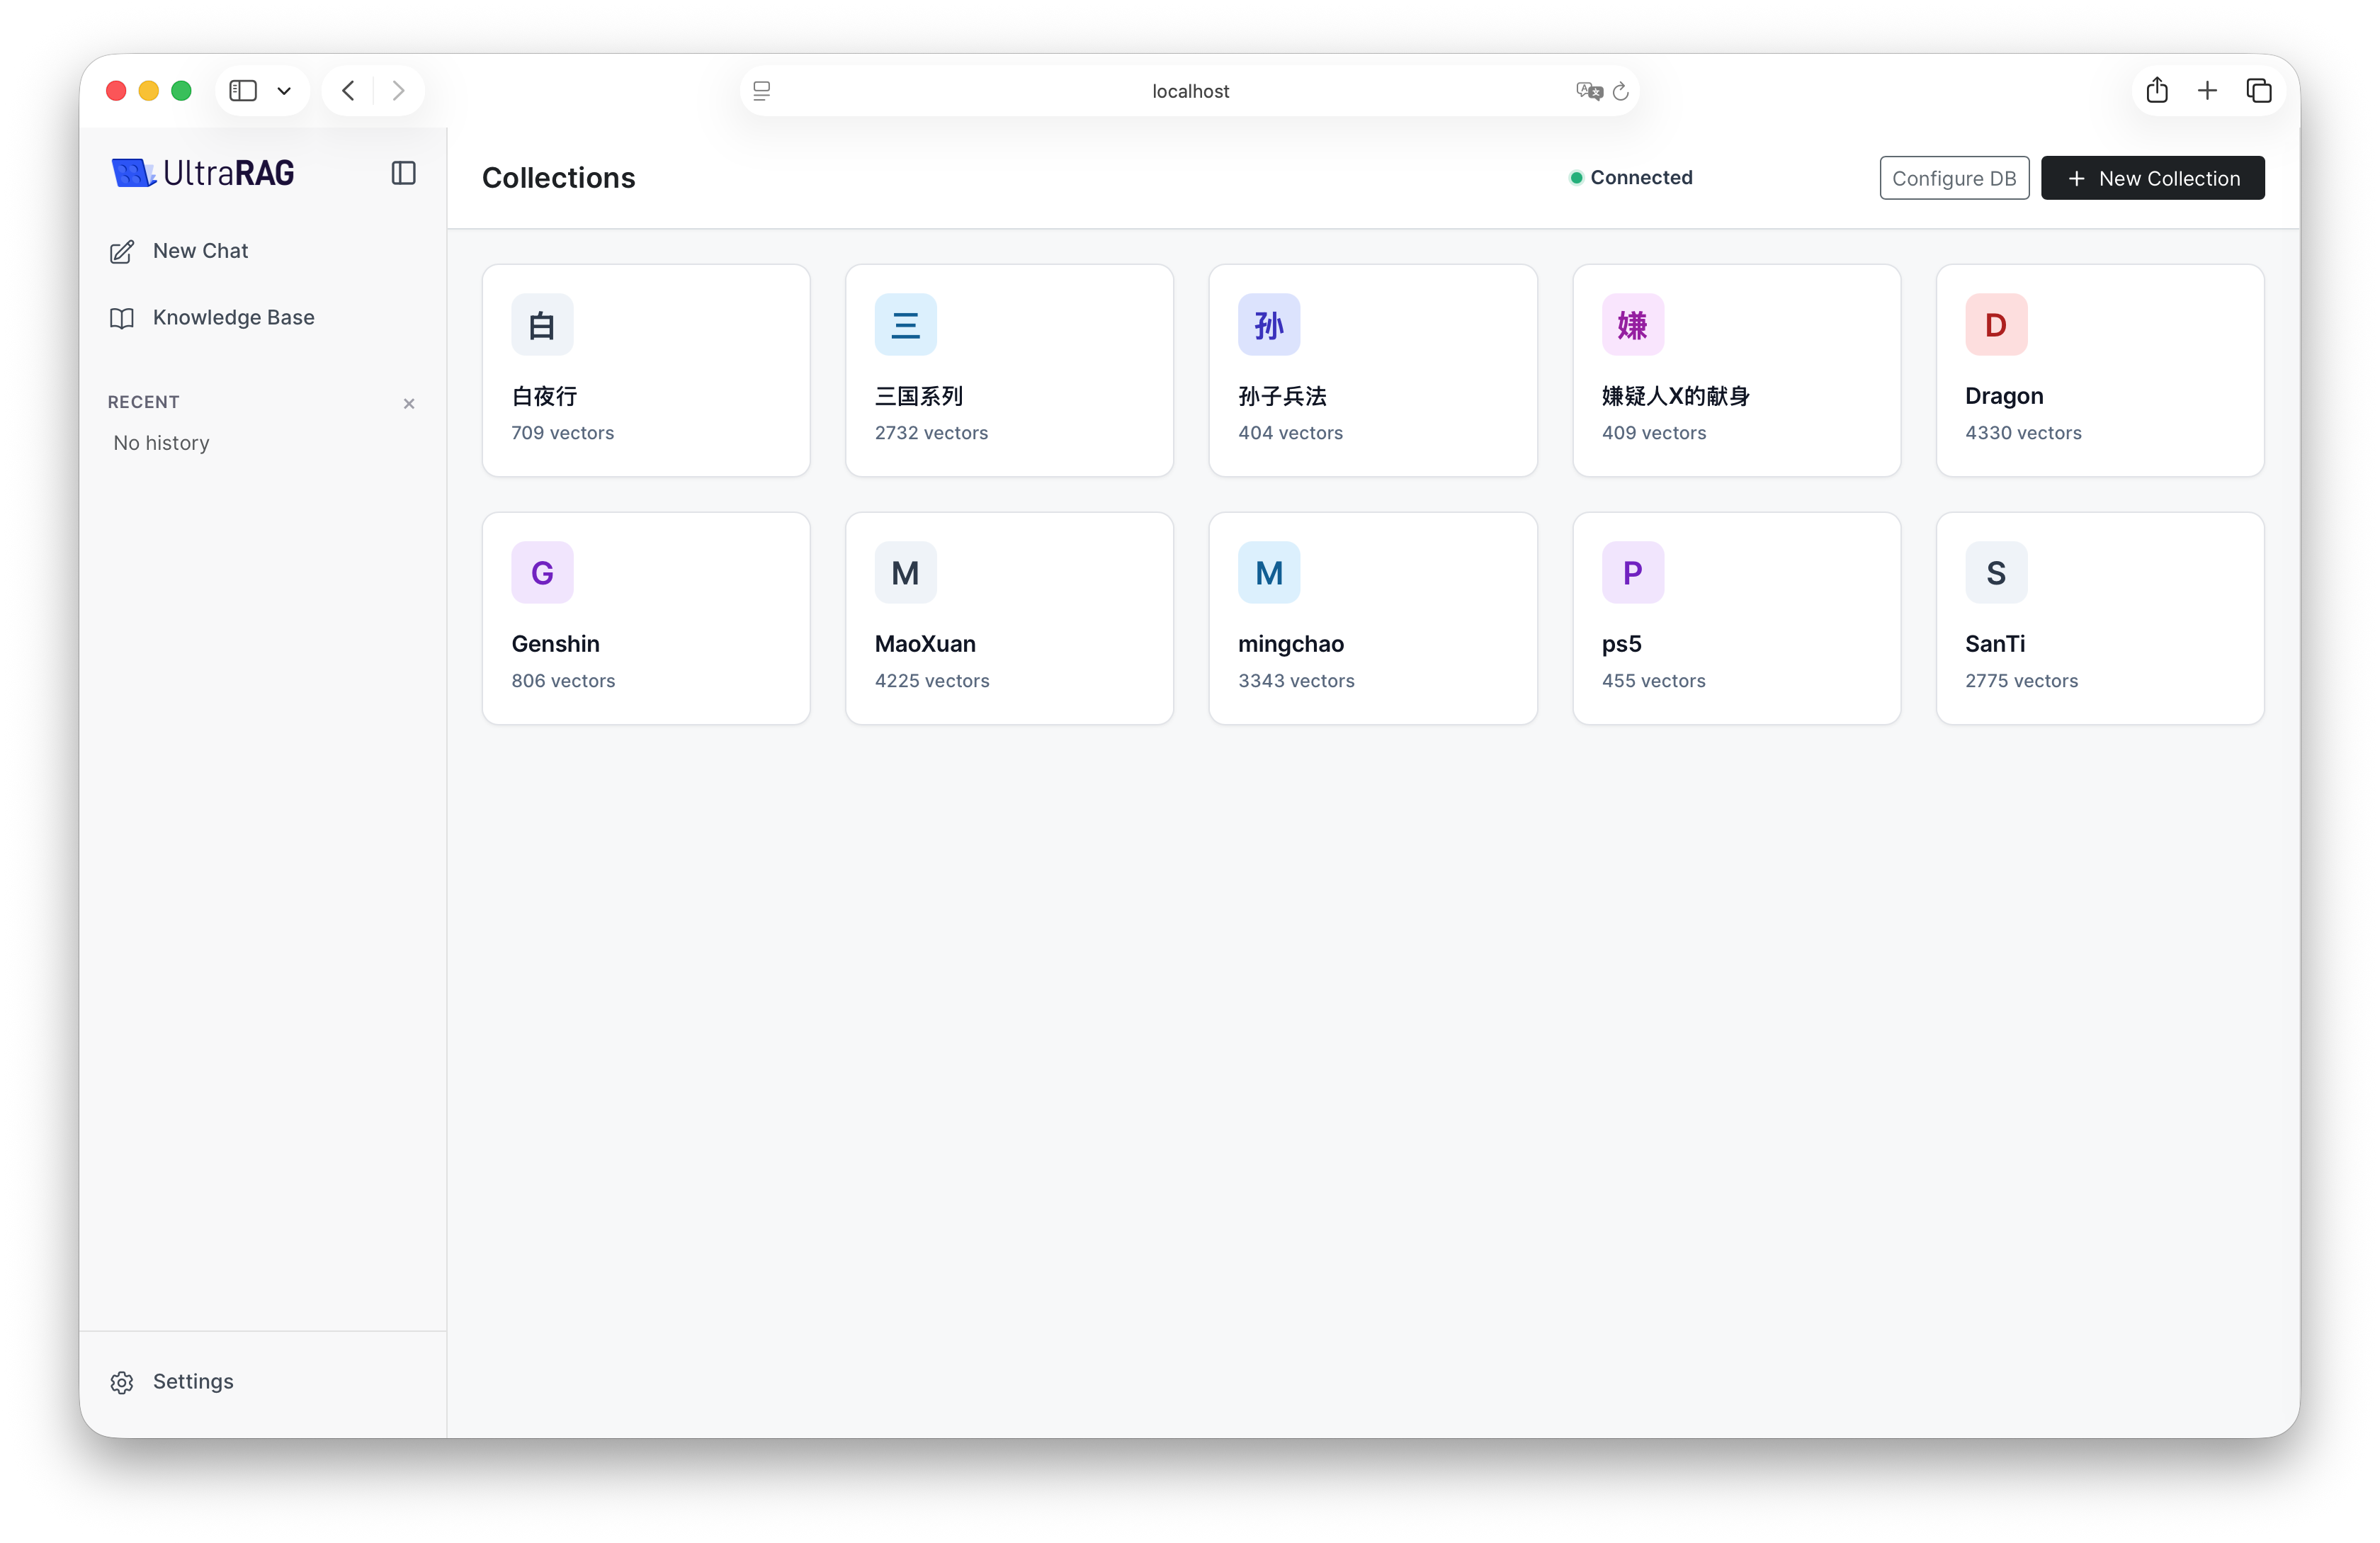
2. Knowledge Base
UltraRAG UI provides full-process knowledge base management functions, supporting file upload, chunking, and embedding management.
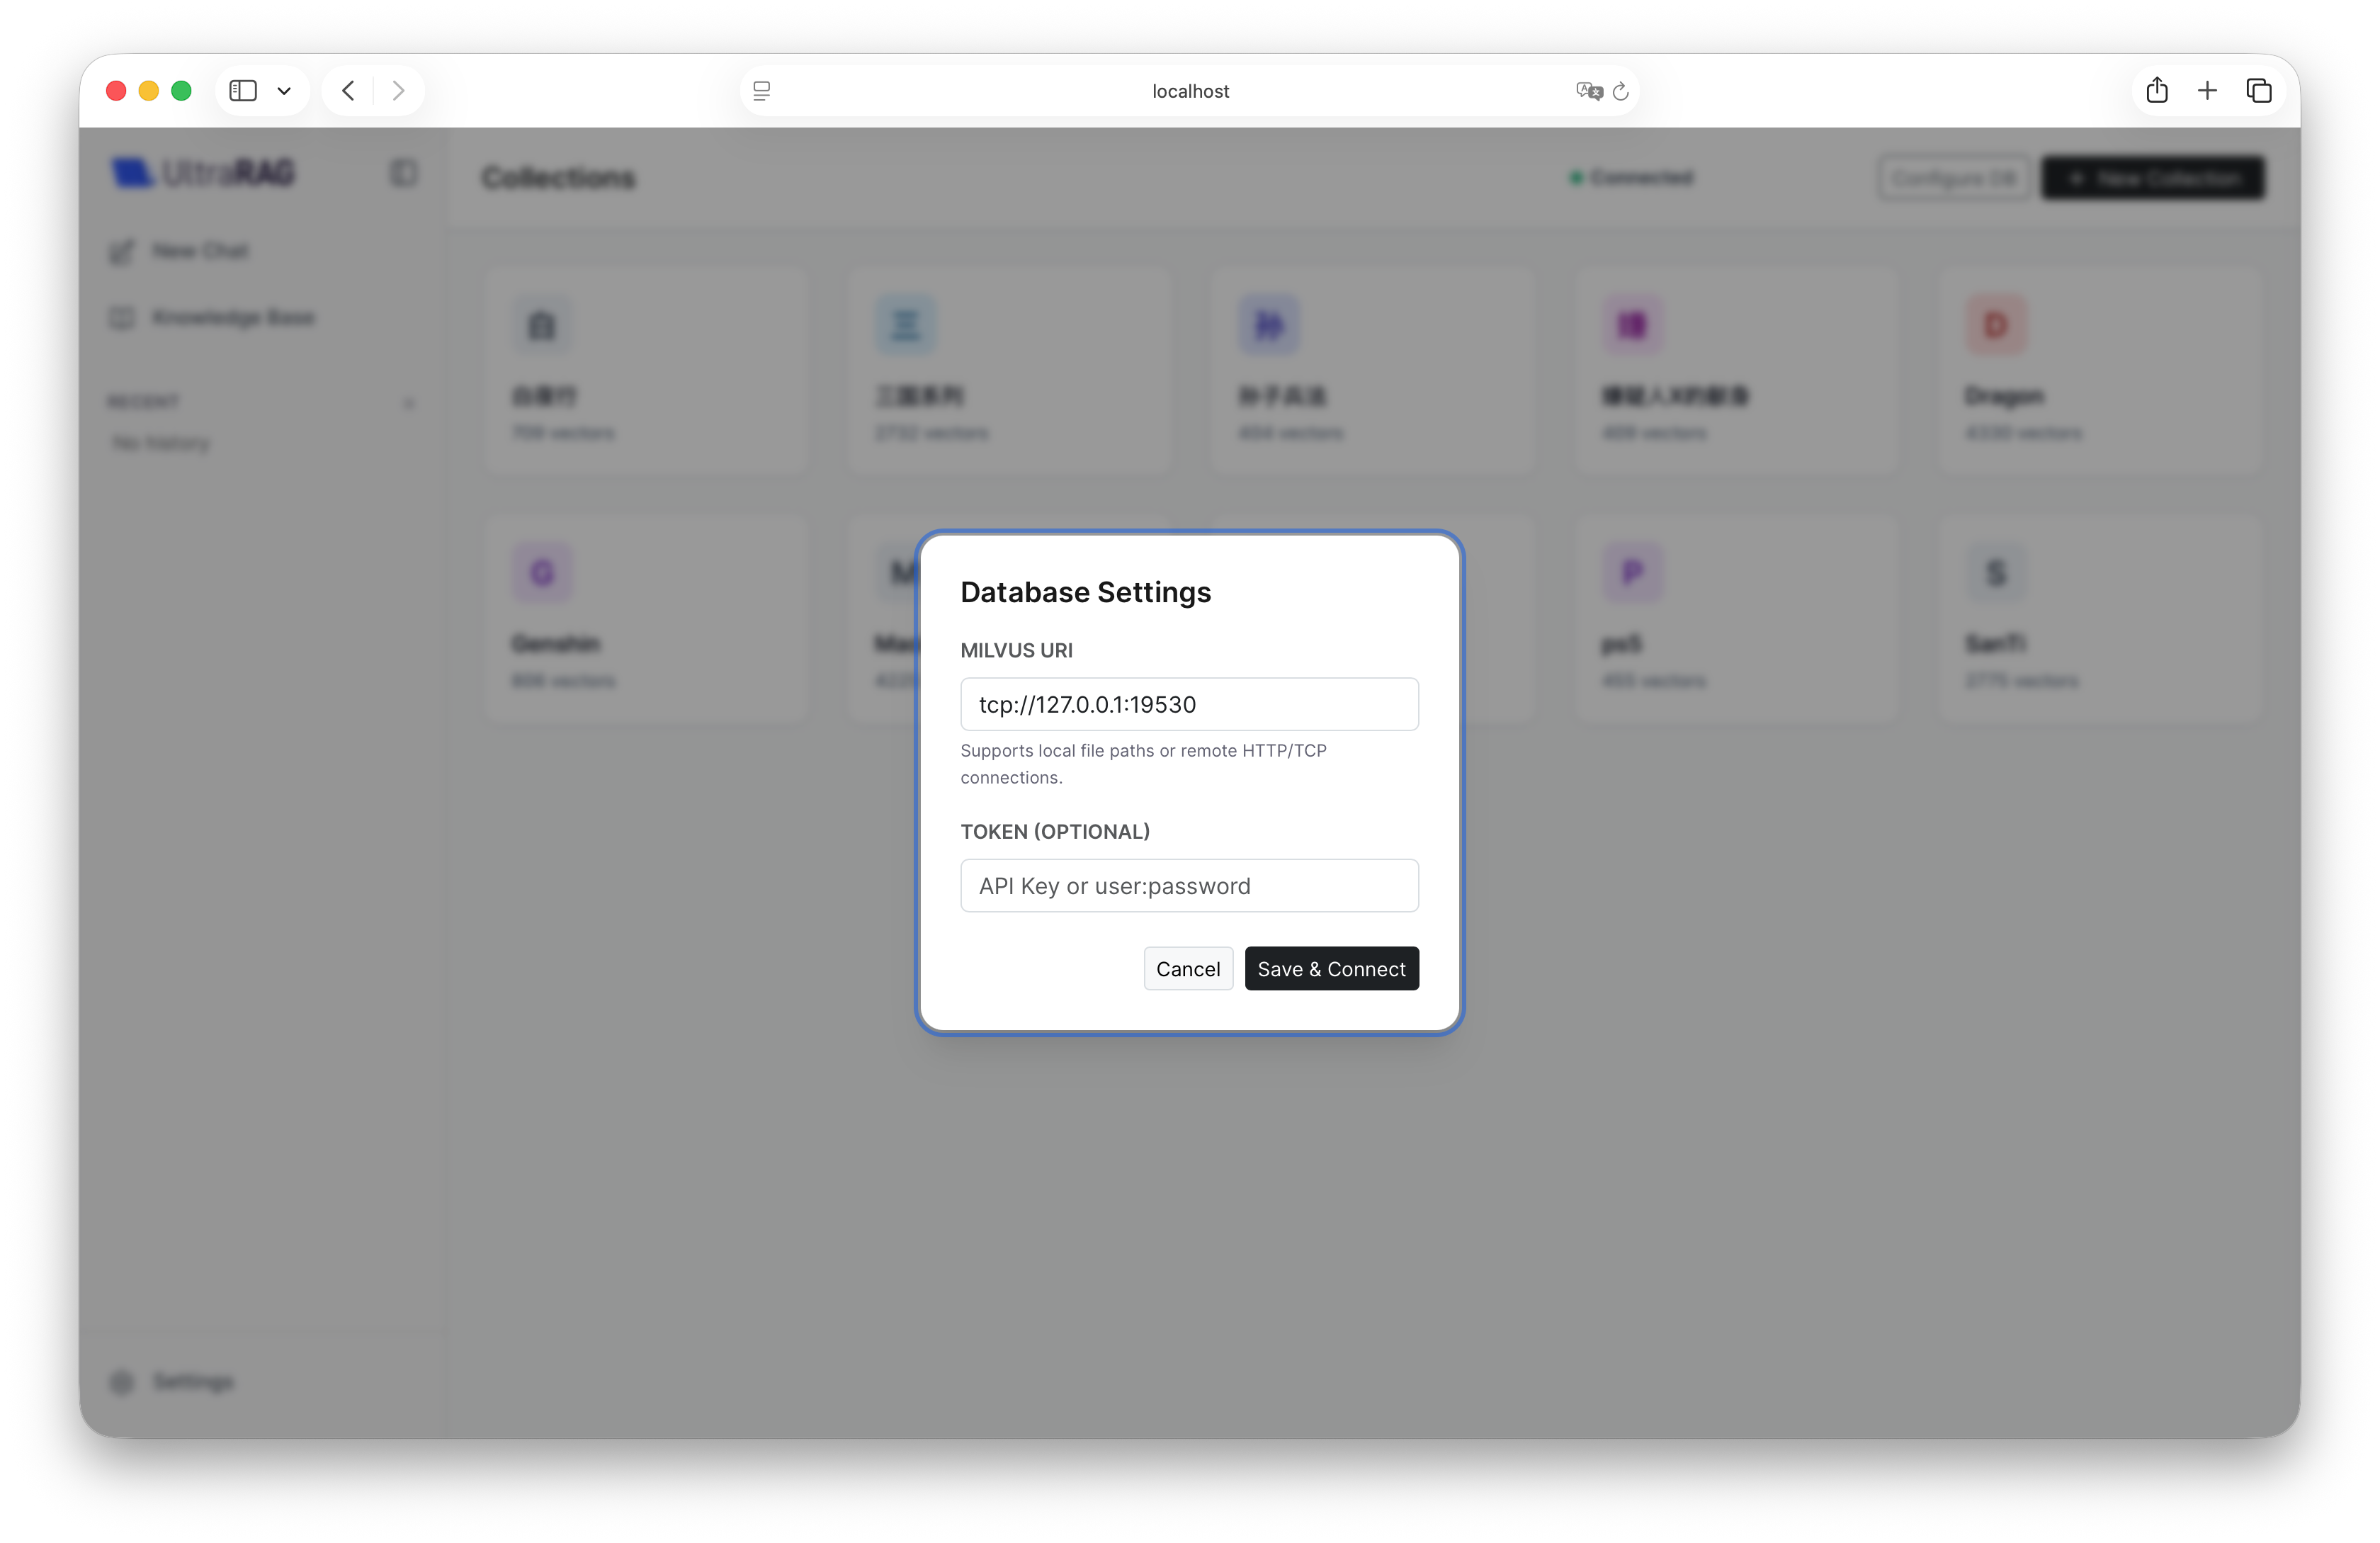
Connect Vector Database
Don’t know how to deploy Milvus vector library? Please refer to
Deployment Guide.
Build Knowledge Base
Click New Collection to upload documents and create an exclusive knowledge base.
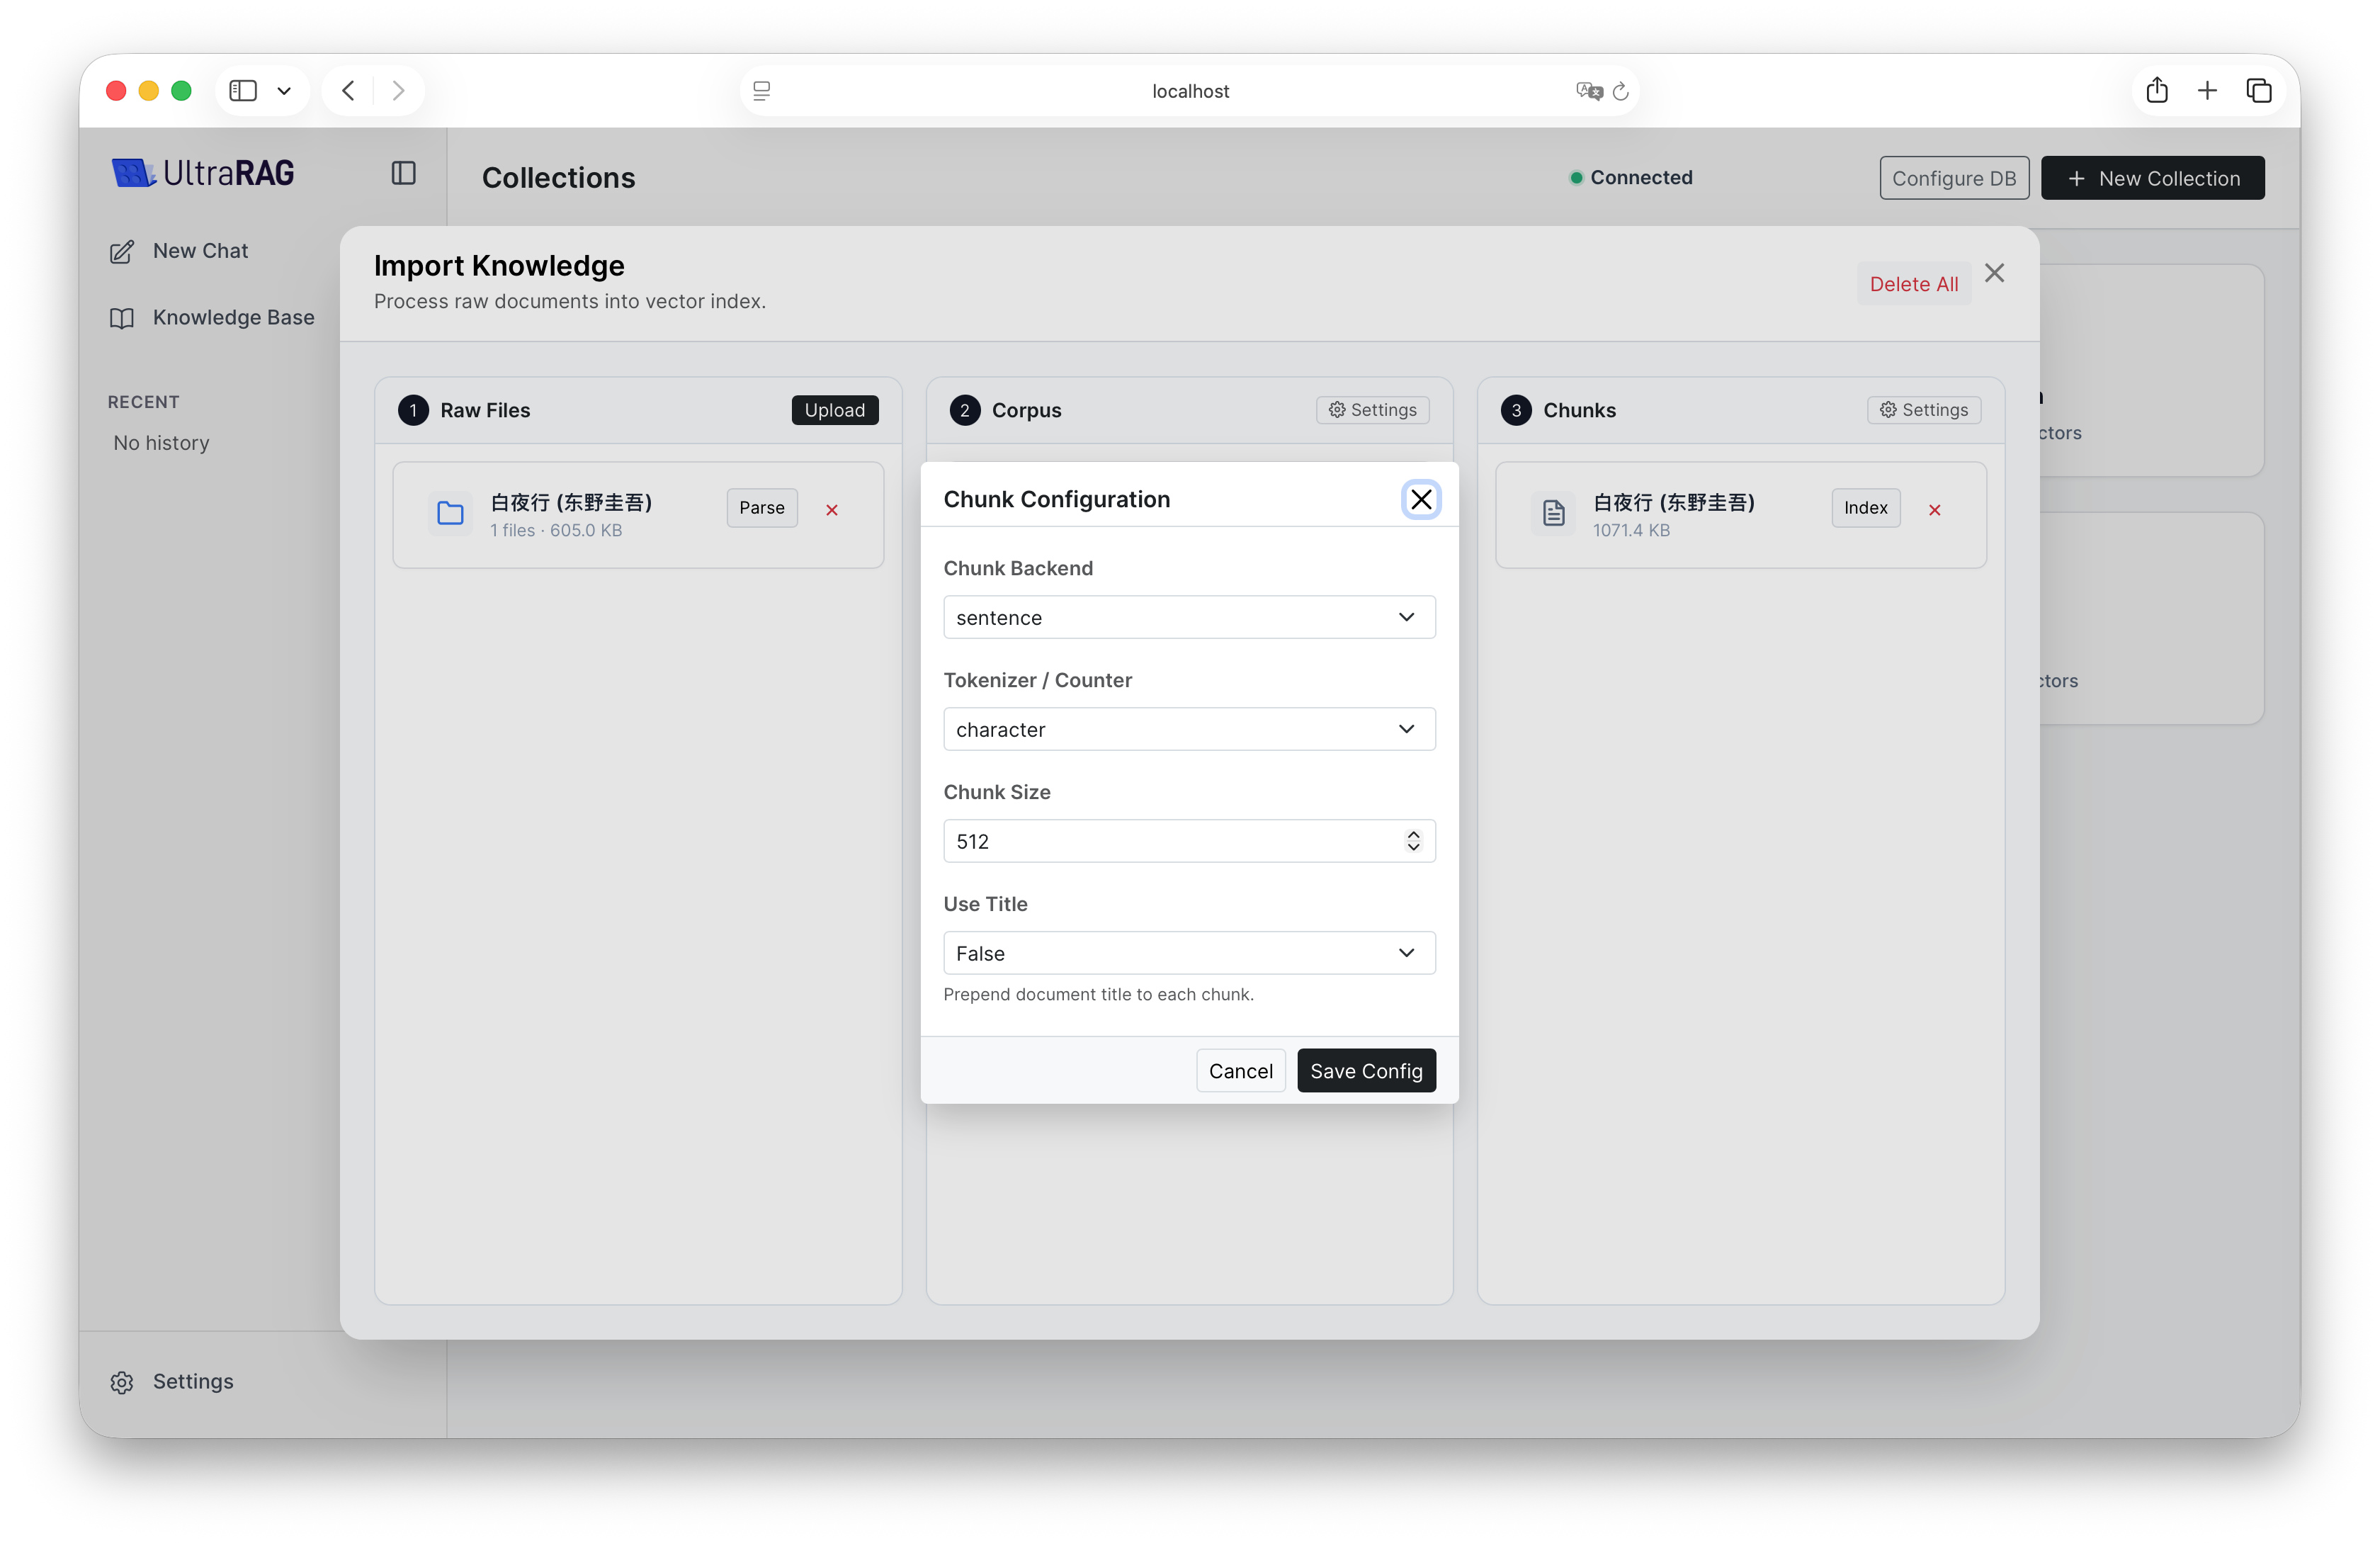
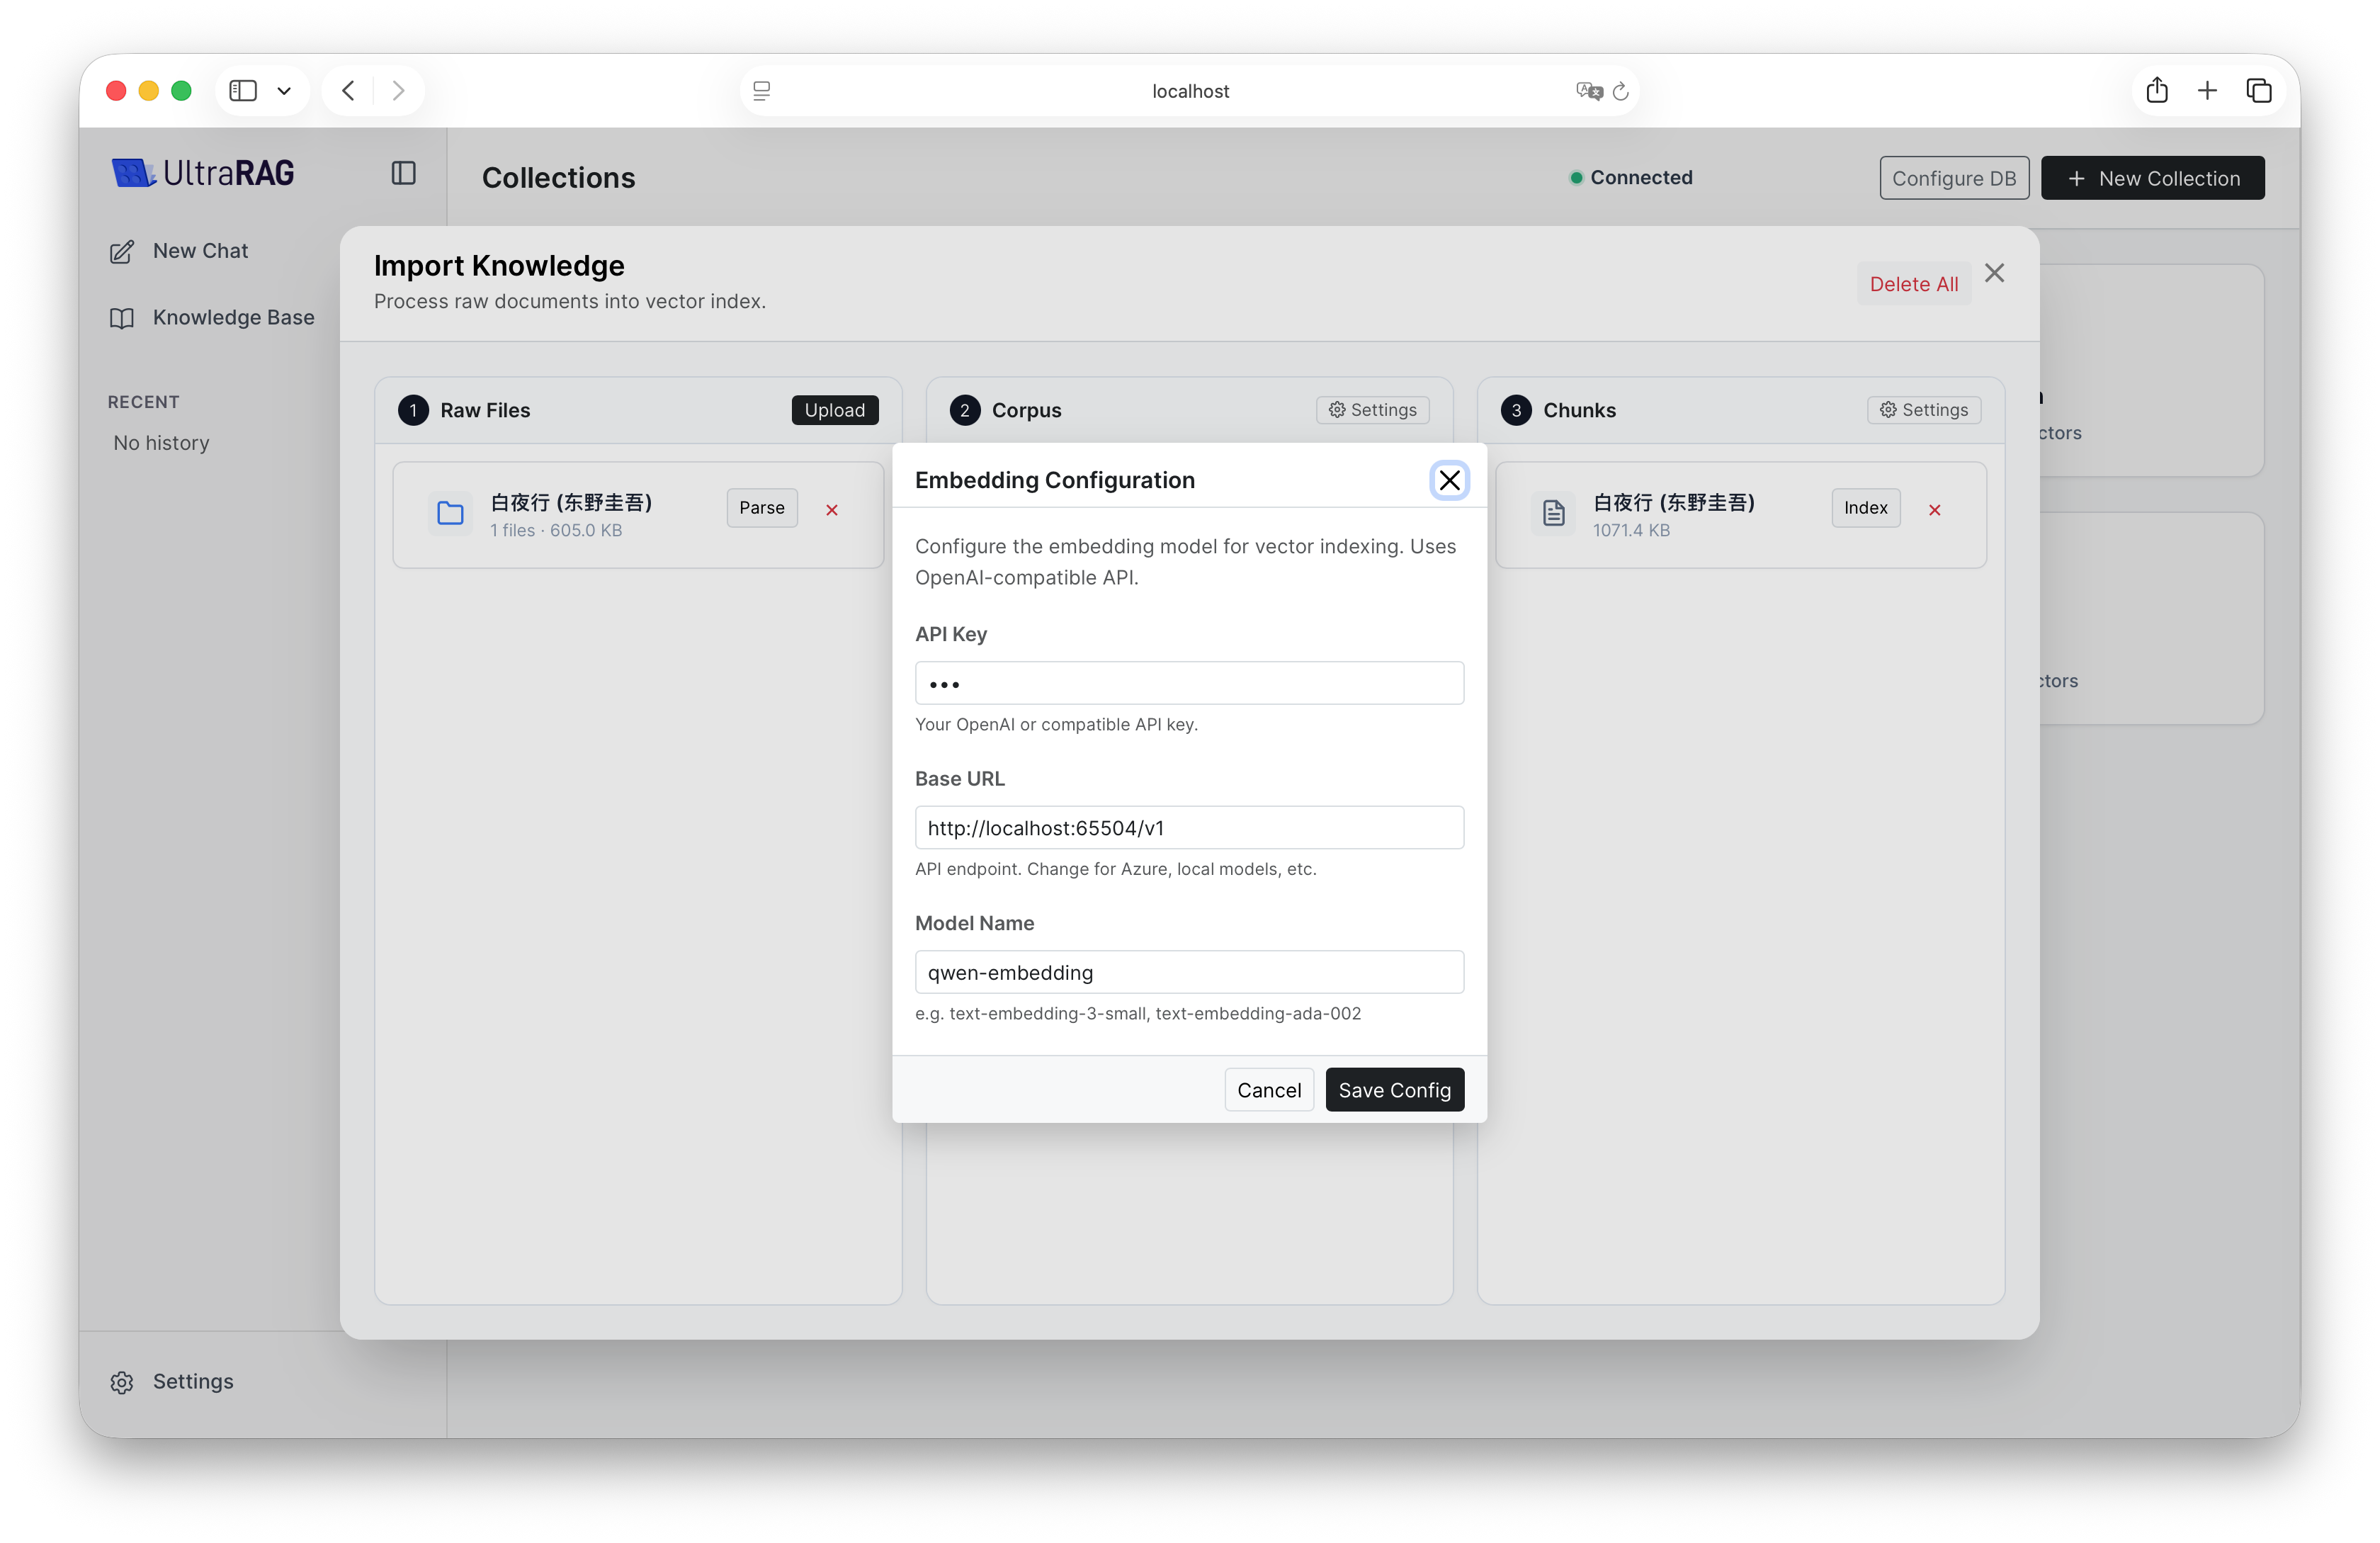
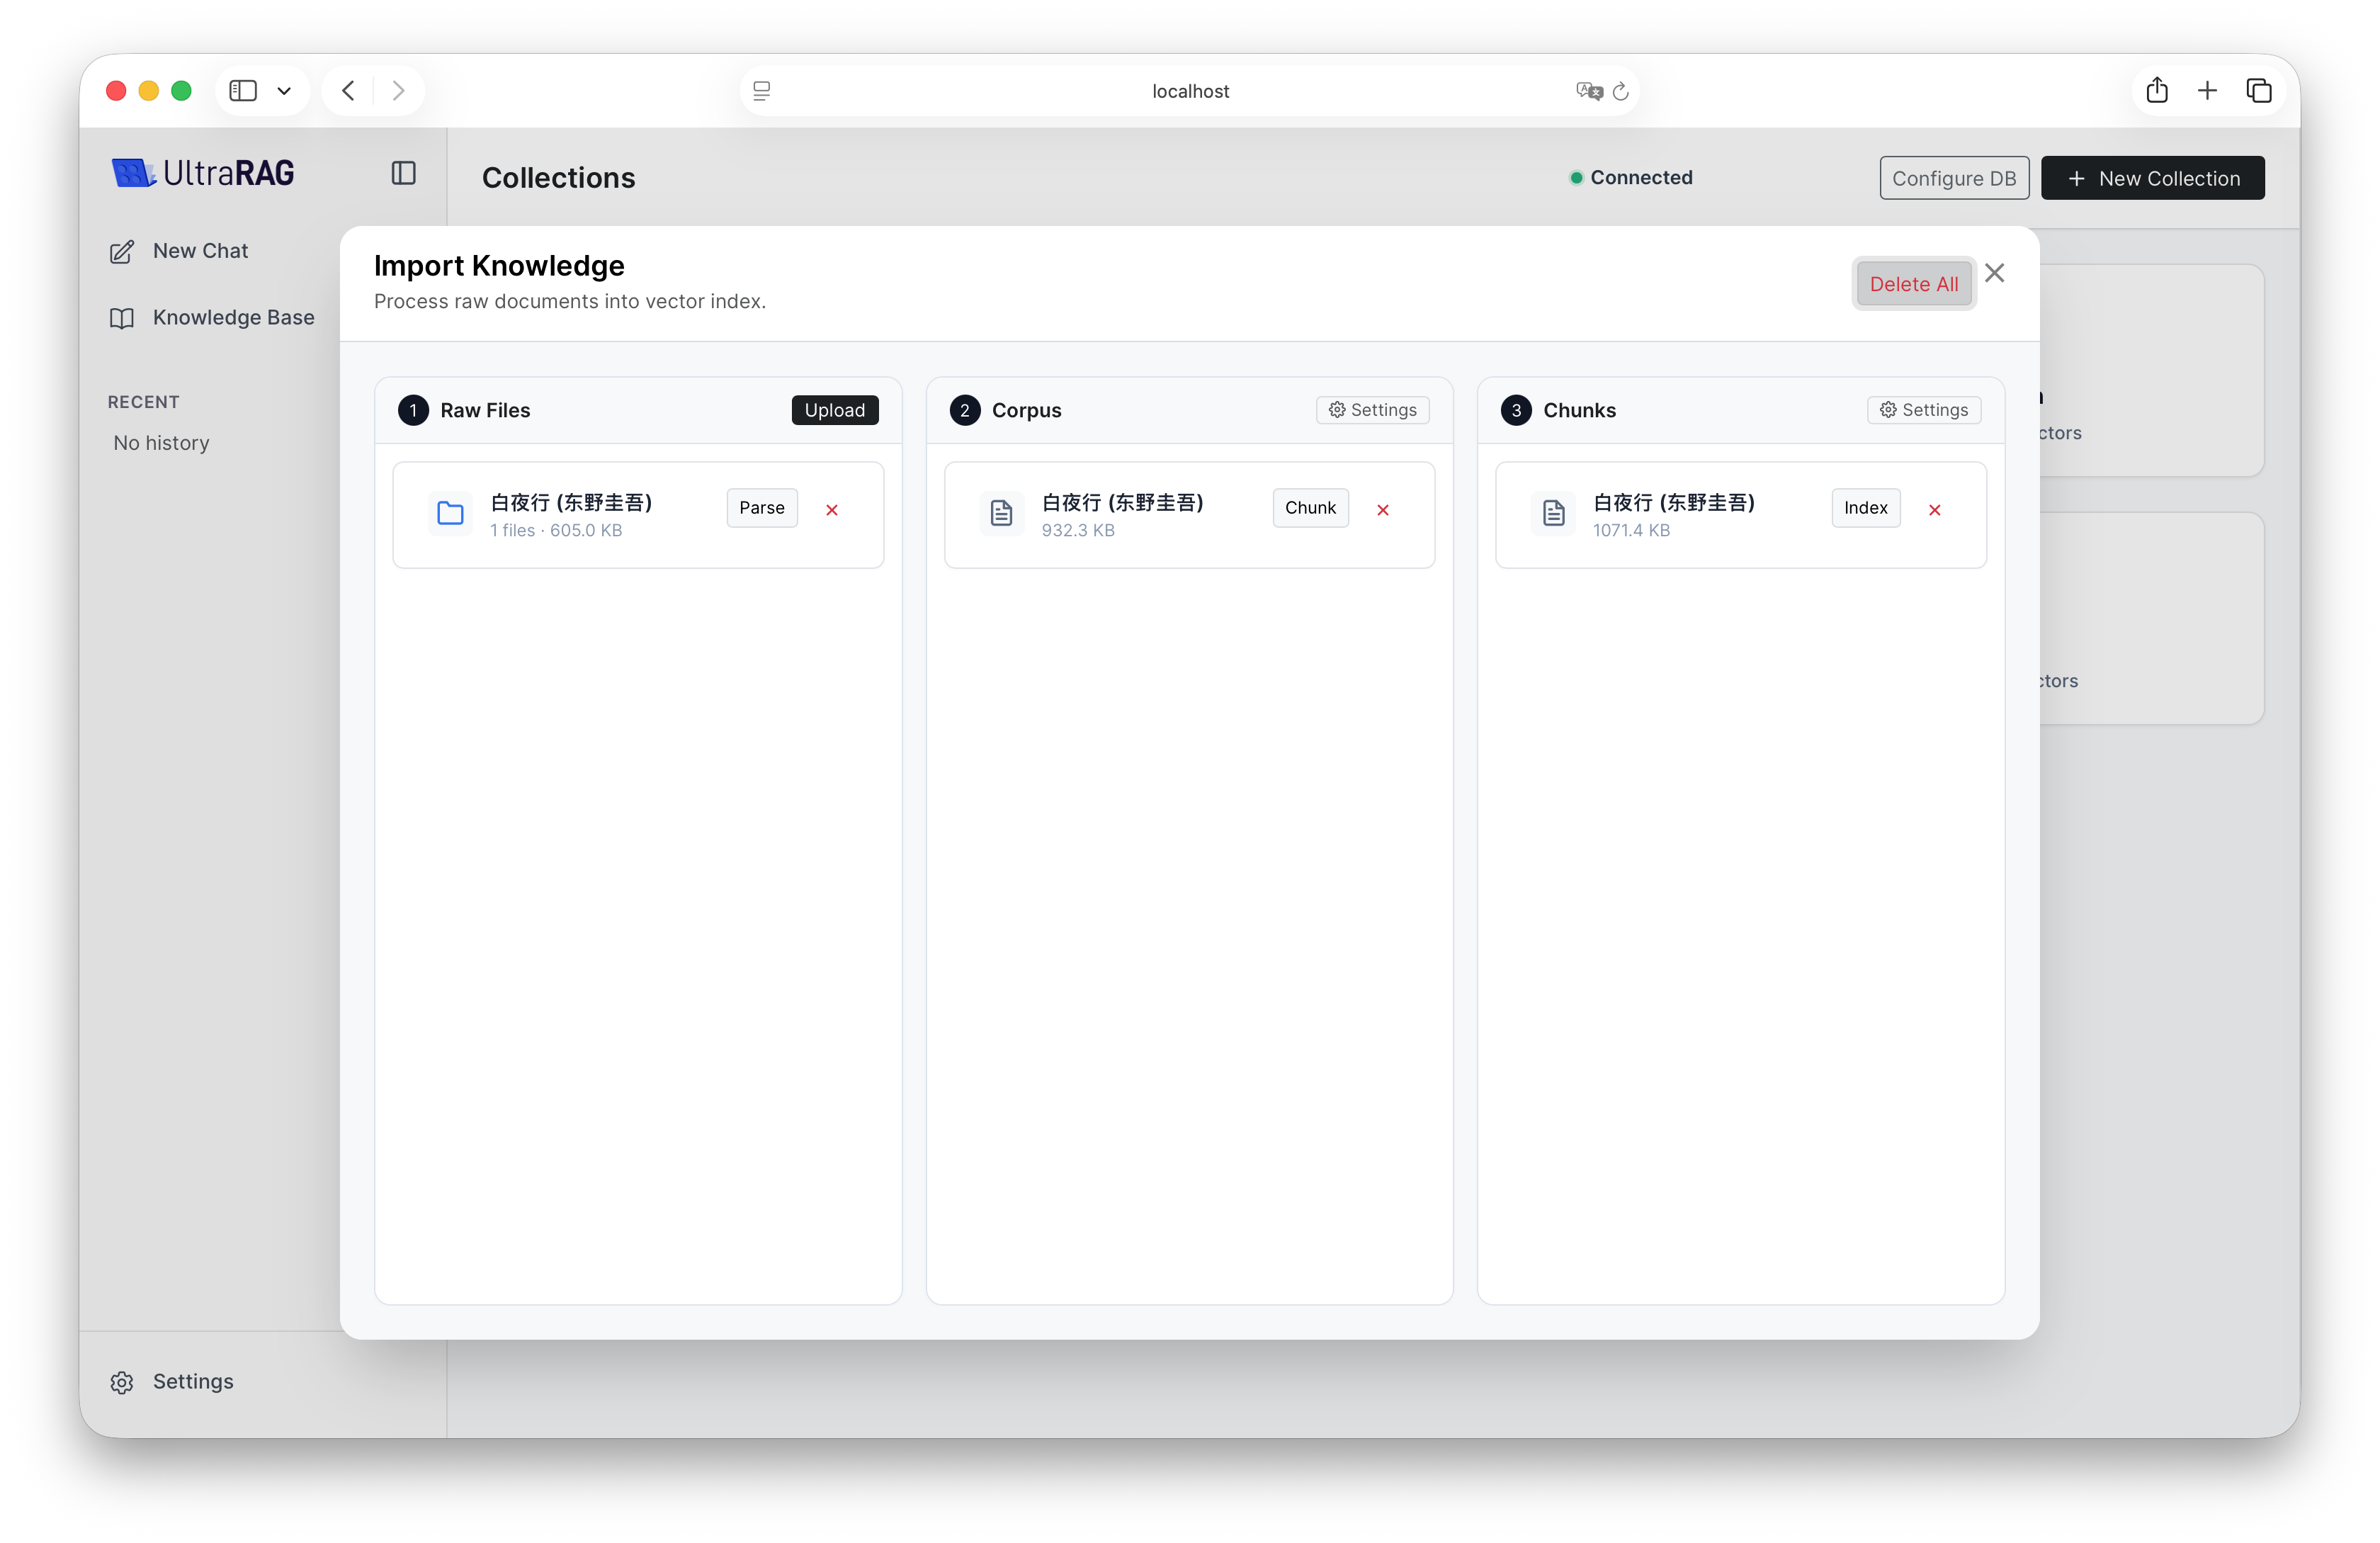 Click the Settings button to customize the slicing strategy (Chunk) and Embedding model parameters.
Configuration is usually required for first-time use. If you want to achieve configuration-free deployment (users do not need to set manually), please modify relevant parameters in examples/parameter/corpus_chunk_parameter.yaml and examples/parameter/milvus_index_parameter.yaml in advance to skip the setting steps below.
3. Pipeline Builder
If the --admin parameter is specified at startup, the sidebar will display the Settings entry. Click to enter the advanced configuration page.
Visual Pipeline Construction
Supports bidirectional real-time synchronization between drag-and-drop orchestration on the left canvas and code editor on the right. You can build intuitively like building blocks, or fine-tune in the code editor.
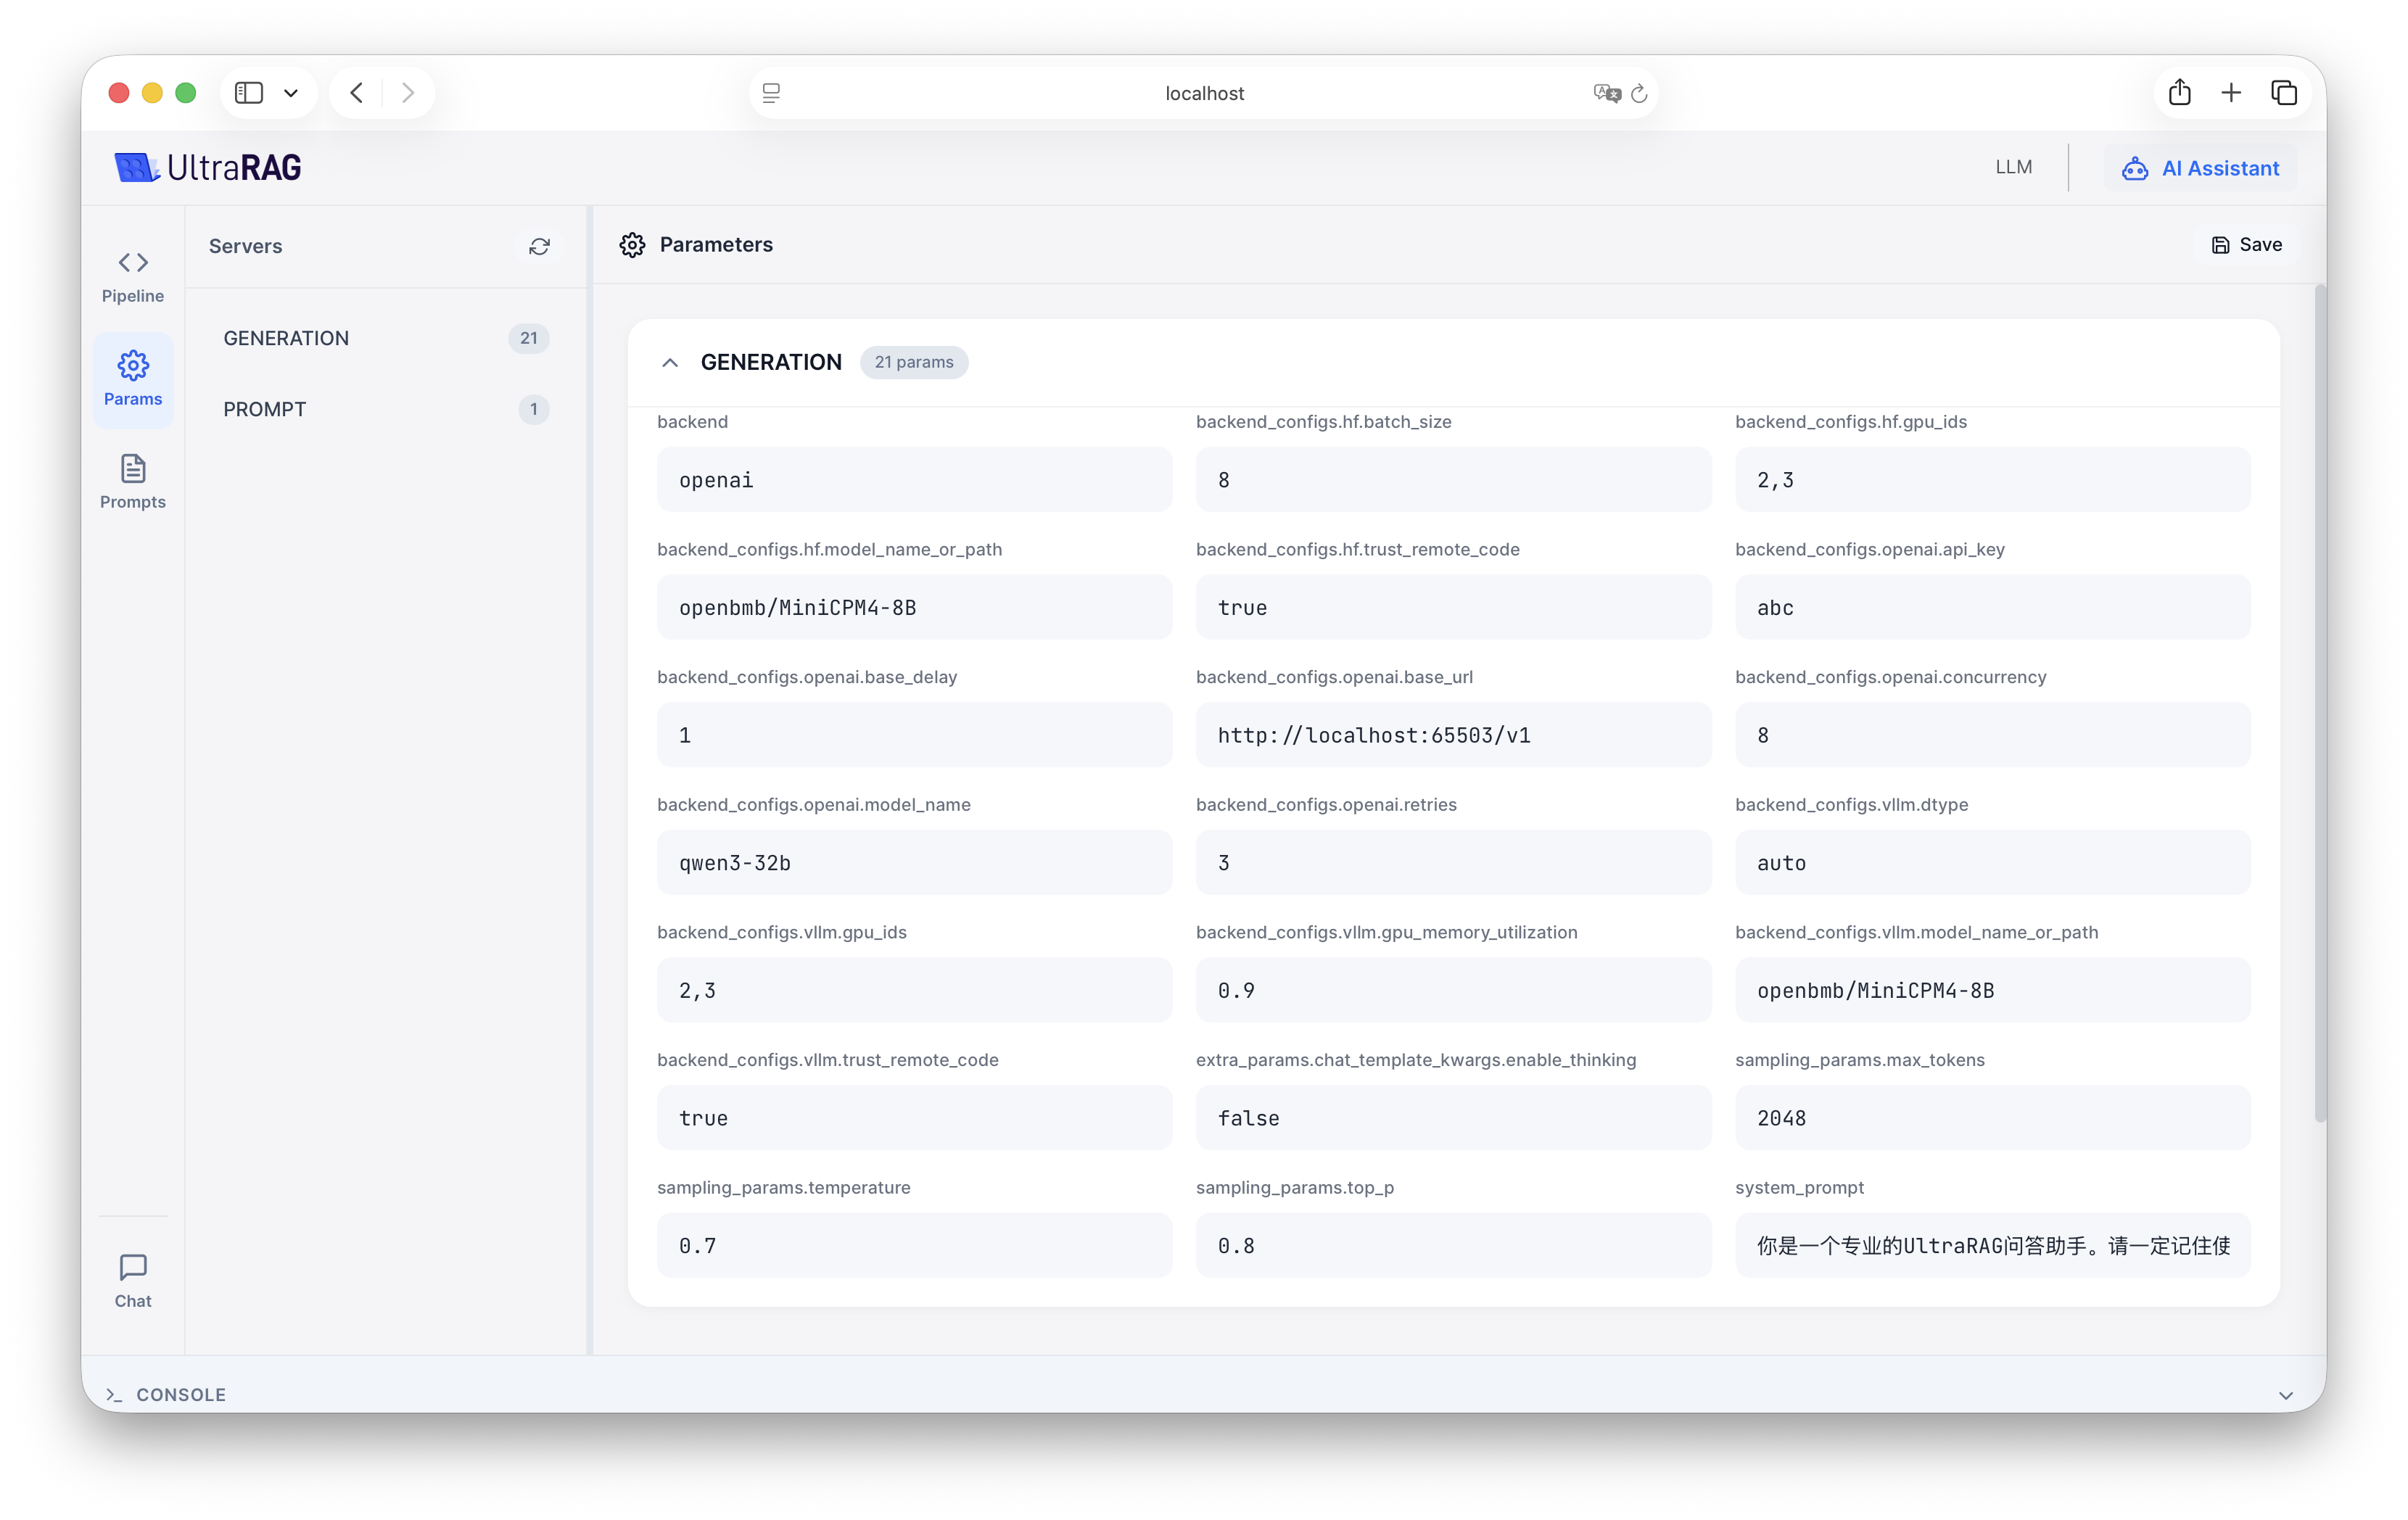
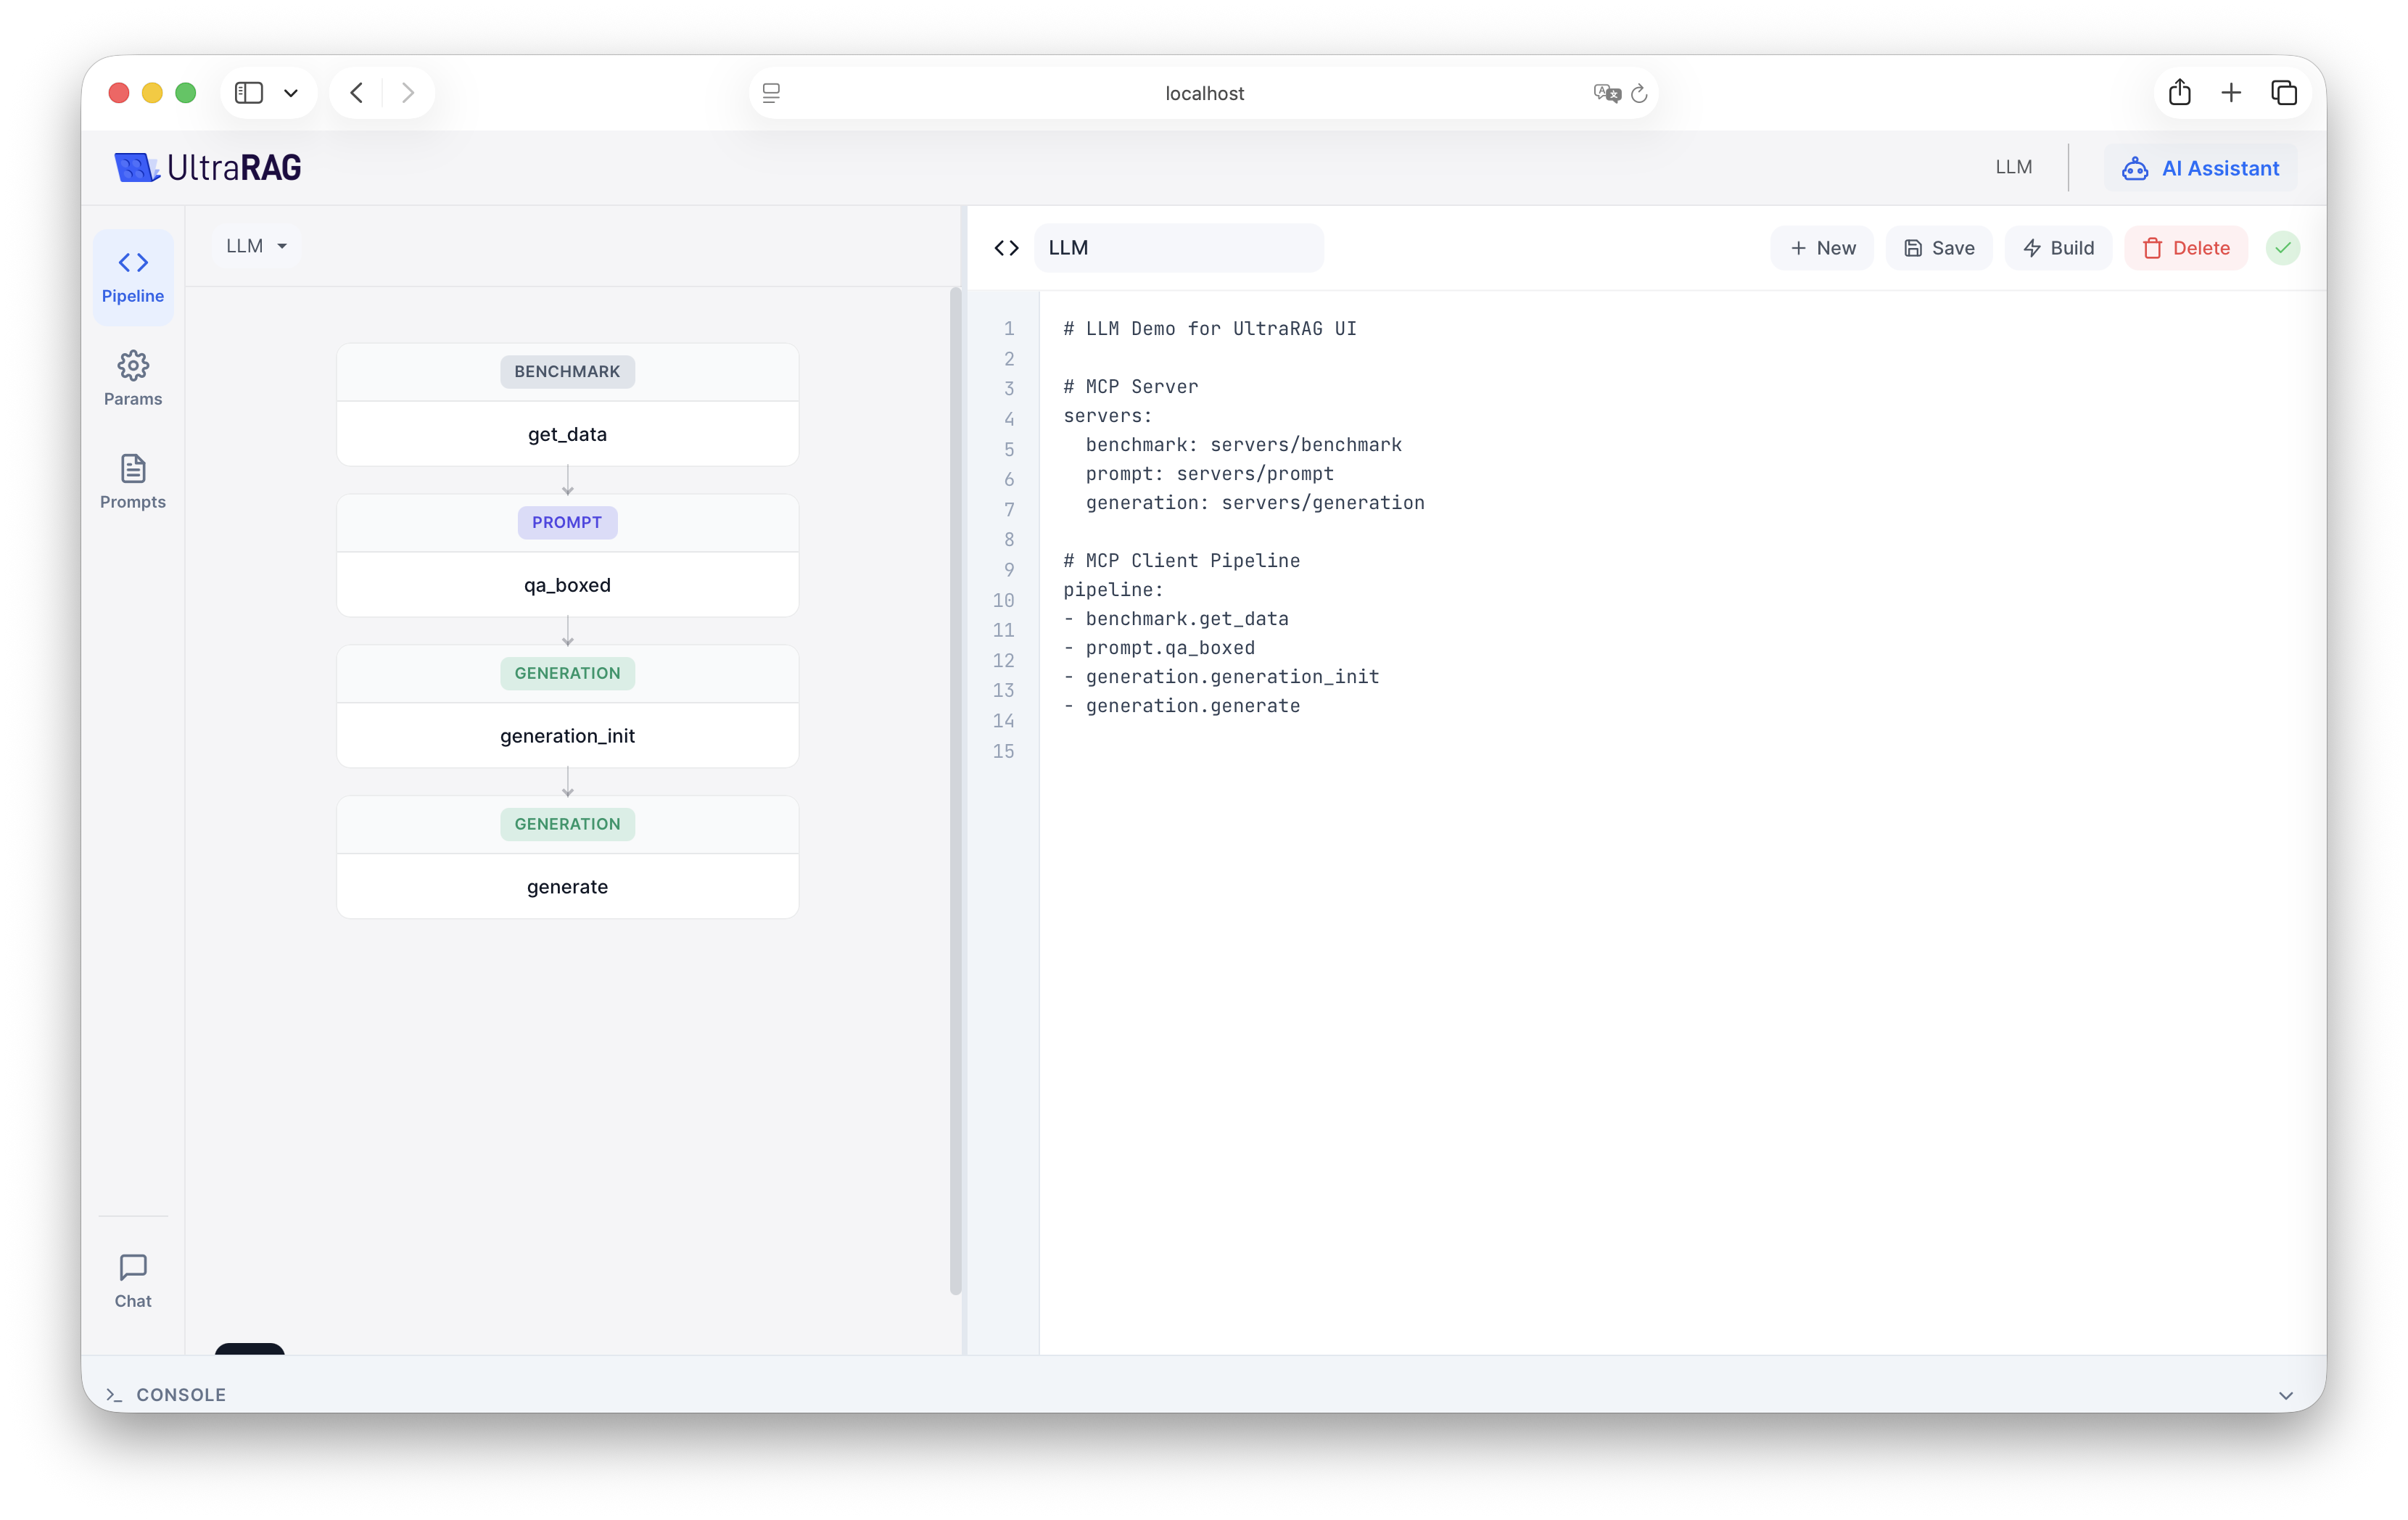 After clicking the Build button to parse the Pipeline, you can view and modify running parameters in the parameter panel.
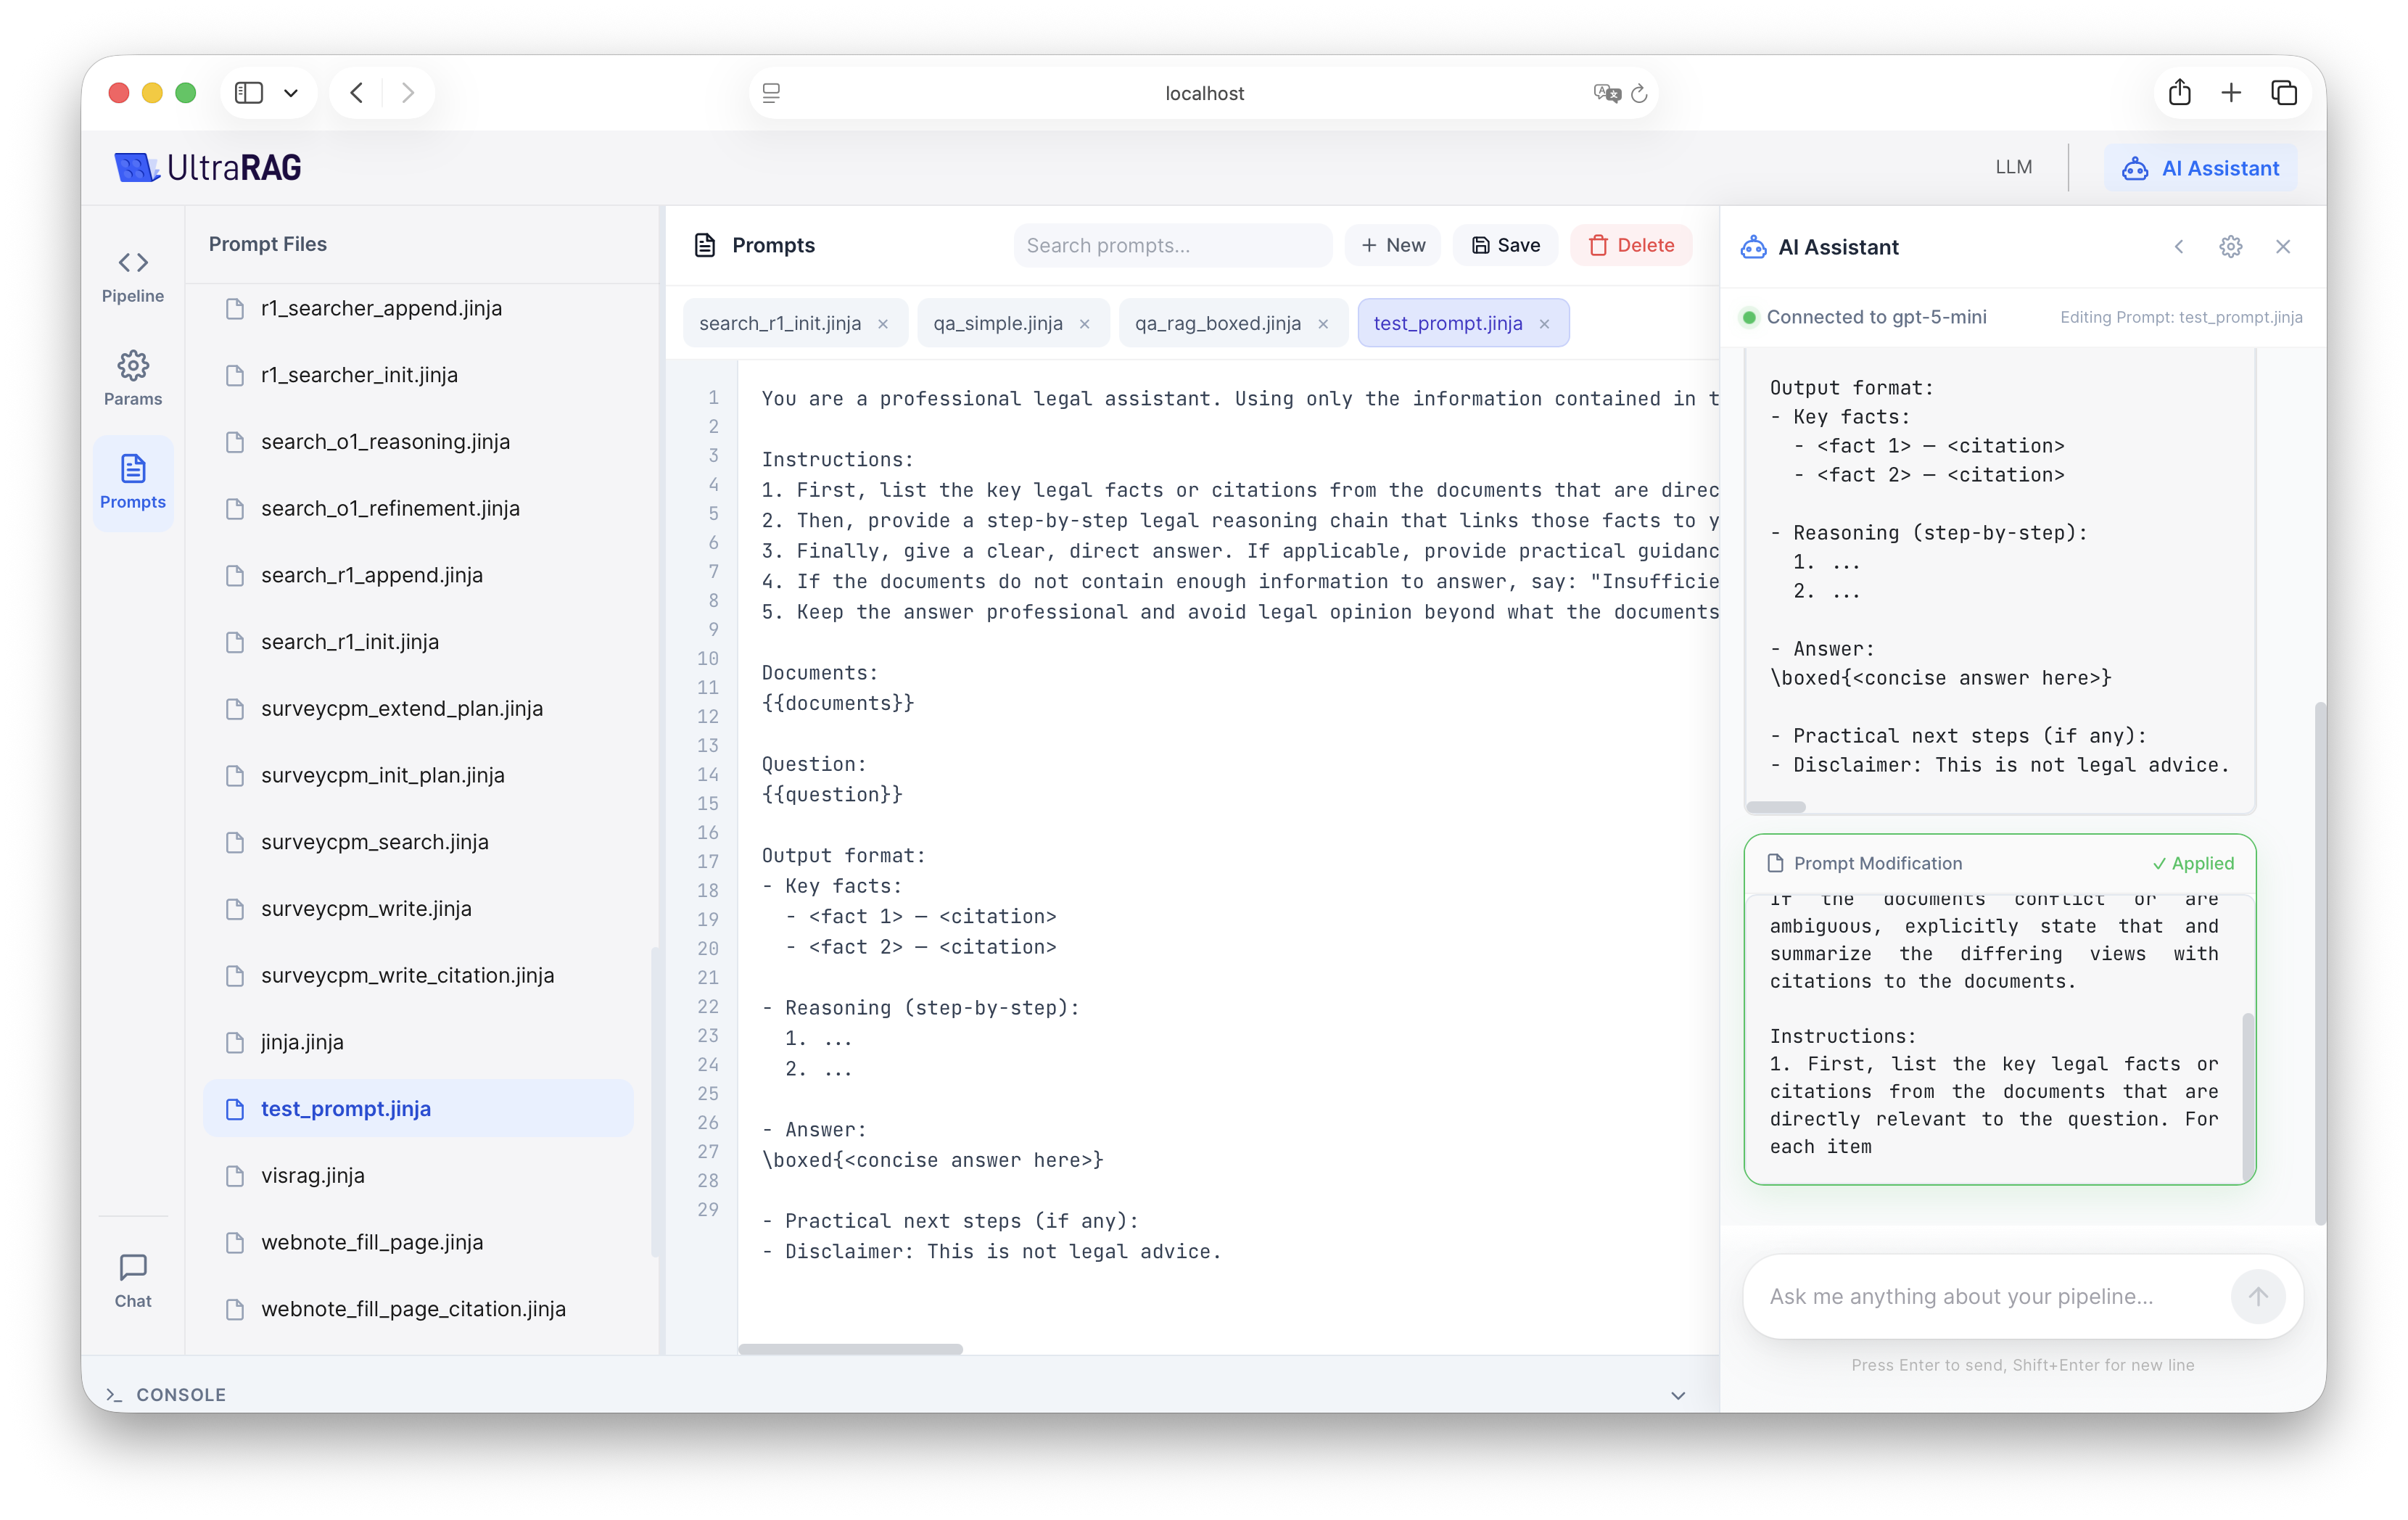
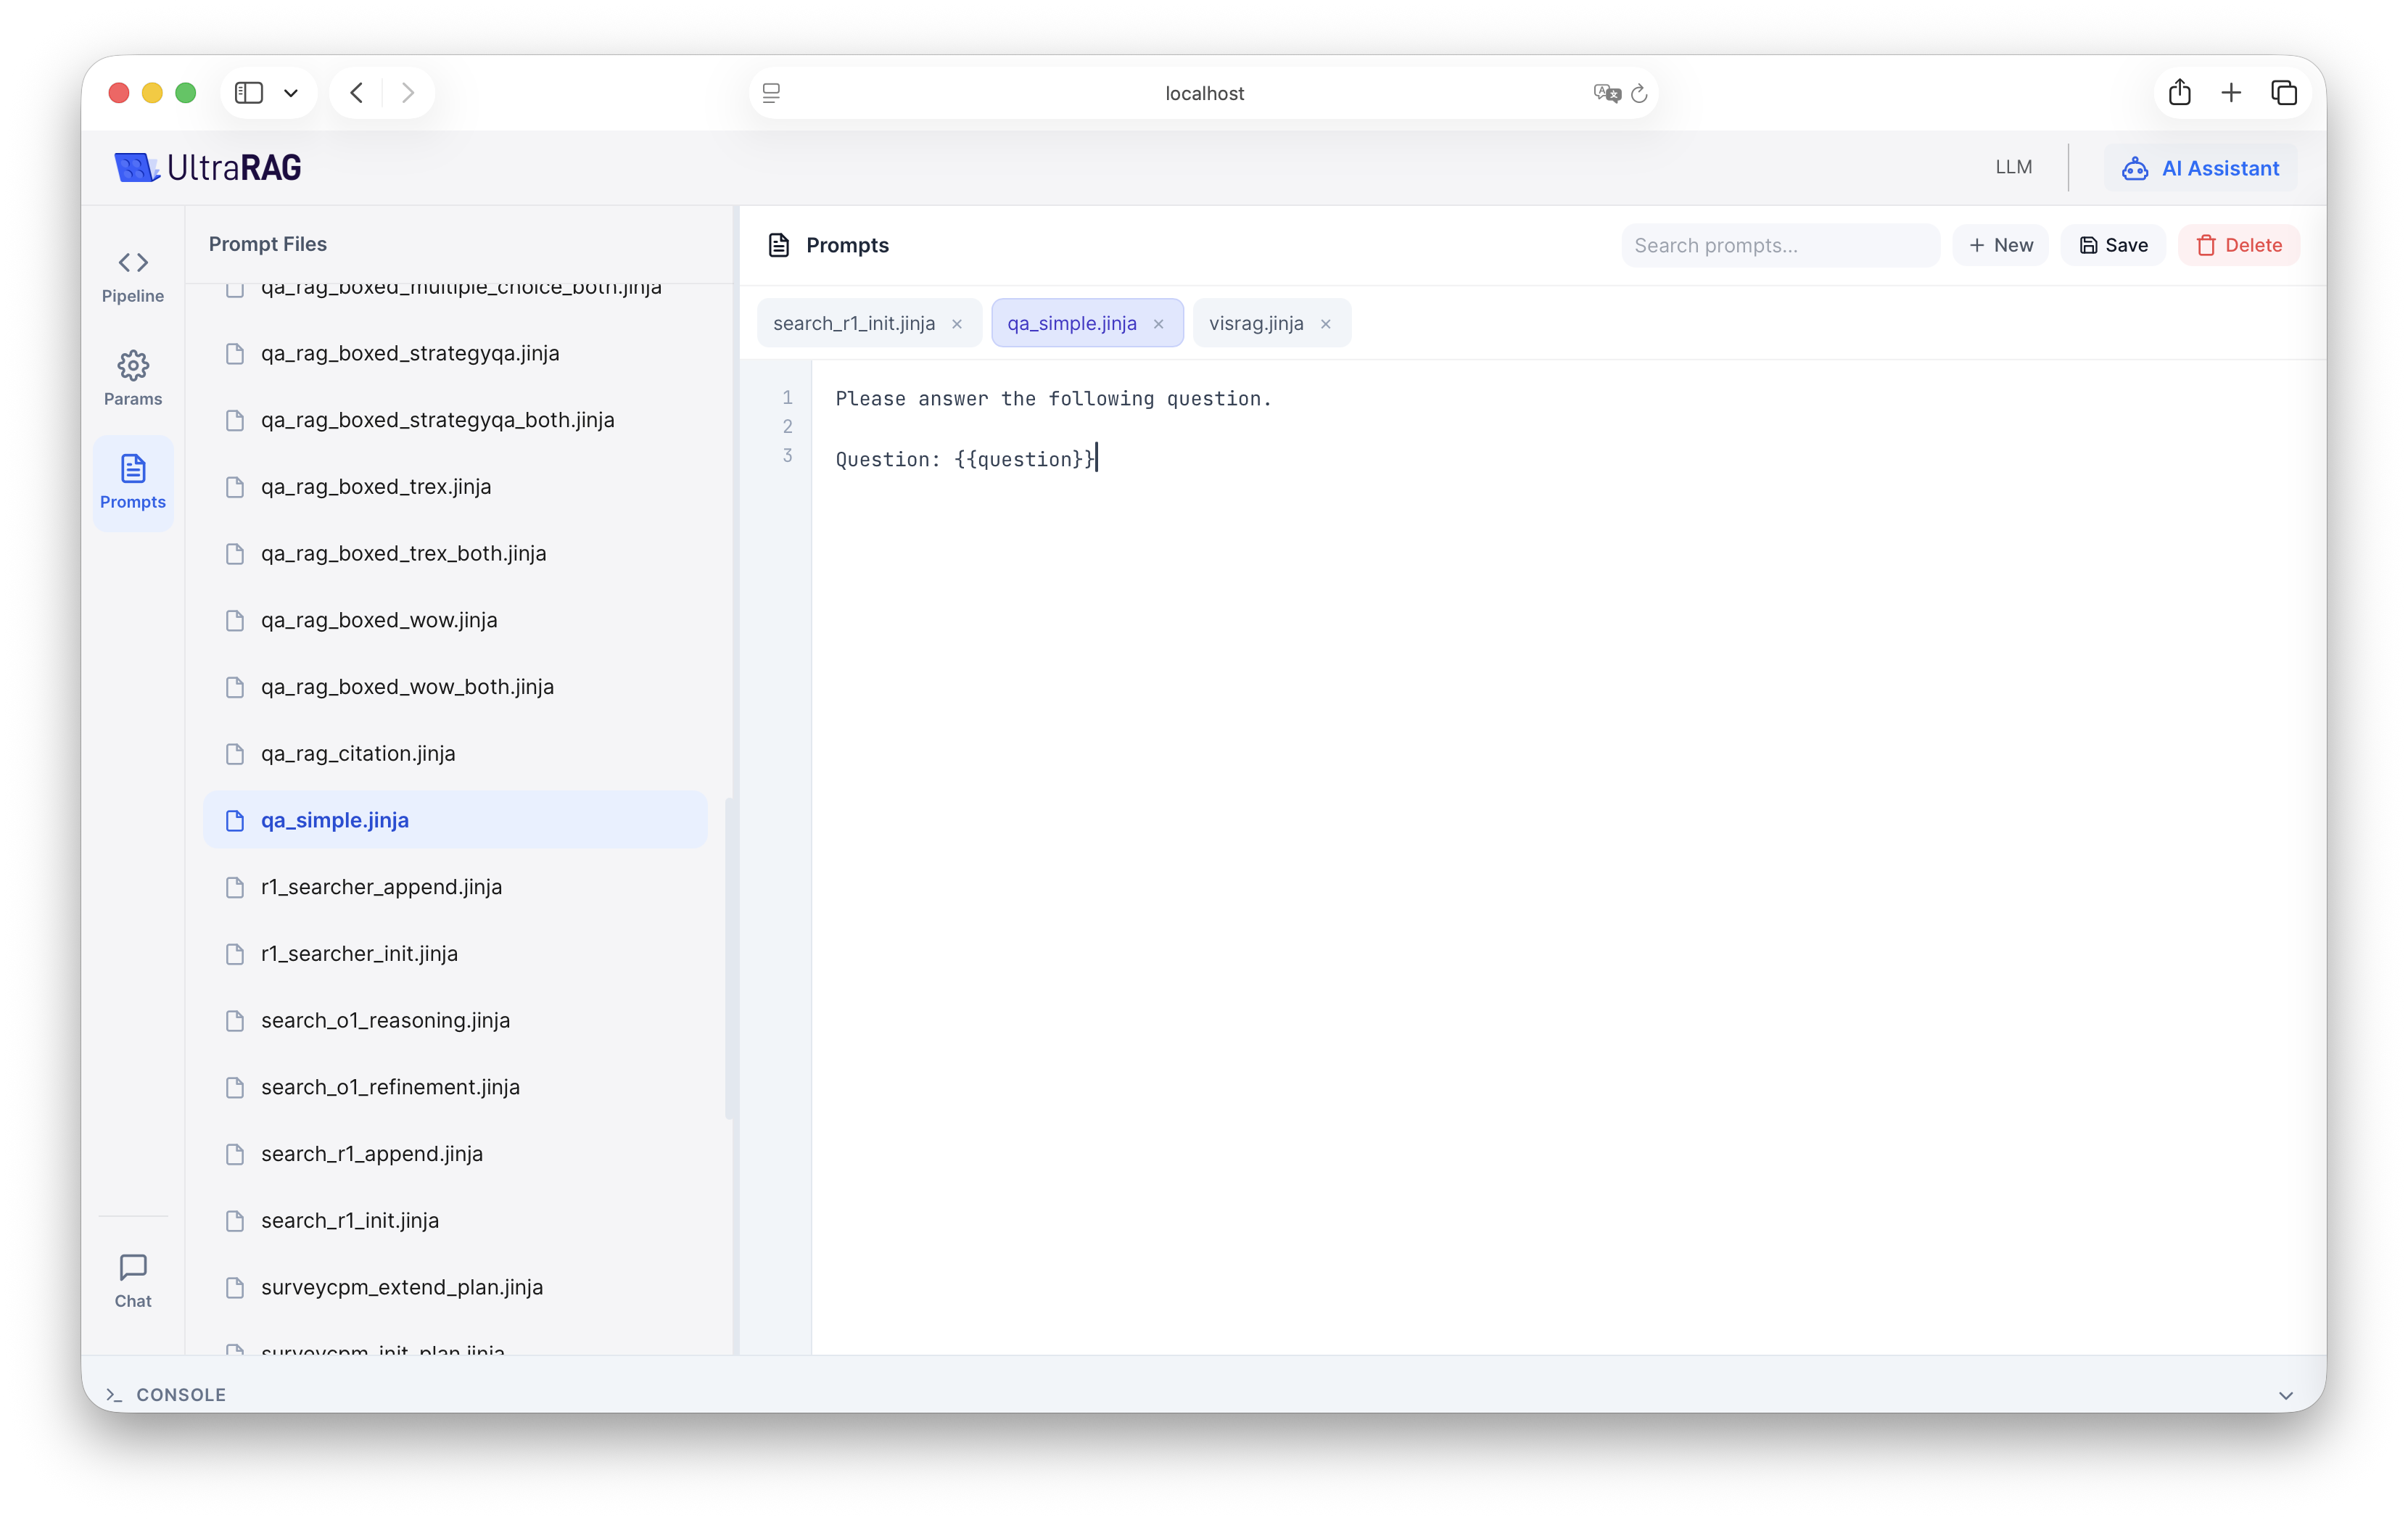
Prompt Management
Supports online creation, editing, and deletion of Prompts, and one-click application to the Pipeline.
AI Assistant
The system has a built-in AI assistant that can assist you in building Pipelines, adjusting parameters, and writing Prompts.
Before using this function for the first time, you need to click Settings to configure the API Key and related model parameters.
- Open the AI assistant and enter the original Prompt and modification requirements.
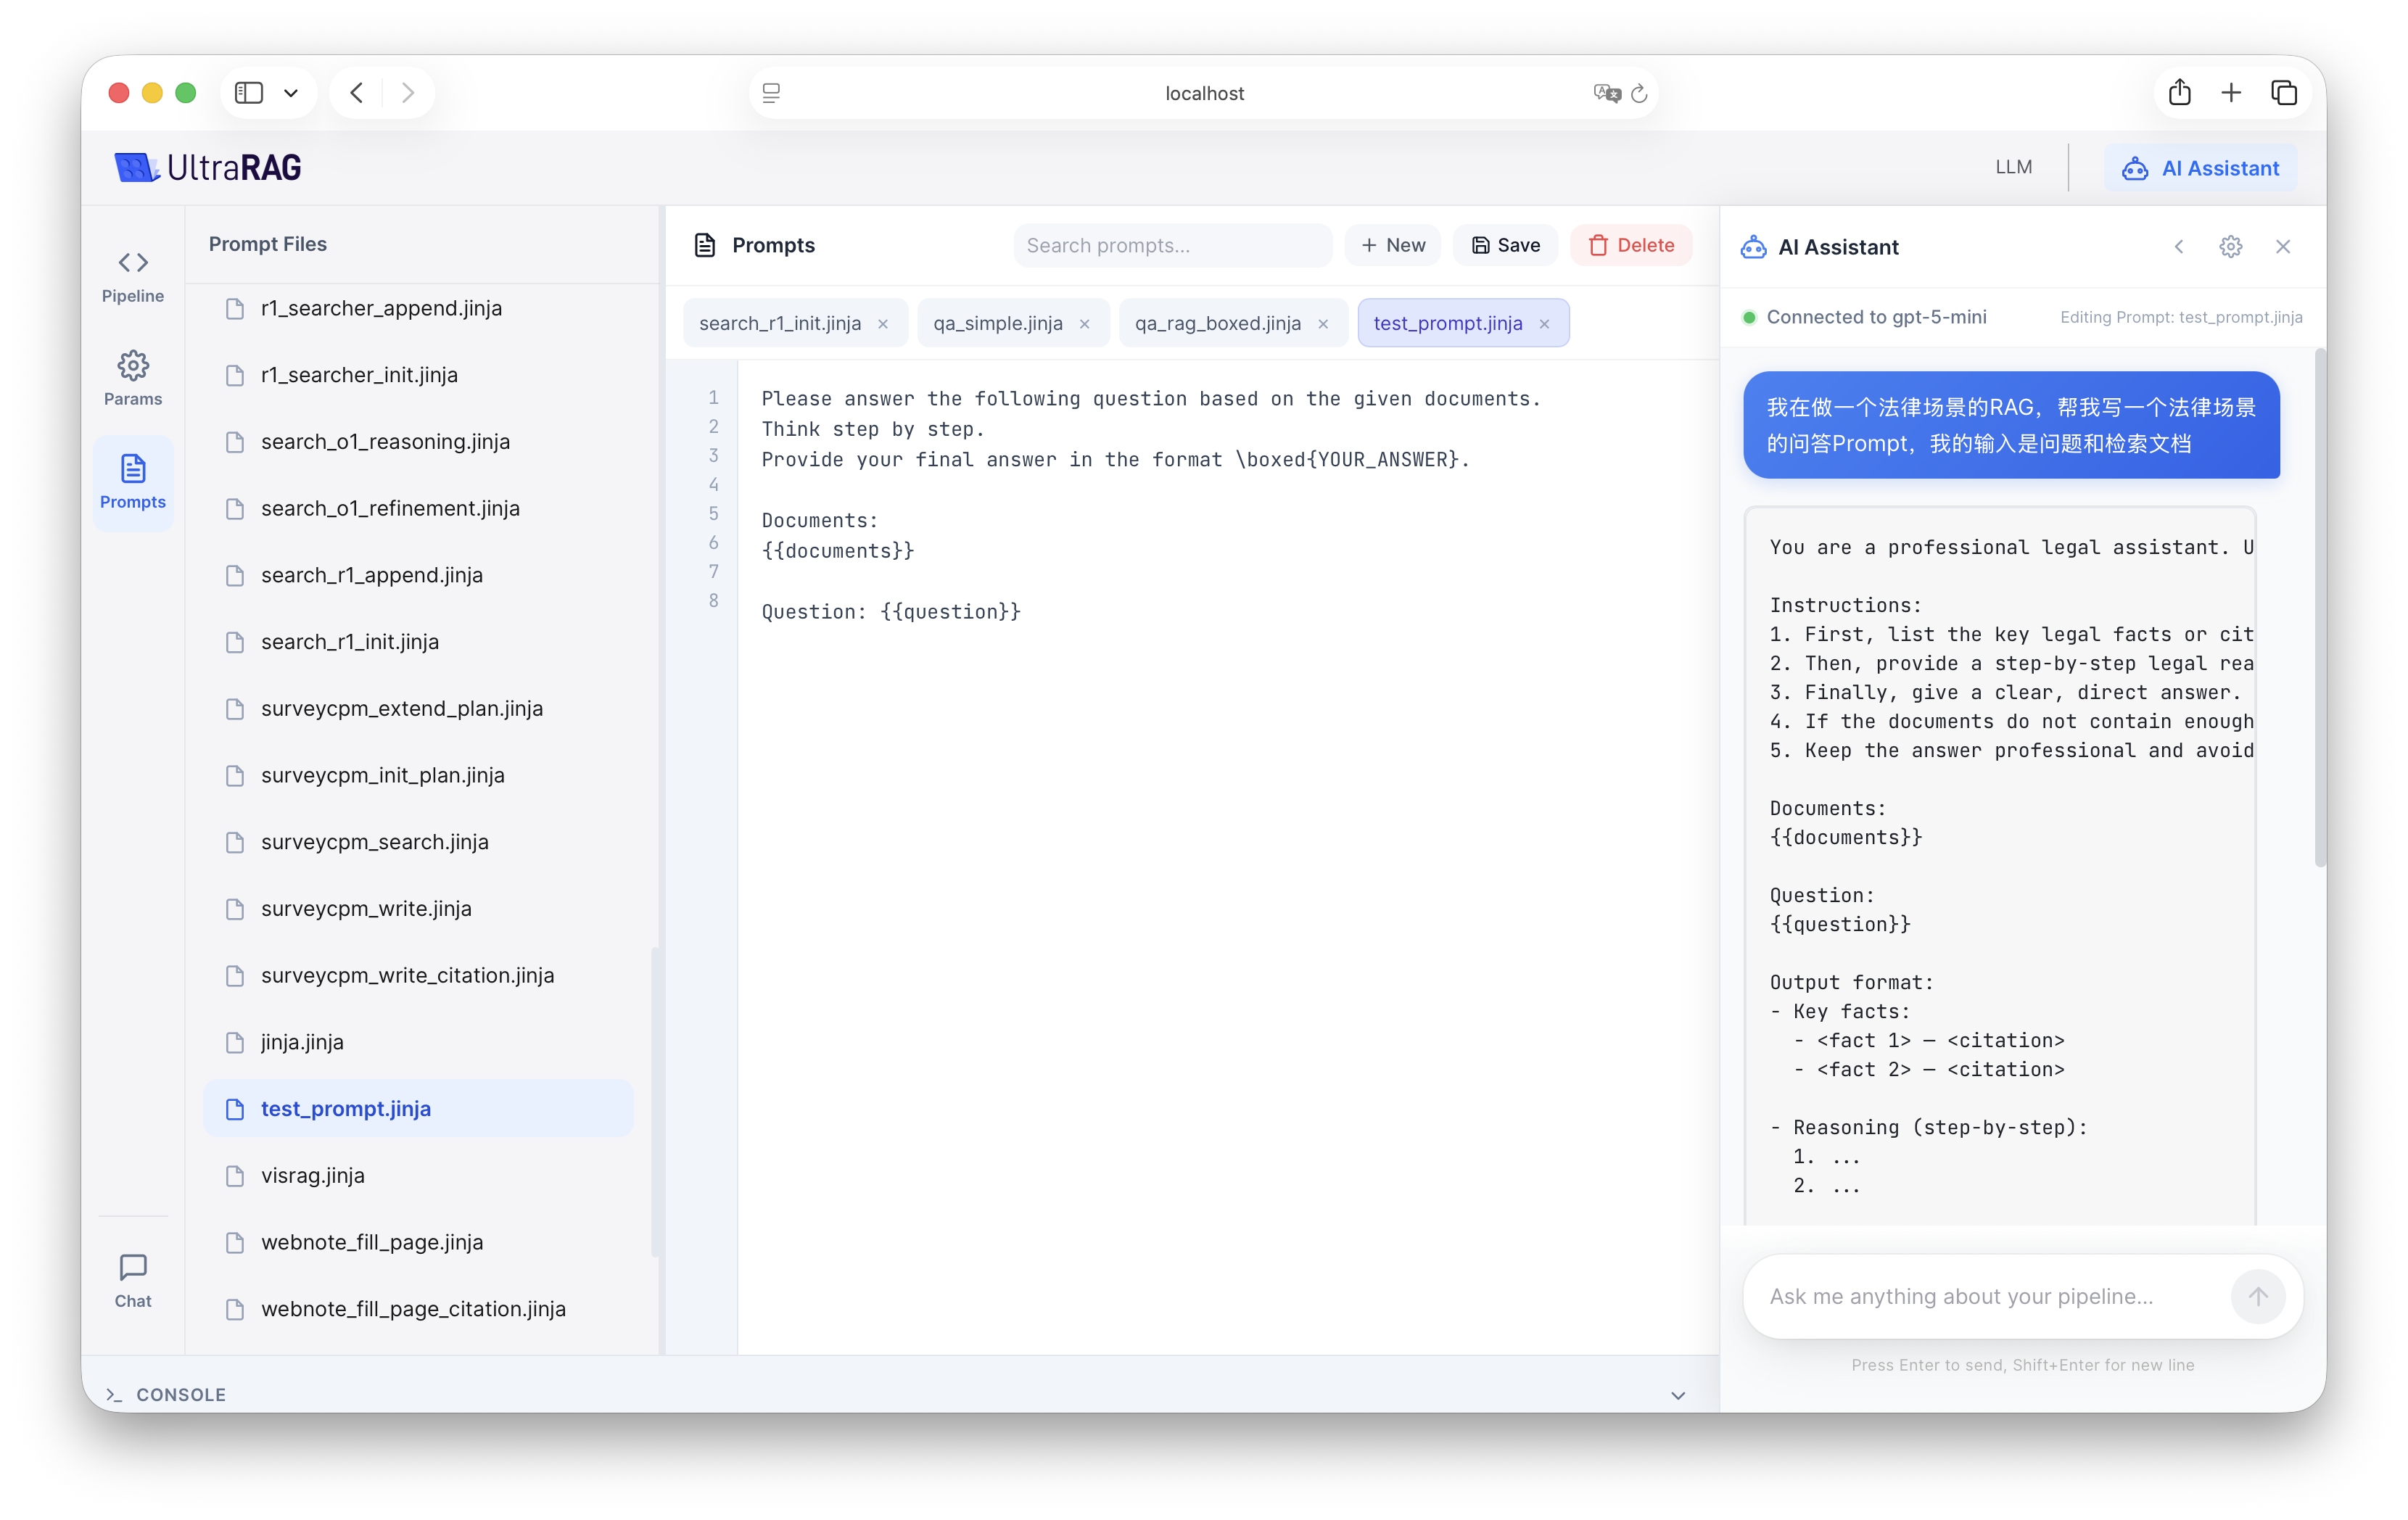
- Click Apply, and the AI assistant will automatically generate optimized content and replace the original Prompt.